If you are using Lotus Notes R5, our SmartIcons are placed under the Universal setting; the SmartIcons for our software should also be located there (if not, they should be listed among the Available icons). You can also add the Smart Icons manually (go to File > Preferences > SmartIcon Settings...).
- The installation database for Ytria software also provides the following troubleshooting and advance configuration options in the Actions menu under the Ytria Support submenu:
- Create a copy of current toolbar configuration (R6 and up): This lets you backup your current toolbar.
- Restore previous toolbar configuration (R6 and up).
- Manually Detach Program Files... (R5 and up): This launches a dialog where you can retrieve all the sundry parts of a Ytria software installation and manually move them.
- Special Installation Settings: These are special settings meant for organizations with a number of Ytria software users. To use these special installation settings, your installer database must be placed on a server. The following options are available in this dialog:
- Enforce the following settings during any installation process using this database: This checkbox allows an administrator to 'force' the settings in this dialog.
- Key Depository Database: An administrator can set the path for a Key Depository Database here. This avoids the need for end-users to add a Notes.ini entry pointing to the Key Depository Database.
| Note | Key Depository is an alternate means of registering Ytria software. It is primarily helpful for organizations with a large number of licenses to manage. For most users, it is quicker and easier to follow Ytria's standard registration scheme.
Click here to read more about the Key Depository Database |
|---|
- SignEZ - Force this current database to be set as the current signEZ database: Ticking this checkbox lets an administrator override a user's choice of default signEZ Database and force the current database to be set as default. .
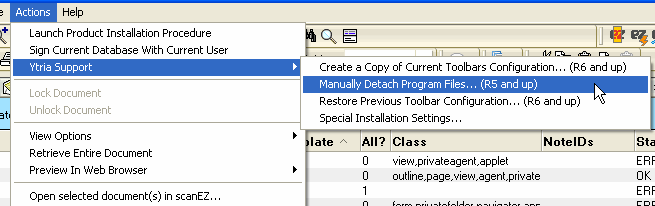 These options are available when you click Actions>Ytria Support in any Ytria installer database.
- In very rare cases where our products crash upon startup, the issue is nearly always related to proxy problems. These issues can be fixed by doing the following:
- From the windows Start menu, choose 'Run.' Then open 'regedit' in the Run window.
- Look in HKEY_CURRENT_USER > Software > Ytria > Settings.
- From here delete the category HTTPProxy.
- Relauch your Ytria software and issue should be resolved.
An important note for Windows Vista and Windows 7 users
If installing Ytria software on a protected directory on a Windows 7 or a Windows Vista workstation, you will encounter a Microsoft Windows UAC (User Account Control) message. This is perfectly normal; you just have follow the instruction that appear on your screen to complete the installation.
Please follow the three images below to see how this works.
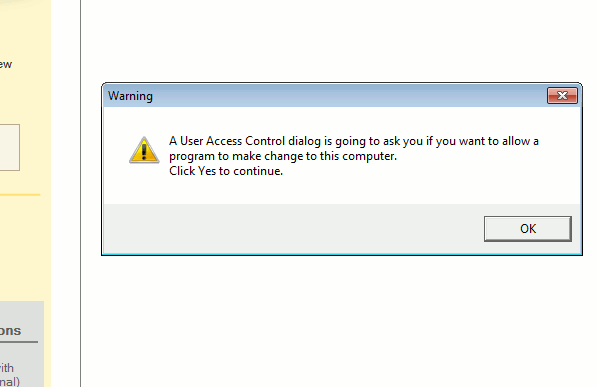
1. When installing Ytria software in a protected directory such as "Programs" on a Windows Vista/7 machine, the installer will prompt you with the message shown above.
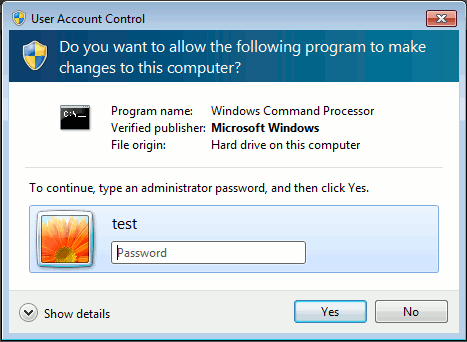
2. The Windows UAC (User Account Control) dialog will look similar to the one pictured above. It will prompt you for your password and ask, "Do you want to allow the following program to make changes to this Computer?" Enter your password and click 'Yes' in this dialog.
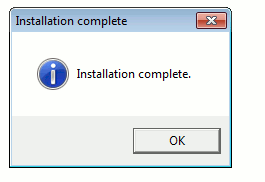
3. Finally, the Ytria installer will move the files in appropriate locations and finally display the confirmation dialog shown above when the installation is complete.