How to create a Microsoft Office 365 Login Report

As an IT admin, you may have to create a Microsoft Office 365 login report to find out which user accounts are active. With this report, you will be able to identify inactive accounts and remove them, so your environment is not cluttered. You can learn more about offboarding here.
There are a few ways to create a Microsoft Office 365 login report. For example, you can use Microsoft Office 365 audit logs to do this kind of report. We will look at a few methods so you can decide which is best for your circumstances. The first method is the Microsoft Entra Admin Center.
Using the Admin center for your Microsoft Office 365 login report
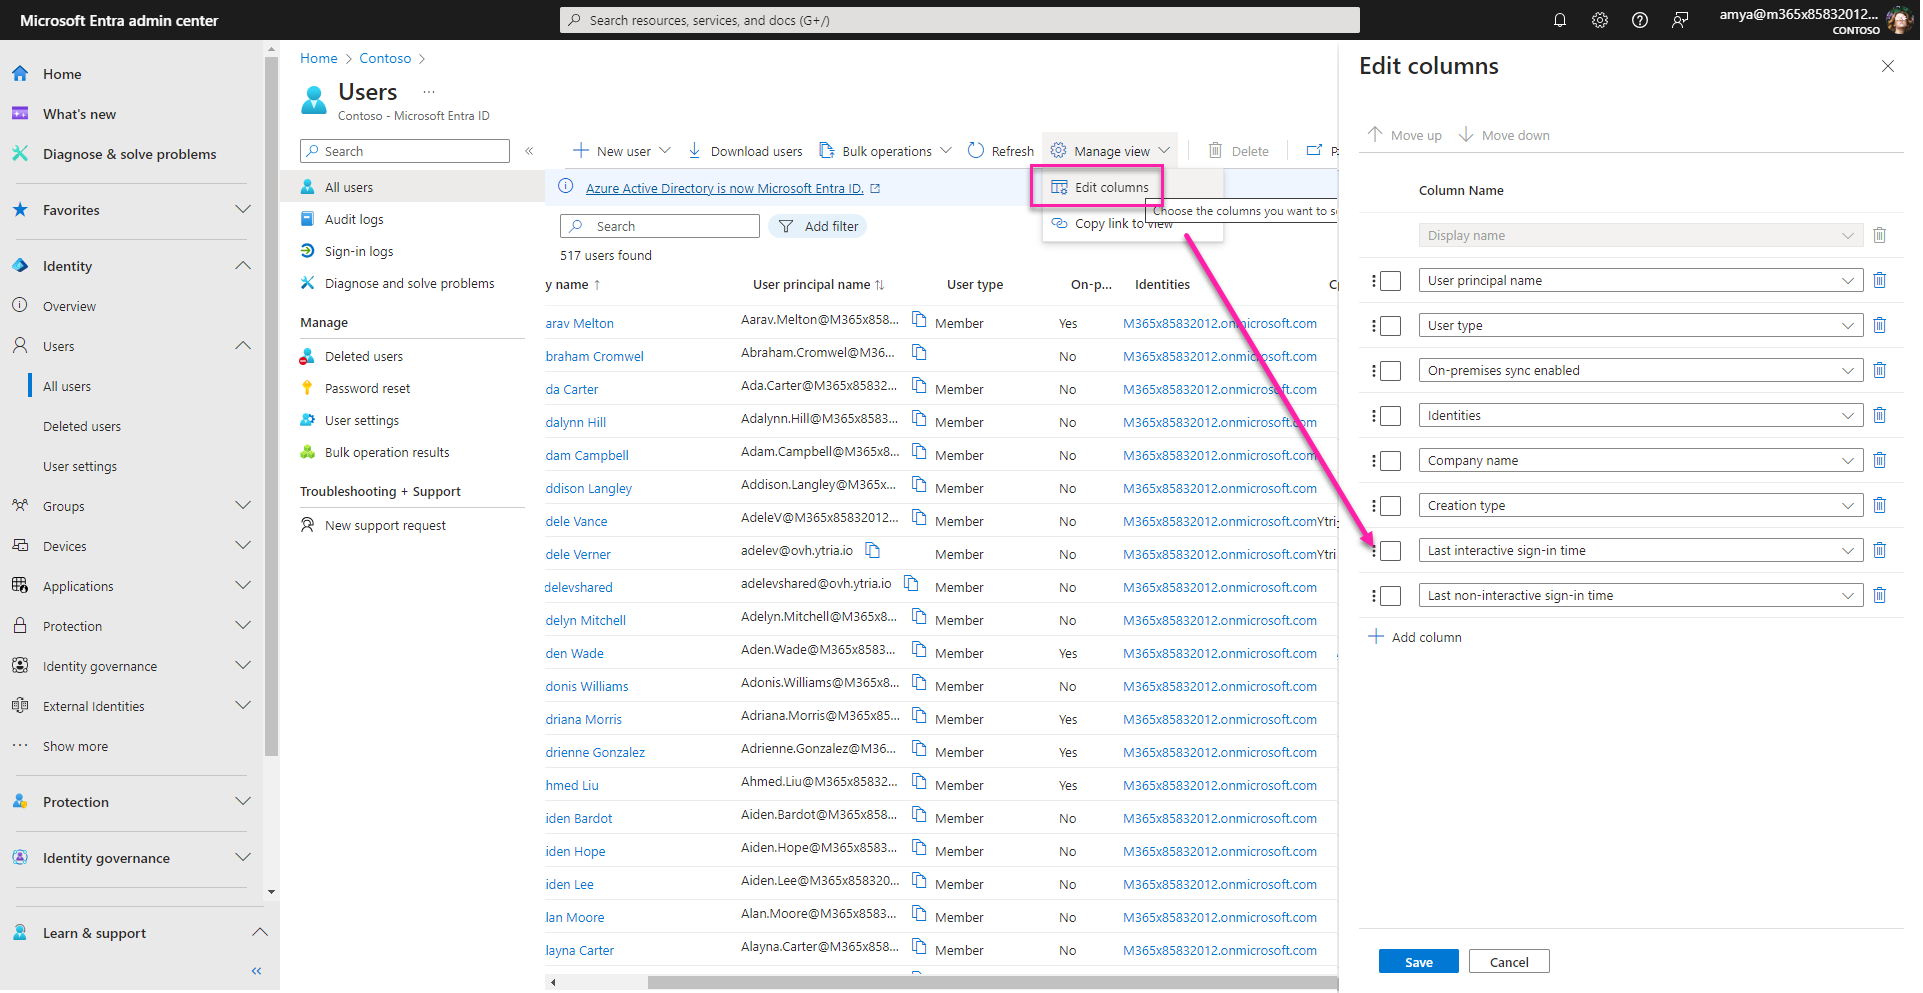
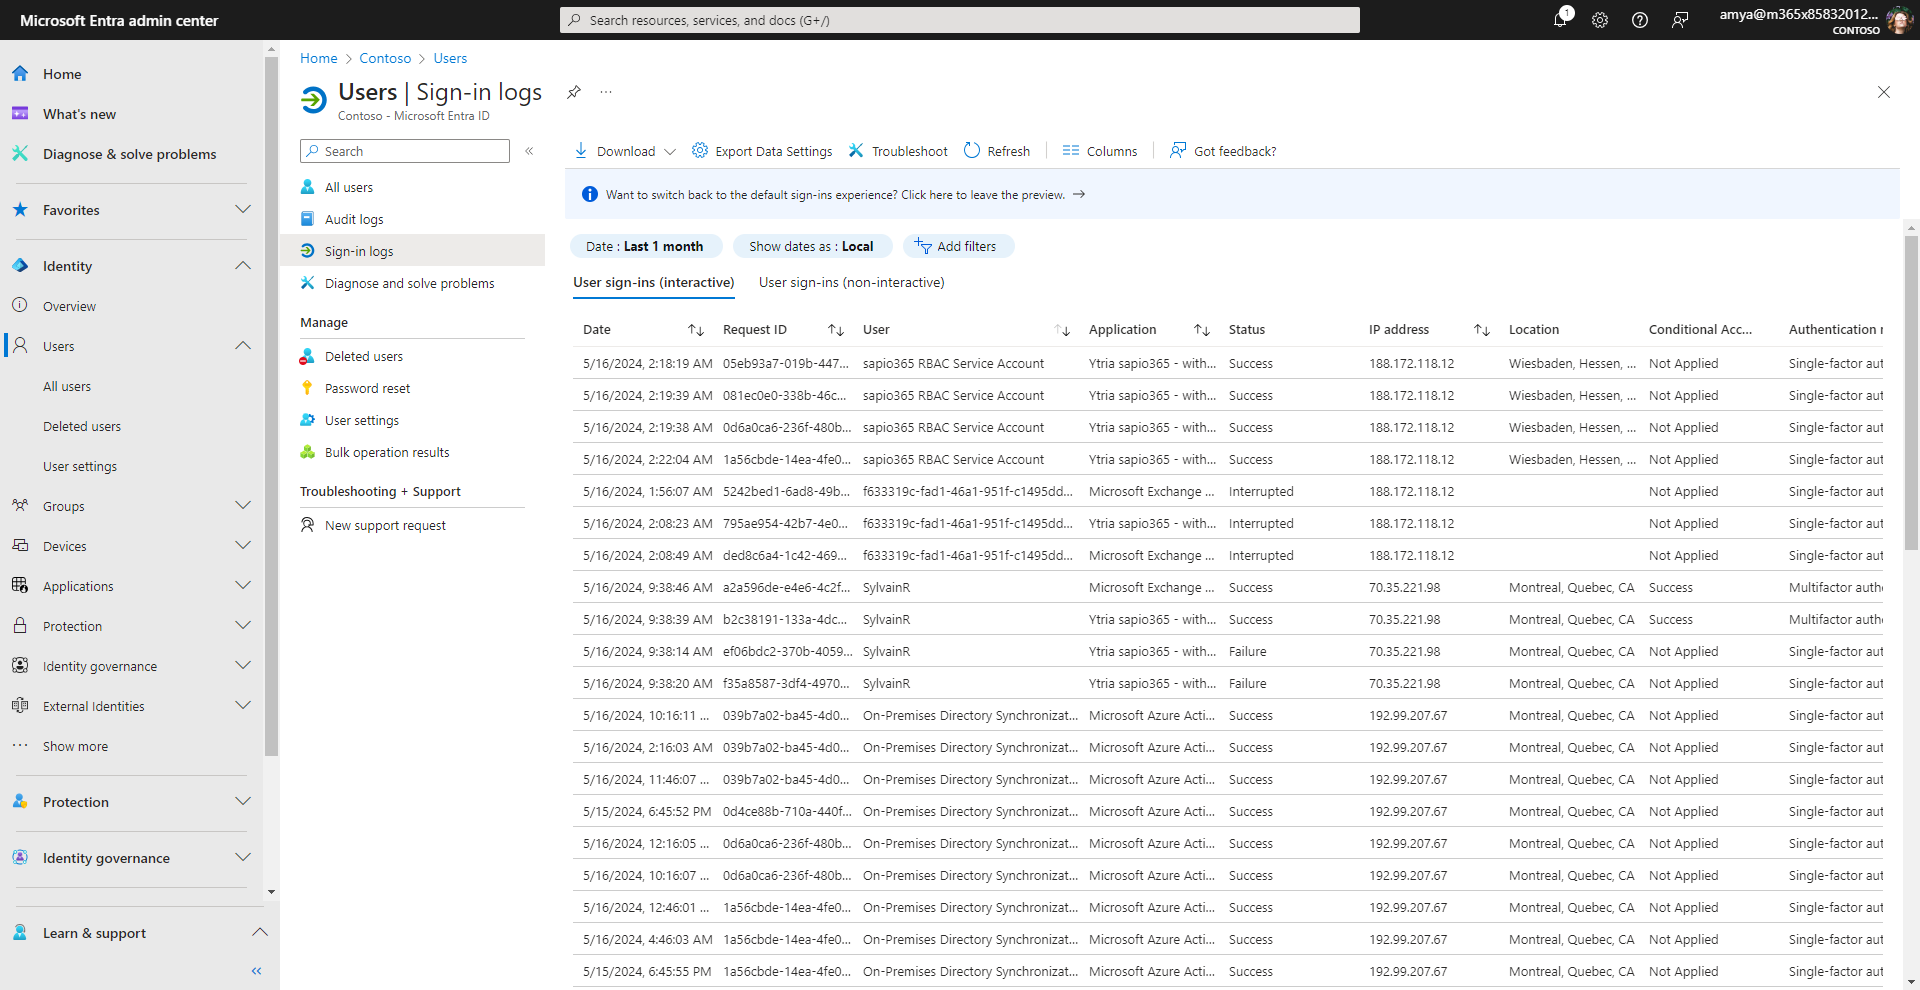
If you choose this method to create your Microsoft Office 365 login report, you will need to go to the Microsoft Entra Admin Center where you can see all your users. Go to Manage View on the top menu so you can edit your columns. You will want to add a column and choose a property that you want to add, in this case, the property that you will add is “last interactive sign in time”. You can also choose the last “noninteractive sign-in”. This will show you users who have signed in without using their credentials (token renewal). Click to save the column.
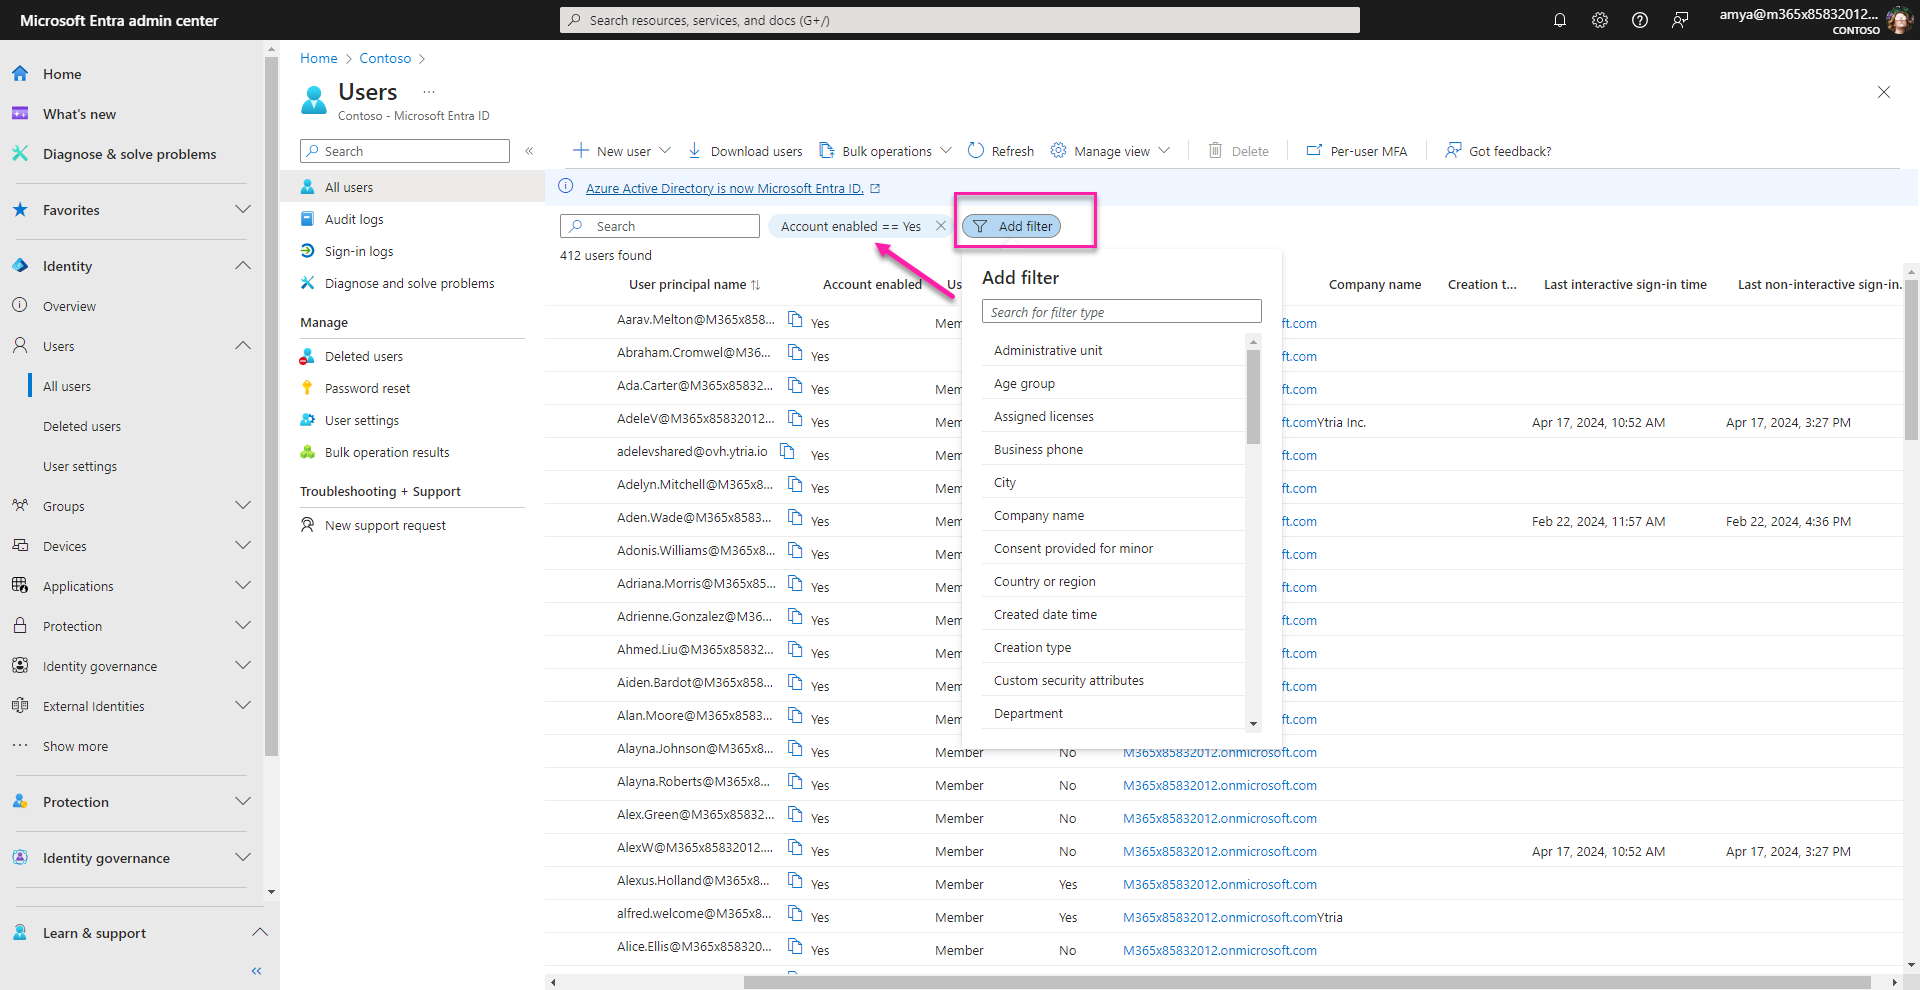
You will now want to add a filter to your results by going to the filter button next to the search window. This will enable you to remove any disabled accounts as they should not be in the report. To do this, add the filter “account enabled” and click on the value “yes”. This will give you a list of all your enabled accounts.
Limitations of using the Microsoft Admin Center
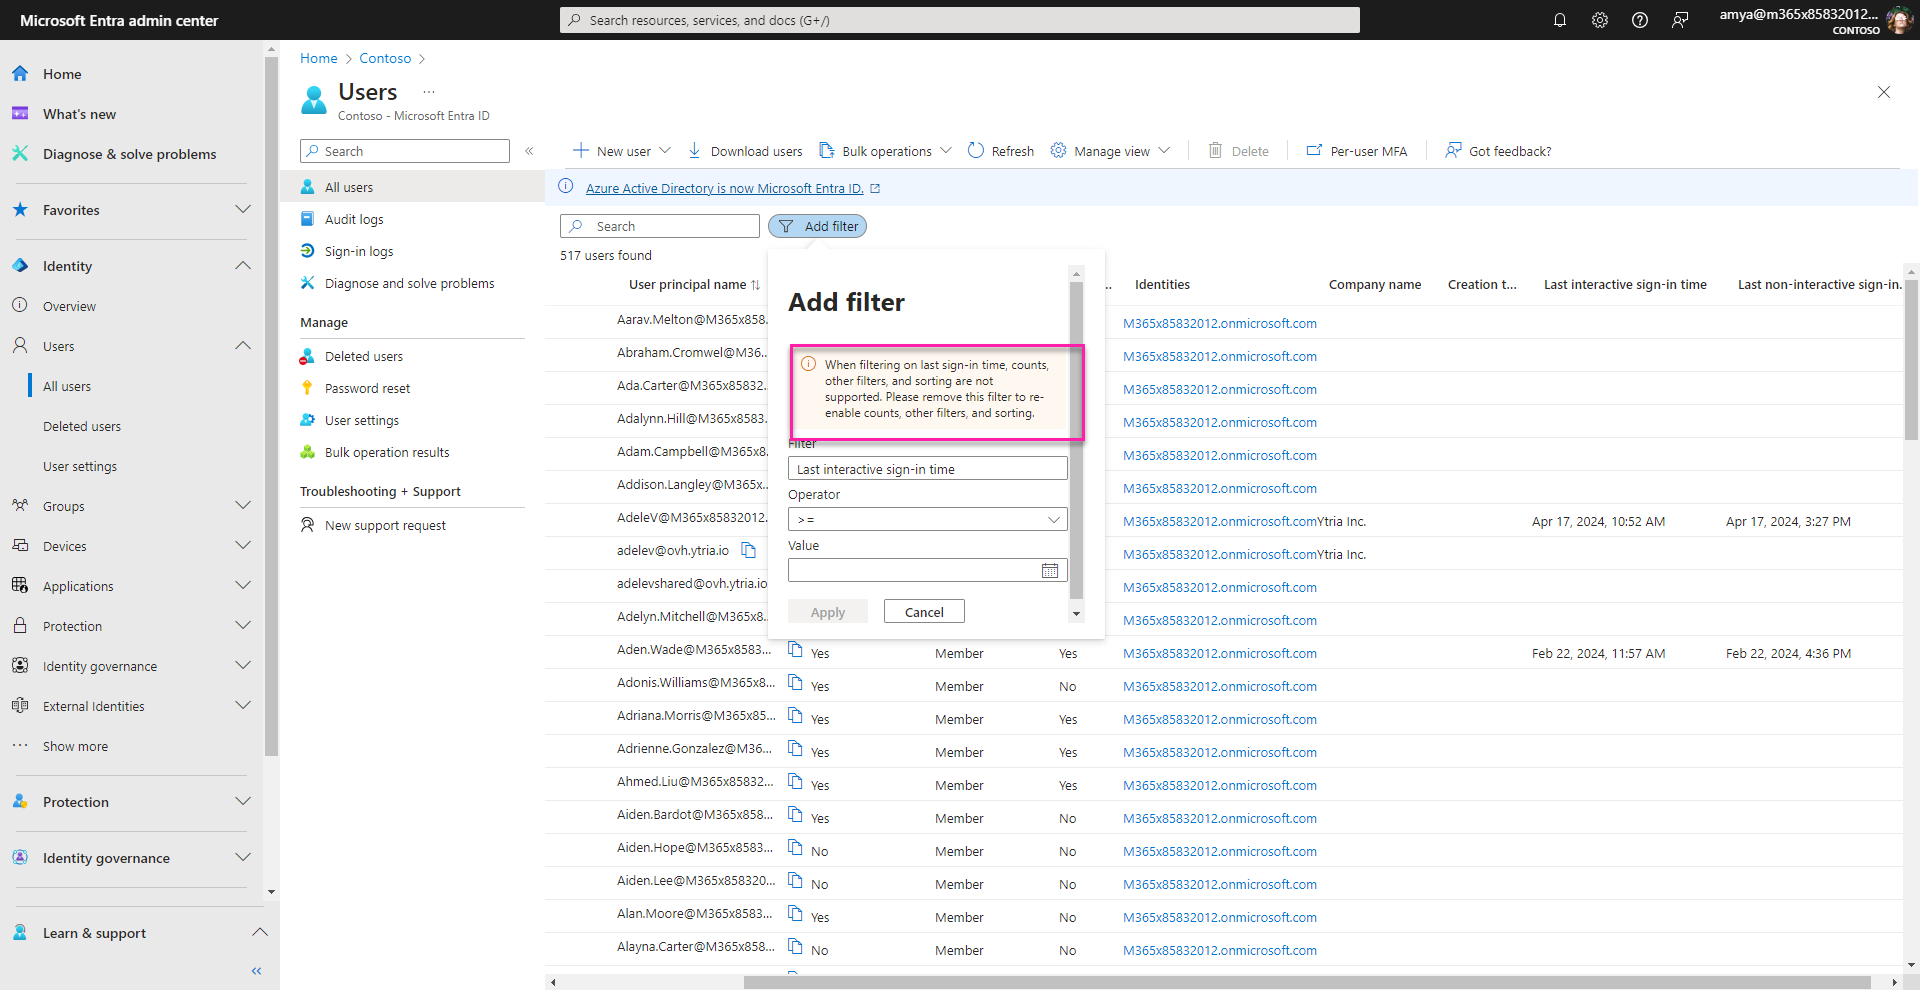
There are several important limitations to using the Microsoft Entra Admin Center. One of them is the inability to sort your results. The second limitation is that a filter on either of the two ‘Last sign-in’ properties cannot be combined with another filter. This means that once you have a list of all your enabled accounts with a sign in date, you will not be able to use a filter according to the last interactive sign-in date.
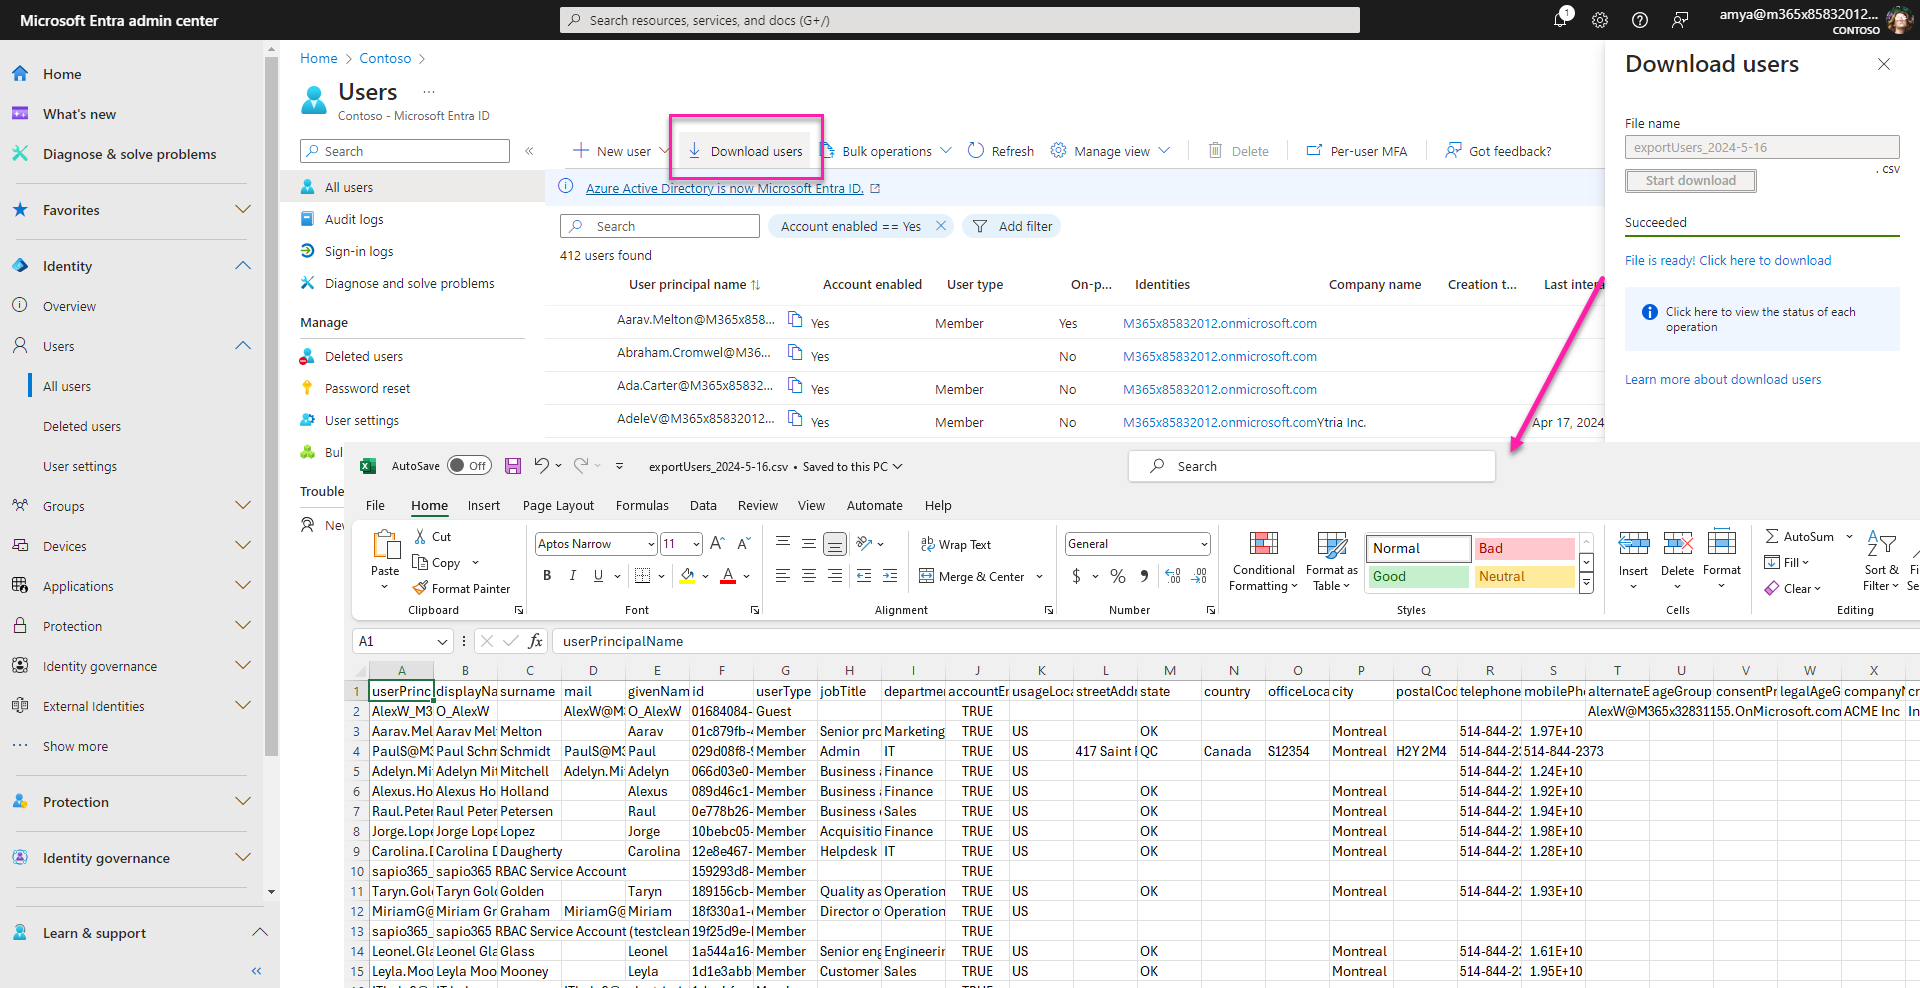
With a large environment, you will have difficulty seeing all the accounts due to pagination issues. Also, you will have a lot of information that you don’t need and user accounts like service accounts or shared mailboxes which will also be included in your results. You may choose to export this data by going to the “download users” button at the top but if there are a lot of users, it will take some time to download. You will also waste time downloading other properties that are not important to you.
To get a clean and accurate report, you will need to do some manual cleanup to remove the unnecessary properties, and sort on the dates of the last sign-in.
Note that the Sign-in Logs (also accessible from the main Admin Center reports) lists detailed sign-in activity events for a maximum of 30 days. Therefore, it’s not ideal for creating a report on the last sign-in date per user.
Using Microsoft Graph PowerShell for your Office 365 login report
The second method we are looking at is to use one more PowerShell cmdlets in a script to accomplish this task.
You will first need to connect to Microsoft Graph with the cmdlet Connect-MgGraph.
Then get a list of users using the cmdlet Get-MgUser -All. Add property selection and filter parameters for the properties you want to include.
Details about this cmdlet can be found on this Microsoft Graph PowerShell page.
Note that to get the last sign-in details, you’ll need to loop through each user with the following cmdlet (see image below):
Get-MgUser -UserId “” -Property SignInActivity | Select-Object -ExpandProperty SignInActivity | fl

Limitations of using PowerShell
You will need to have a good knowledge of PowerShell to write your own script, something not all IT admins possess. You can opt to search for a script online, but there is no guarantee that the script is not outdated.
As with all PowerShell scripts, there is no way to check before you apply the changes. This can result in unexpected errors occurring in your environment and these can take you a while to clean up.
Creating a Office 365 login report with sapio365
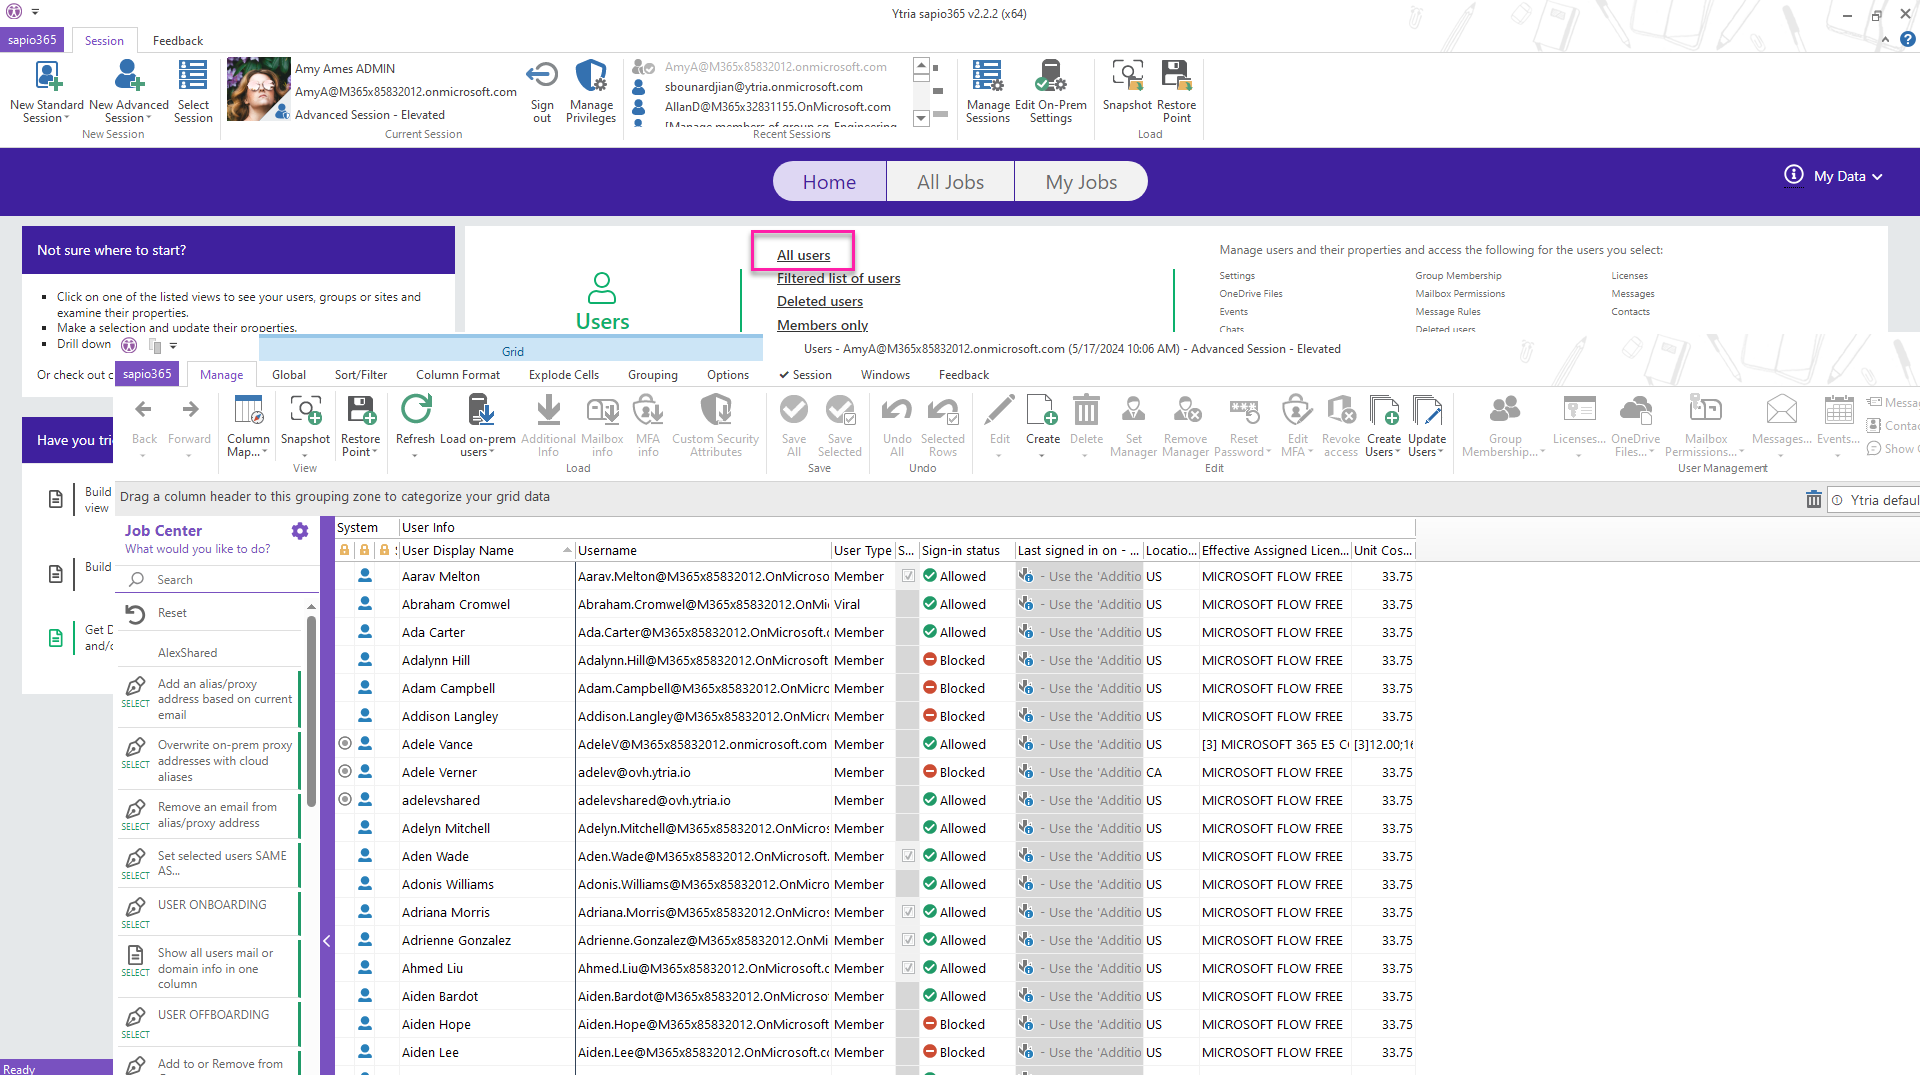
The third alternative for finding the dates for your Office 365 login report is to use a third-party software tool, like sapio365. To use sapio365 for this job, simply go to the sapio365 home page main window. Go to Users and choose all users to see all your users and their properties in one place.
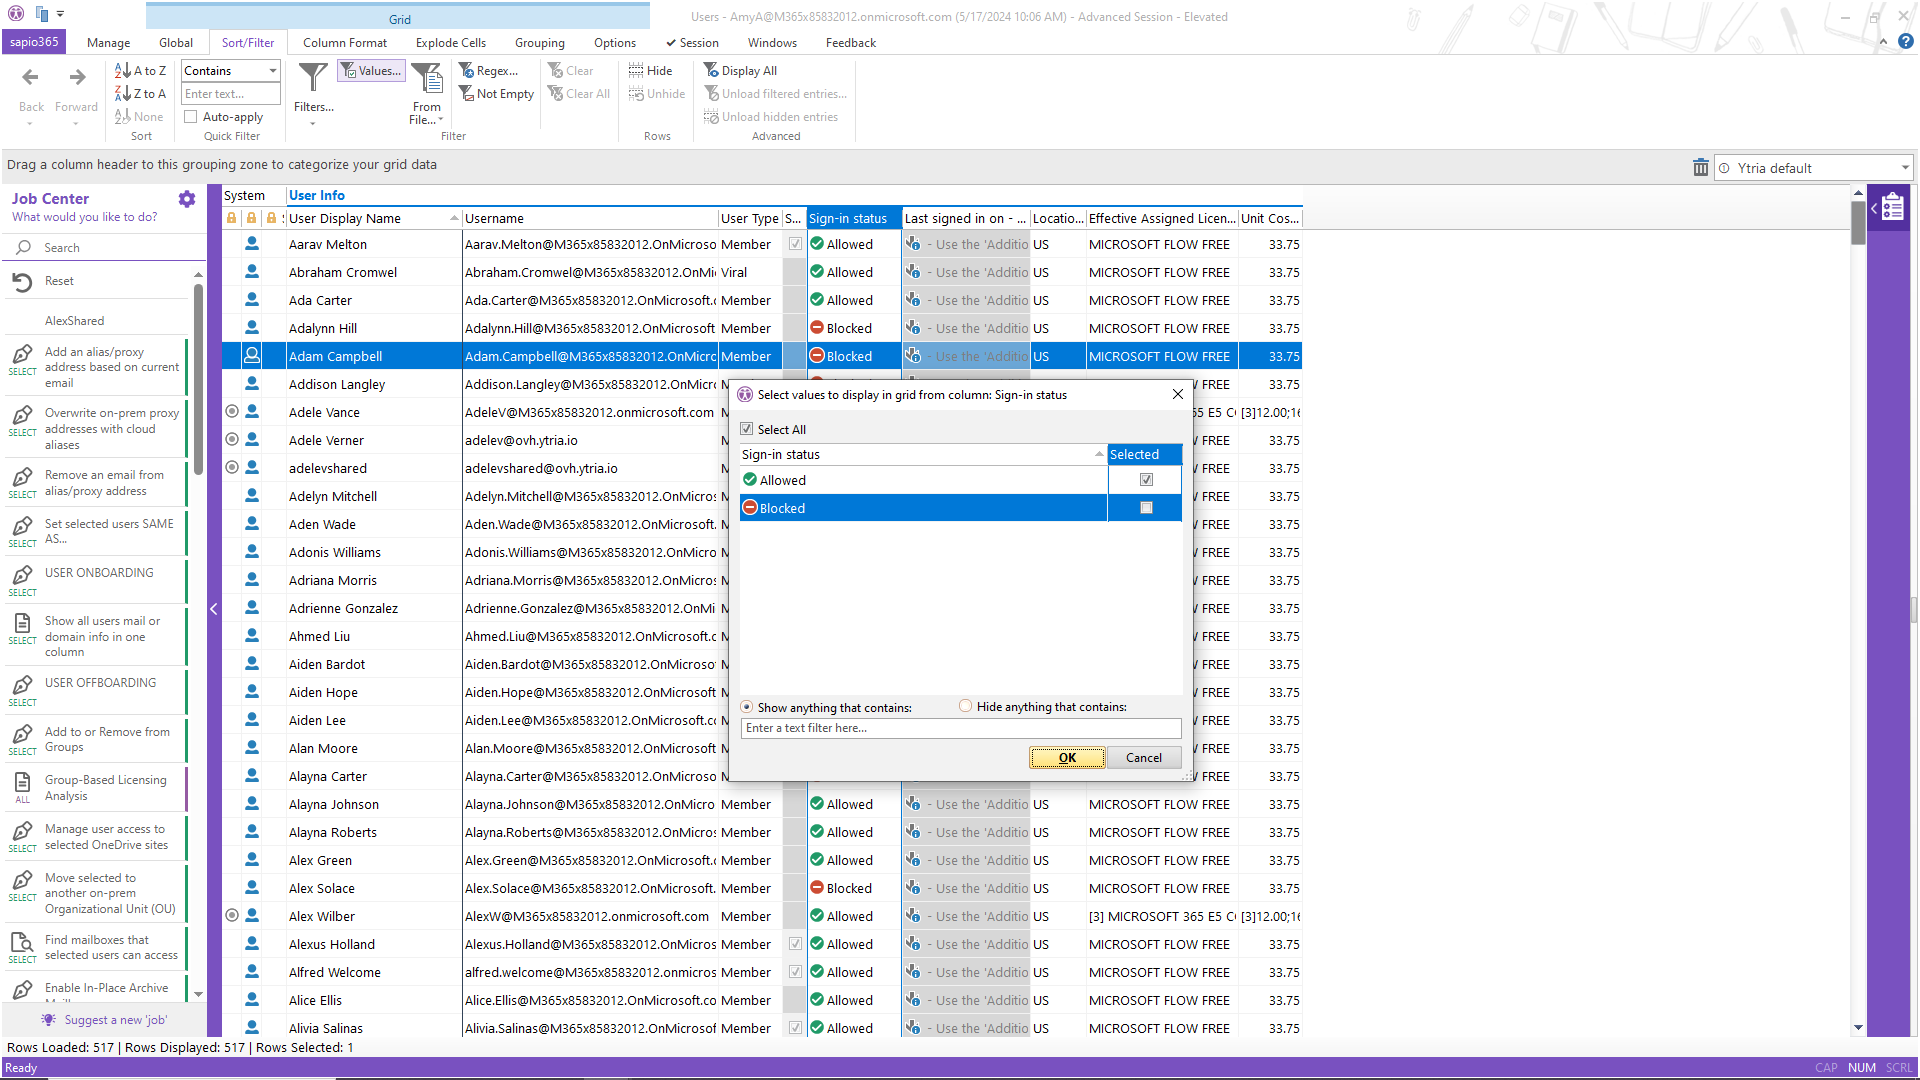
The first step is to filter out all the blocked/disabled accounts by going to the sign-in status column and unchecking the blocked accounts.
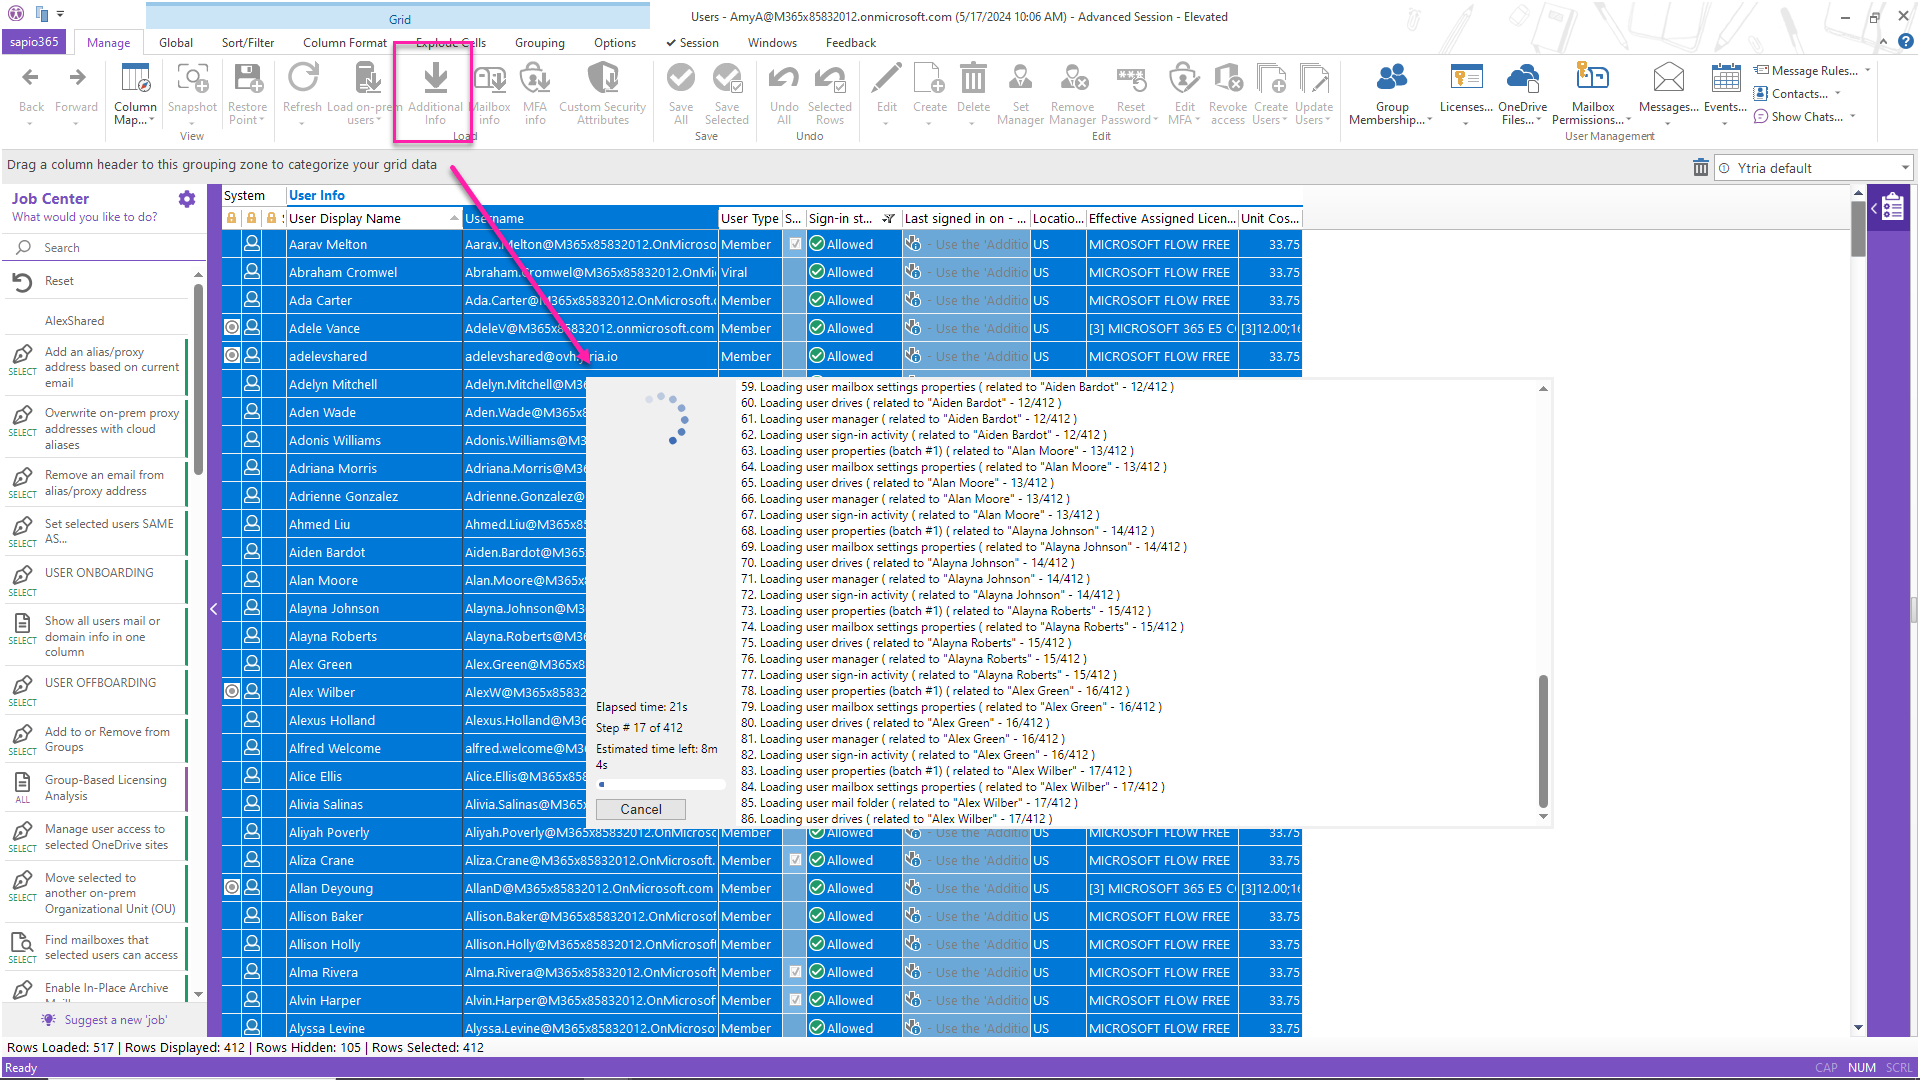
This will provide you with a list of only the enabled accounts. Now, select all your accounts and click on additional info on the menu at the top. This will automatically give you the information about when these user accounts last signed in.
You can now select the User Purpose property and any other user property to add their column to your grid view. The User Purpose property lets you know the mailbox type.
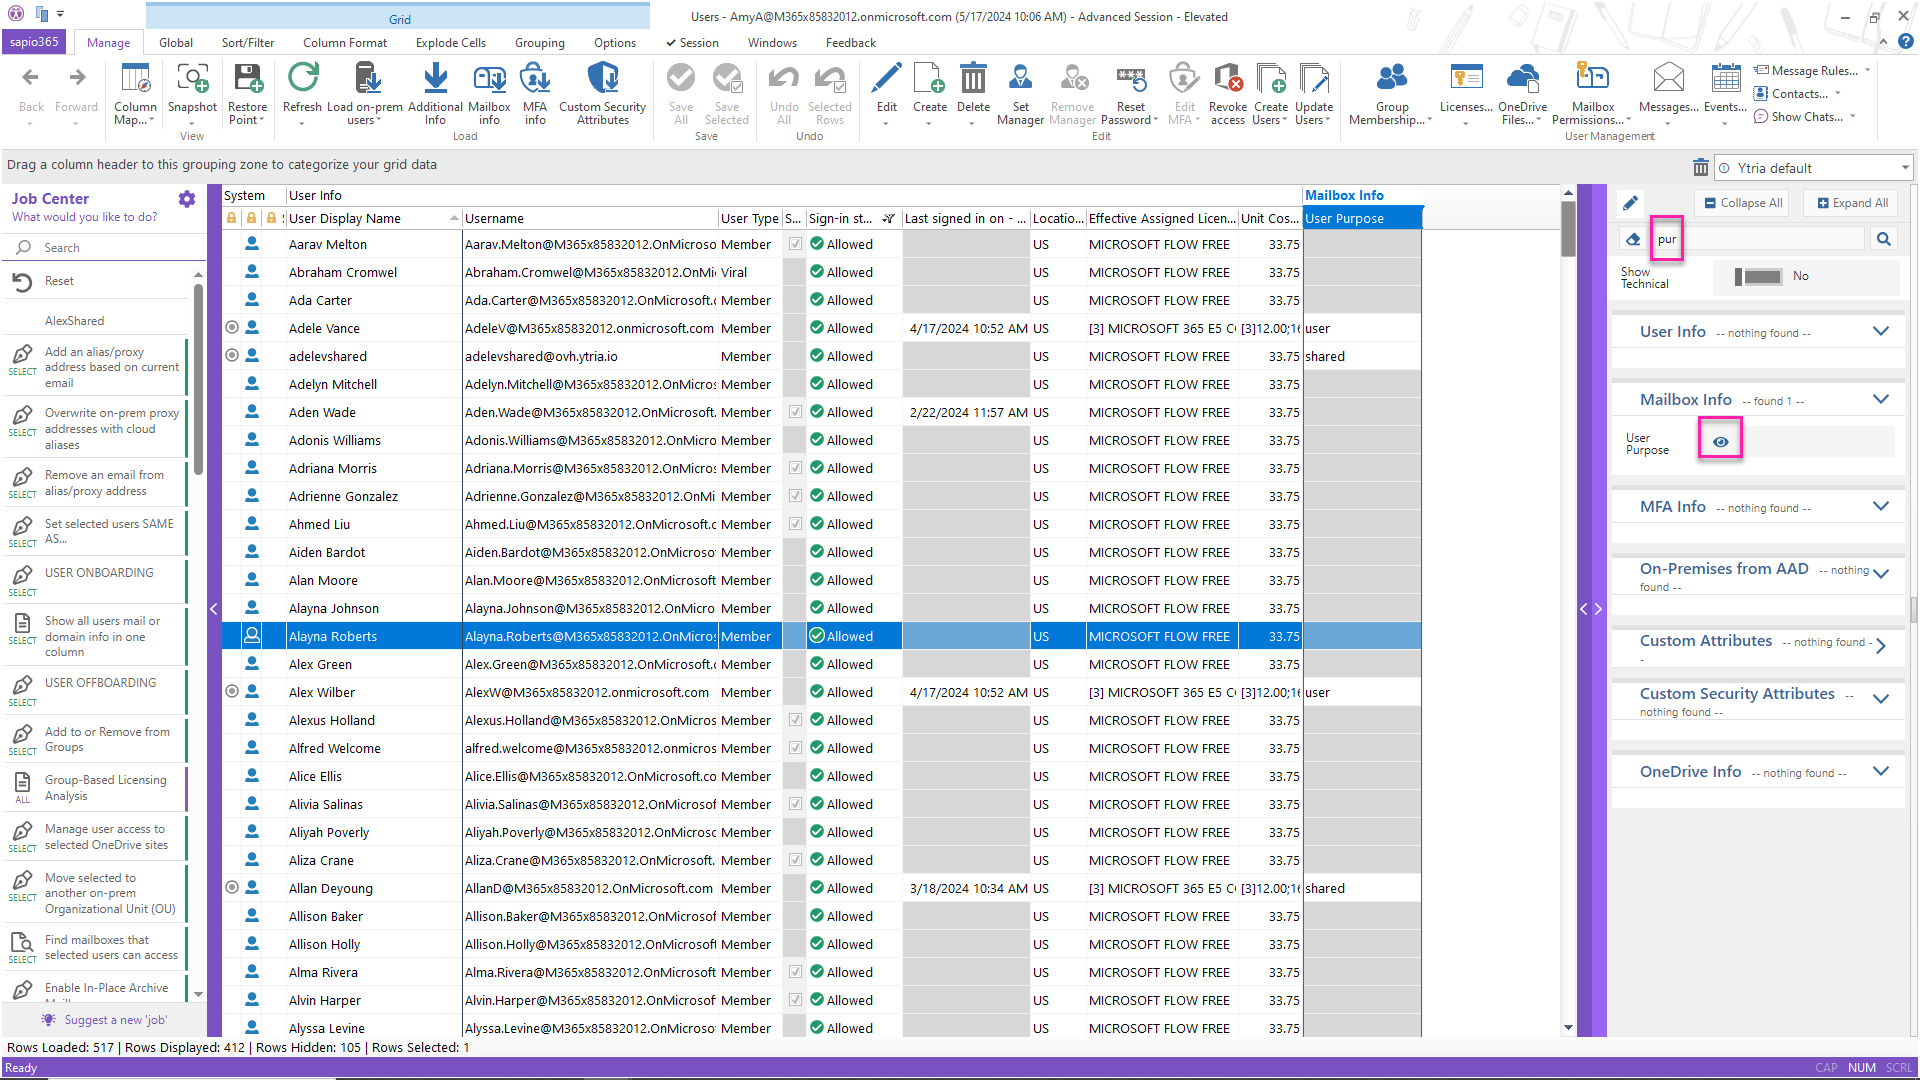
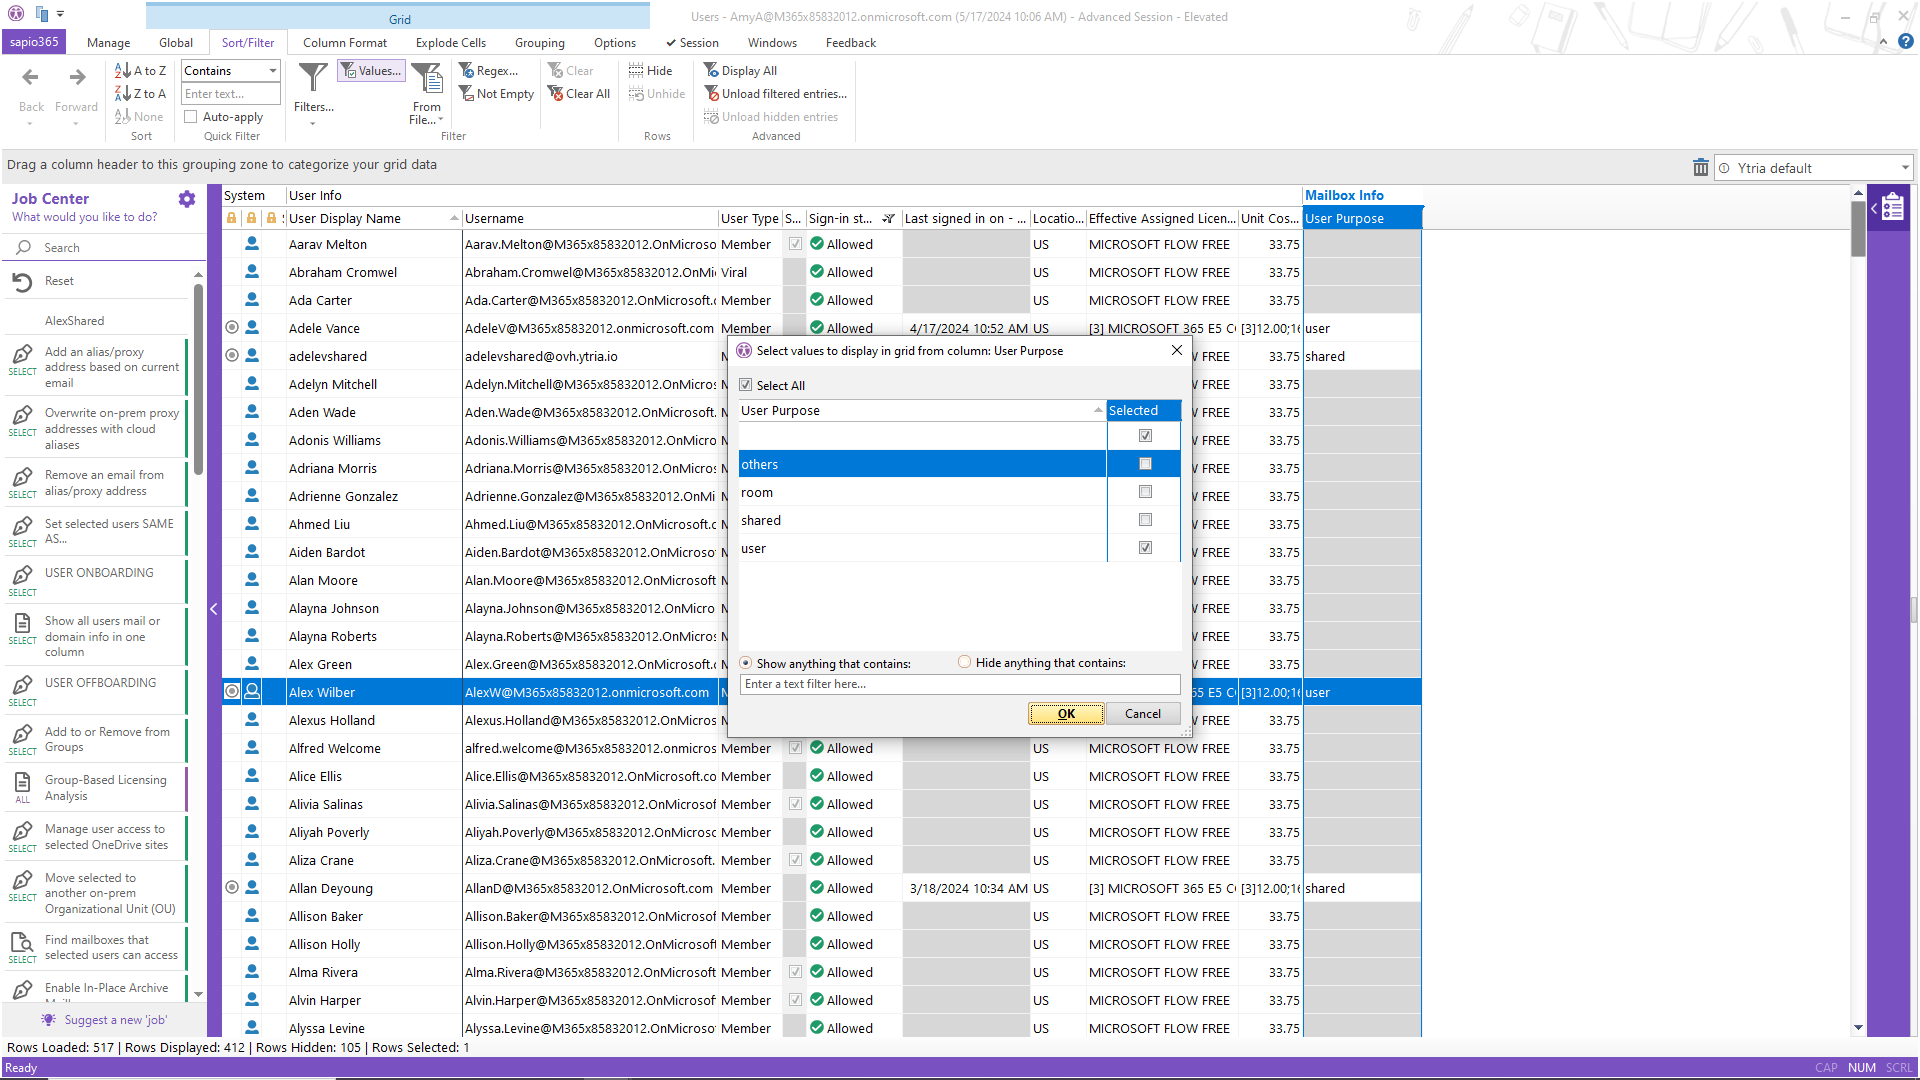
Now you will filter out all the shared mailboxes and rooms by unchecking them in the dialog box.
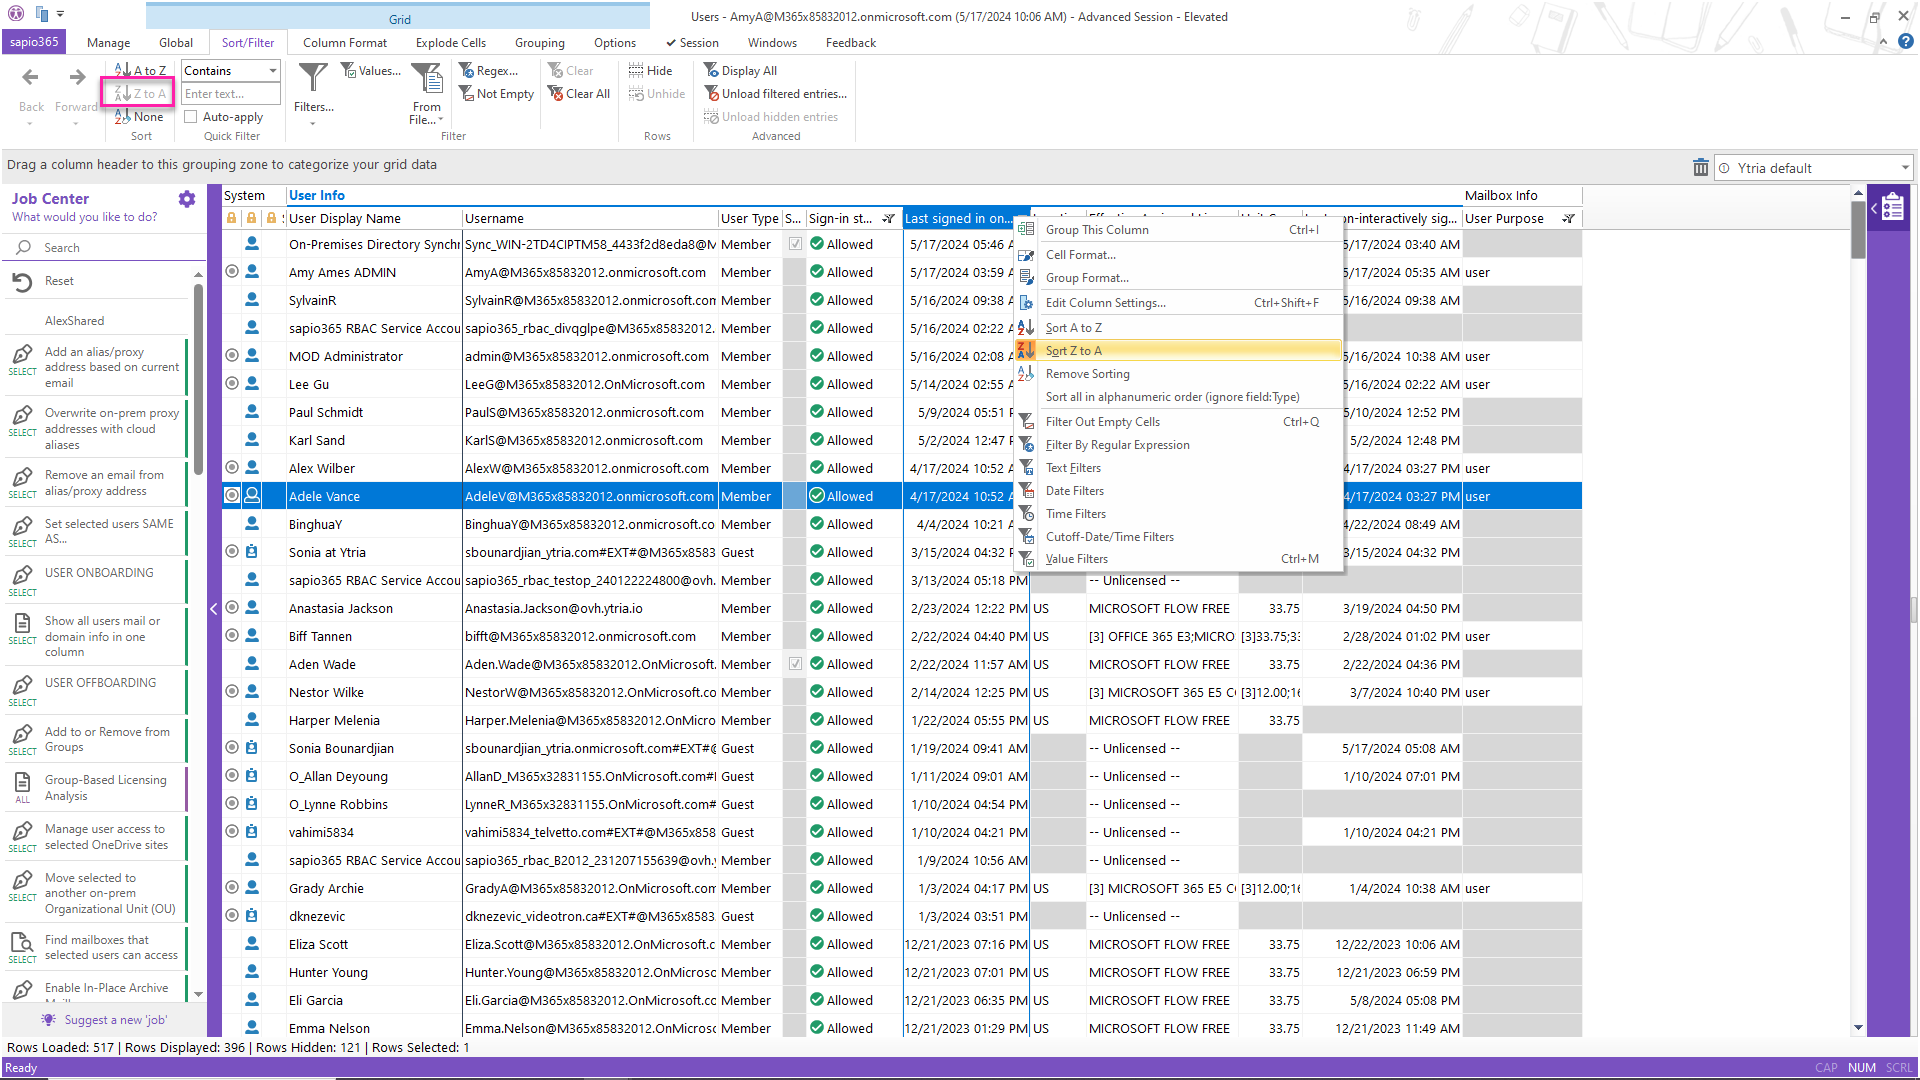
If you need non-interactive sign-in information, you can now also add that information to your report. Finally, you can now sort the information by last sign in date from the ribbon or by right-clicking on the column header.
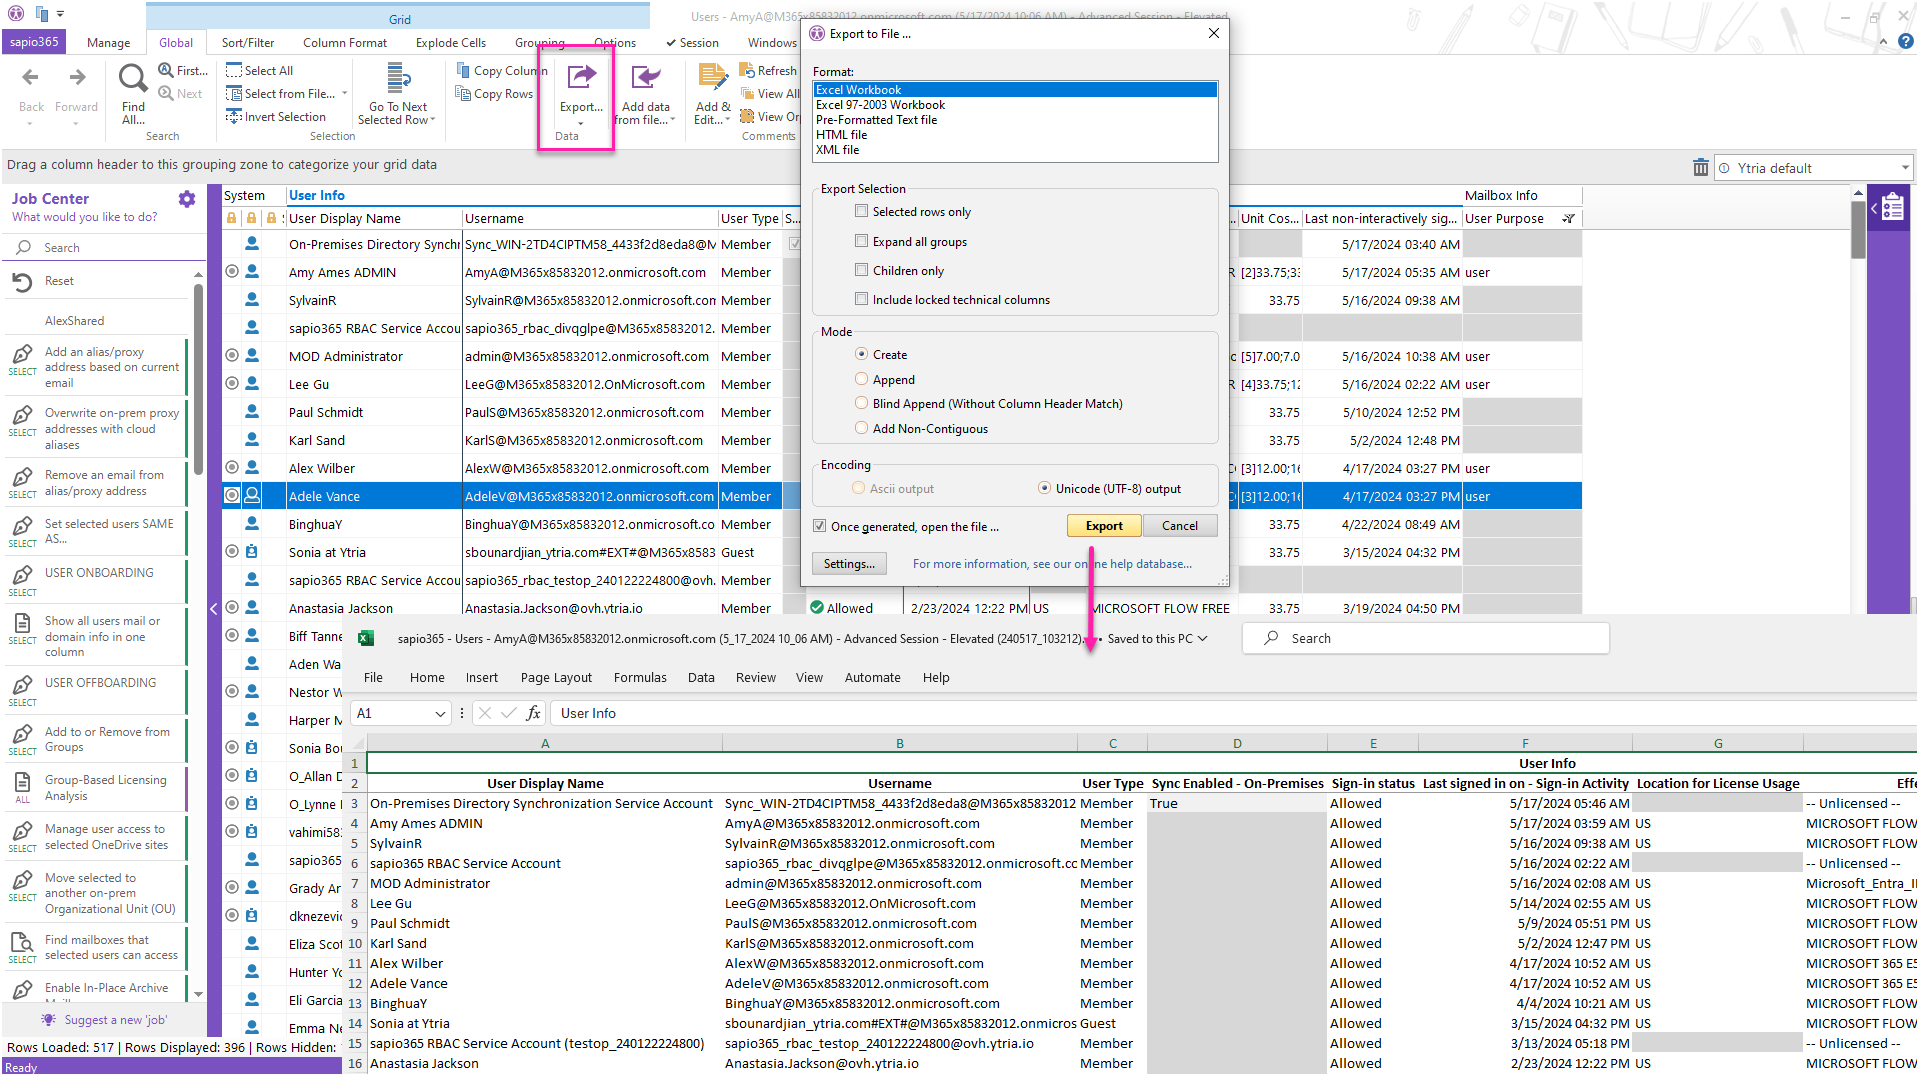
With this view created, you can export it to Excel where you will have a clean spreadsheet with only the information you want included.
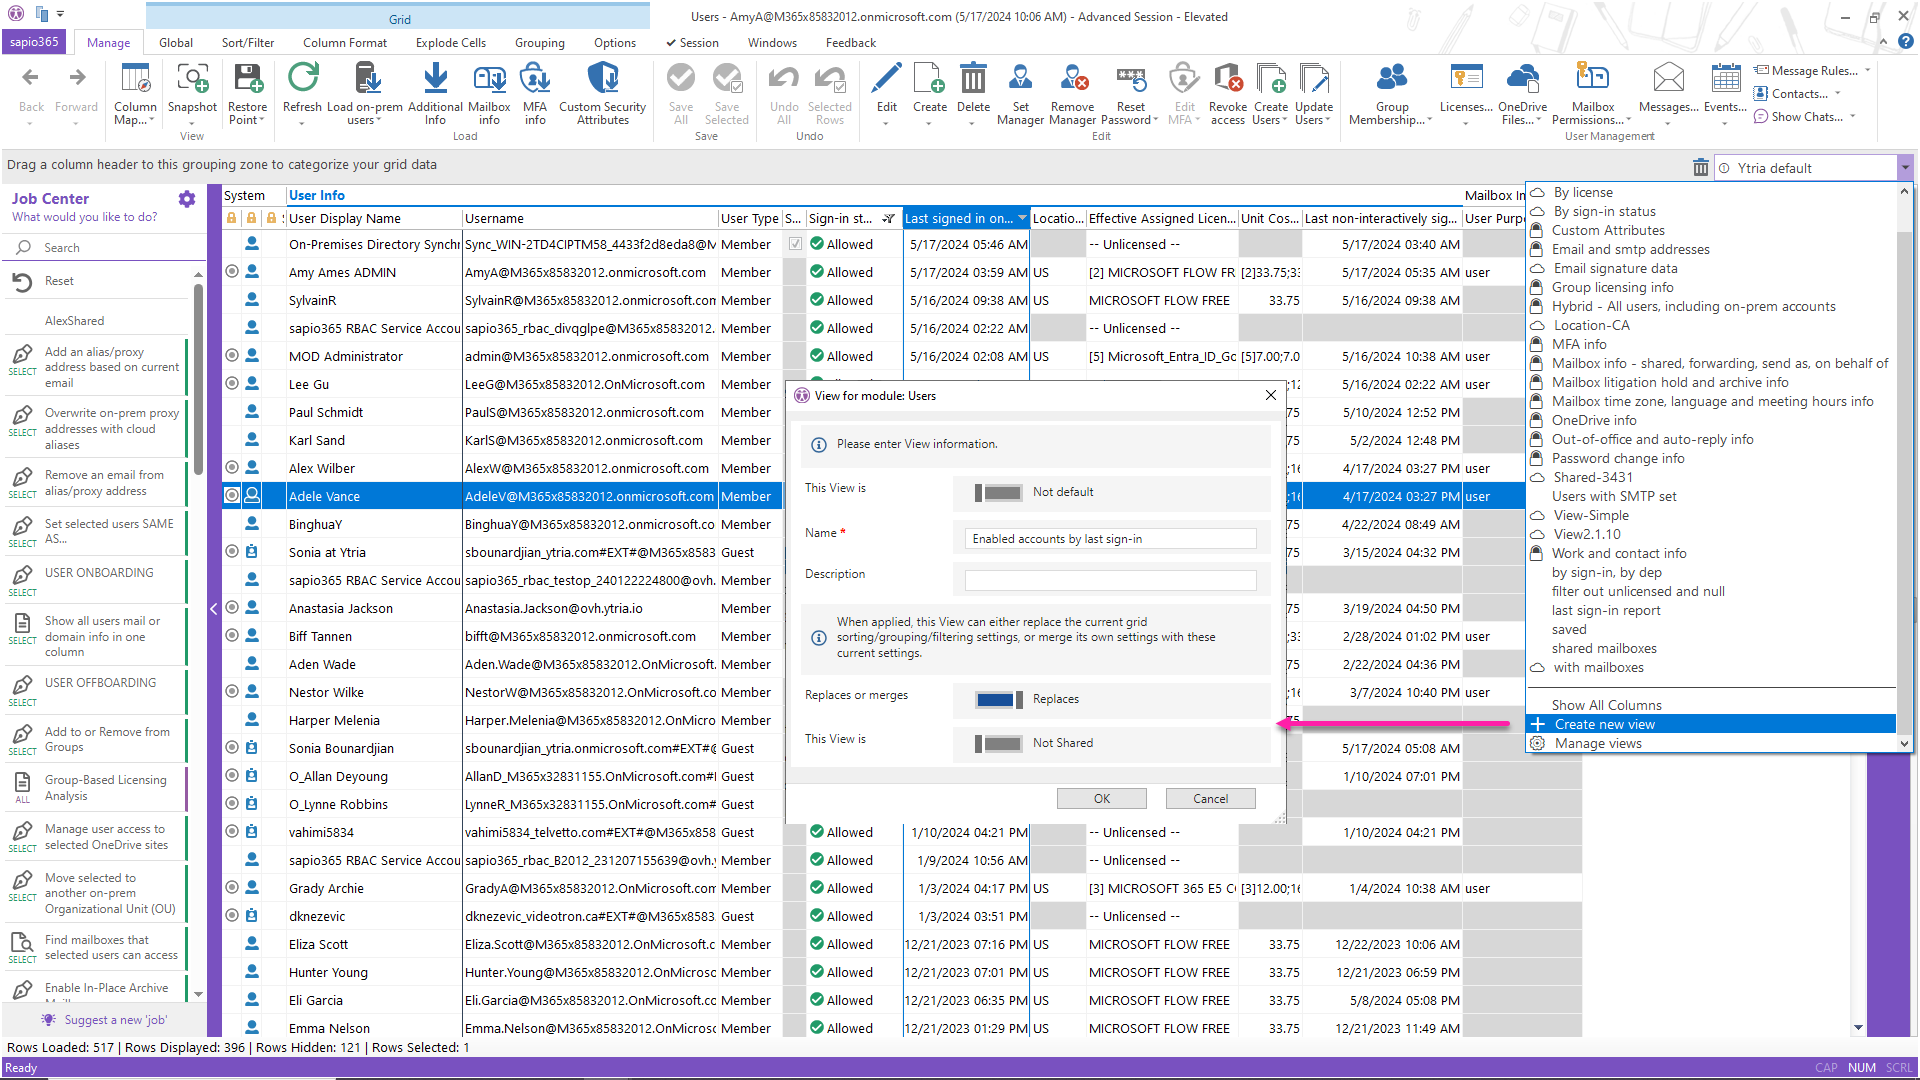
You can also save this view for future use. Simply give your view a name and you will be able to use it again as often as you want. If you want to be organized, you can even schedule the report to run every week or month, depending on your requirements.
Once your Microsoft 365 environment is cleaned up by removing inactive accounts, you may want to take a look at your licenses and find which ones may be unused. This is how one user saved a lot of money by identifying under-utilized licenses. As the above examples show, there are a few ways to get your Microsoft Office 365 login report, but not all of them will give you all the information you need, and some will take longer than others. sapio365 is a great software tool that allows you to accomplish many tasks in less time. Discover how using sapio365 to handle typical Microsoft 365 administration can save you hours of time every single day.


Submit a comment