How to Power Automate sending custom emails based on Excel data

I had a case where I needed to send an email using the contents of a generated Excel file.
This article gives you a step-by-step on how to use Power Automate to send customized emails based on data in an Excel file, and then update that file.
-
You must have access to Power Automate and OneDrive for Business.
-
A table must be defined in the Excel Sheet.
If the Excel file has been generated or updated by another process, you may not have a table set with your data. But this can be easily fixed. An Office Script will let you create a Table with your data or update an existing Table so it contains all your data.
Create a script in Excel to use in Power Automate
To create an Office Script, open any Excel file on OneDrive. Then go to “Automate” and click on “All Scripts”. This will show you the Script Editor, where you can create a new script.
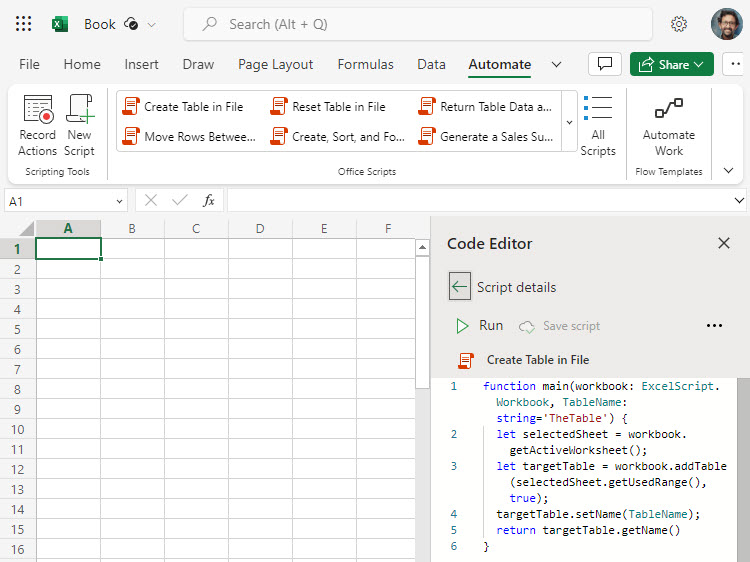
You can create scripts in Excel that will be saved directly on OneDrive. These scripts will be available to Power Automate to be run on any Excel file.
Script to create Table from the content of the file
function main(workbook: ExcelScript.Workbook, TableName: string='TheTable') {
  let selectedSheet = workbook.getActiveWorksheet();
  let targetTable = workbook.addTable(selectedSheet.getUsedRange(),true);
  targetTable.setName(TableName);
  return targetTable.getName()
}
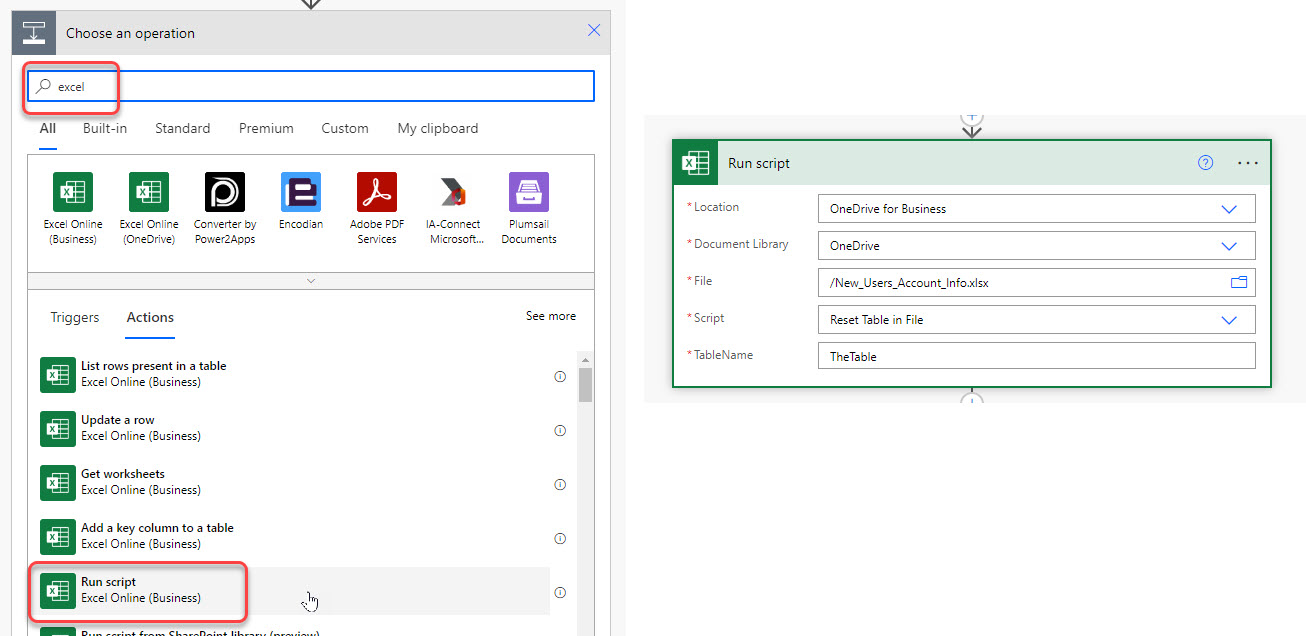
Script to reset a table in Excel
function main(workbook: ExcelScript.Workbook, TableName: string='TheTable') {
  let targetTable = workbook.getTable(TableName);
  let selectedSheet = workbook.getActiveWorksheet();
  targetTable.resize( selectedSheet.getUsedRange() );
  return targetTable.getName()
}
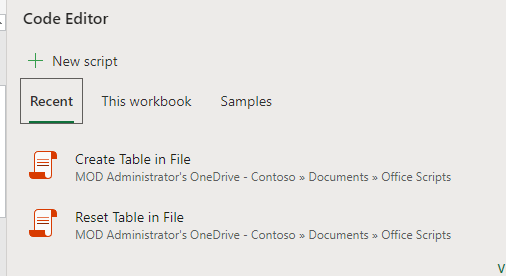
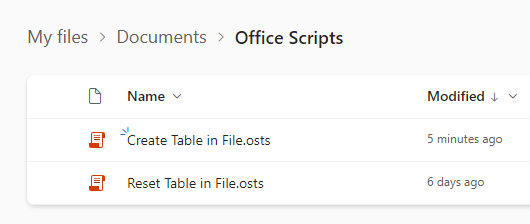
The scripts are stored here in the personal OneDrive:
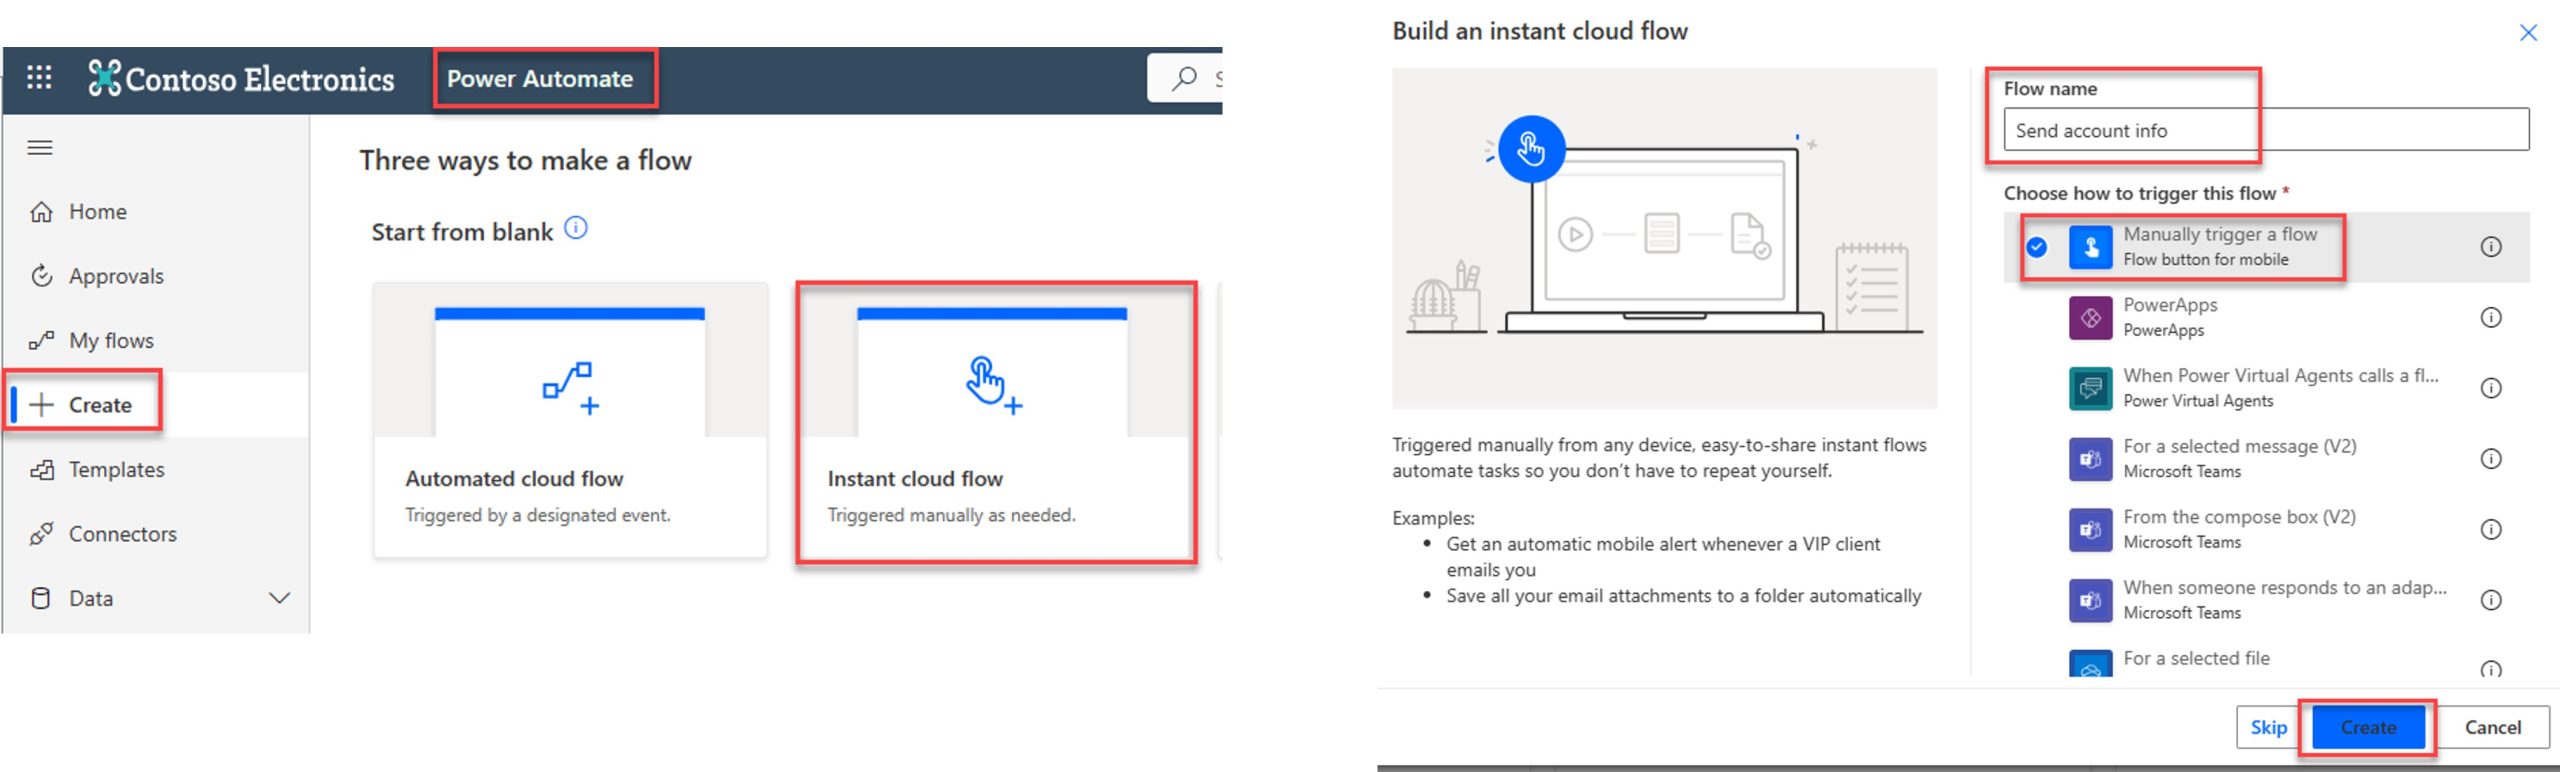
Create a new cloud flow
Open Power Automate and create a new instant cloud flow that is manually triggered.
Run the Office Script (if needed)
If required, the very first action will be to execute the Office Script on the Excel file to properly set the Table.
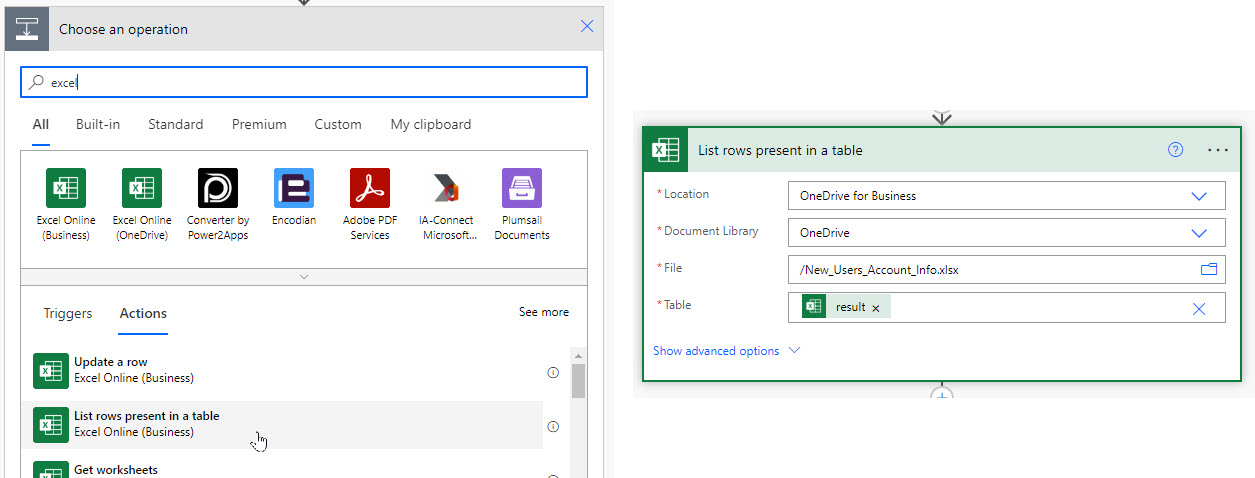
List all rows
When the flow runs, we want to list all the rows that are present in a given table in a specific Excel file.
Note that since we ran the Office Script previously, we use the “Result” of the previous step for the name of the Table. If you don’t need the script, just select the table to use.
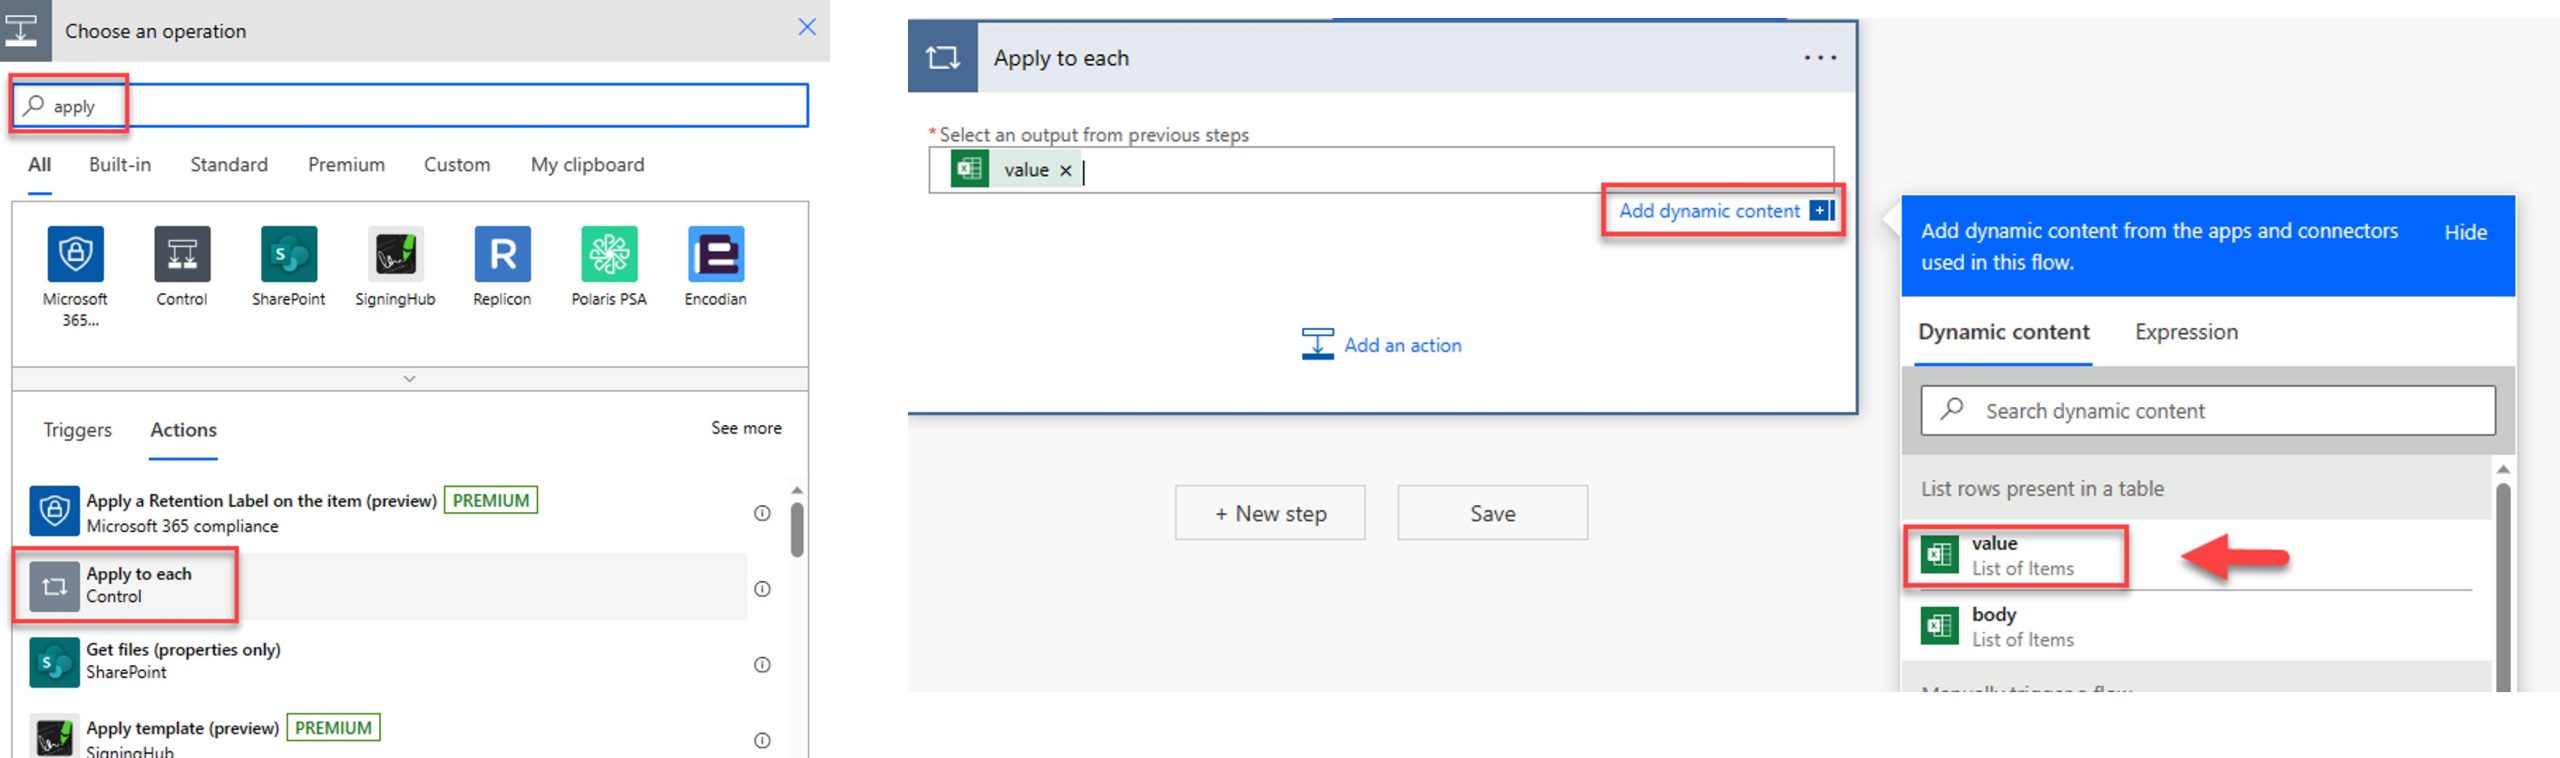
Get the Value of each cells in the row.
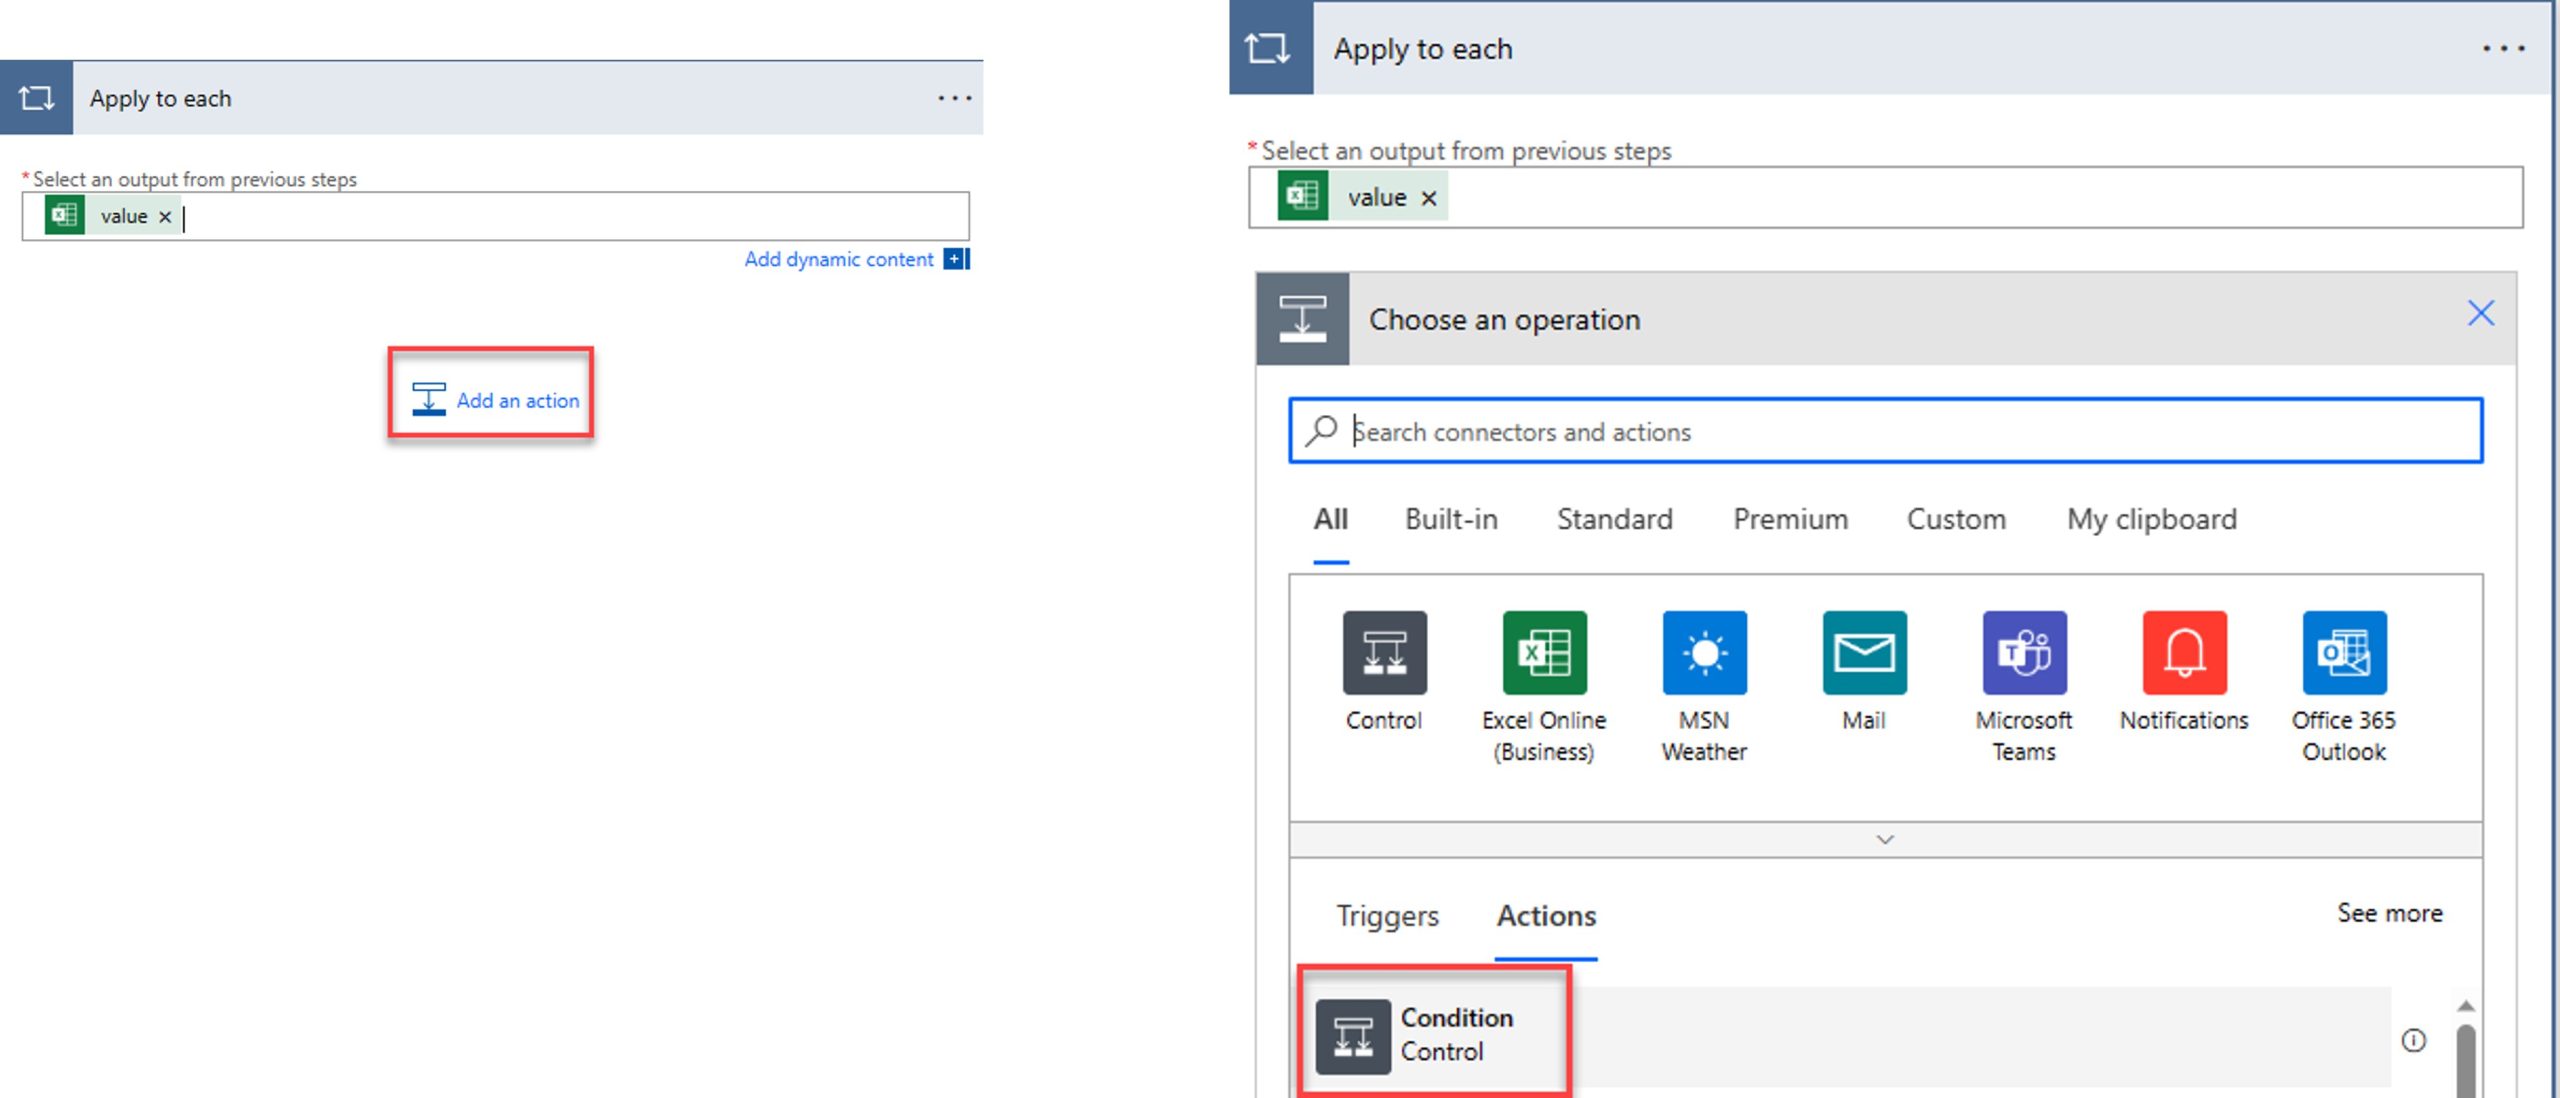
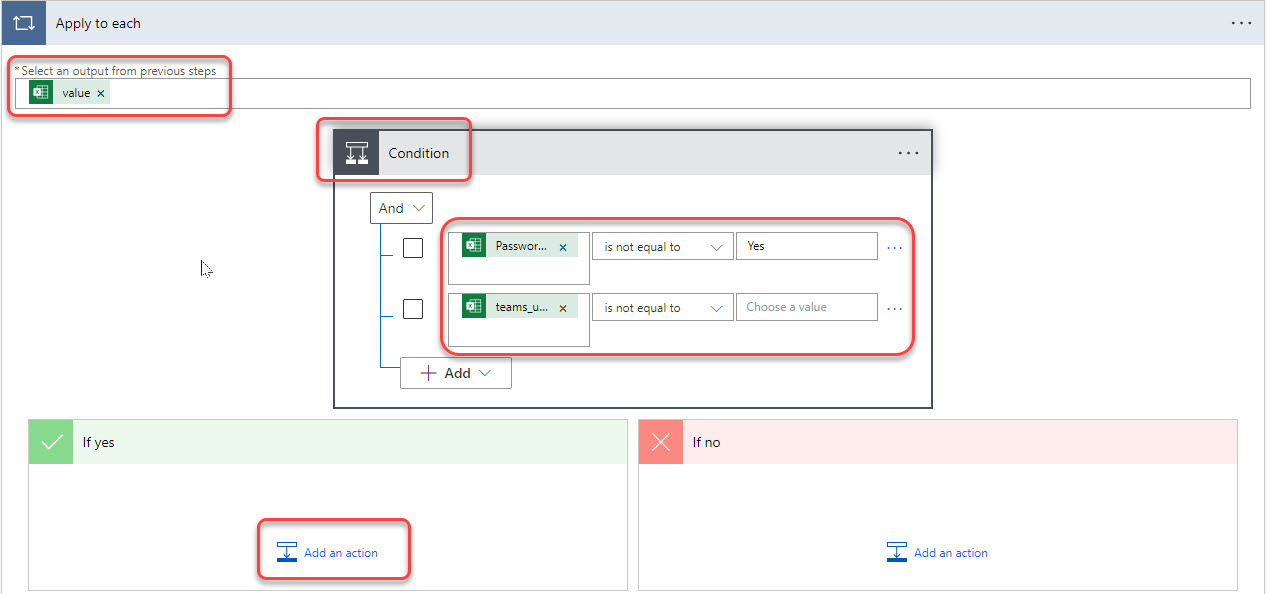
Once we have the rows, we can loop on each row and process it.
Add conditions to run the actions
On each row, we will check if the row needs to be processed by using a condition.
We add two conditions:
- a first condition to verify if the value of the cell’s Password Sent is not equal to Yes, so it has not been processed yet.
- a second condition to check that the username is not empty, in the case the table contains empty rows.
And then we can add the actions to execute if these two conditions are true.
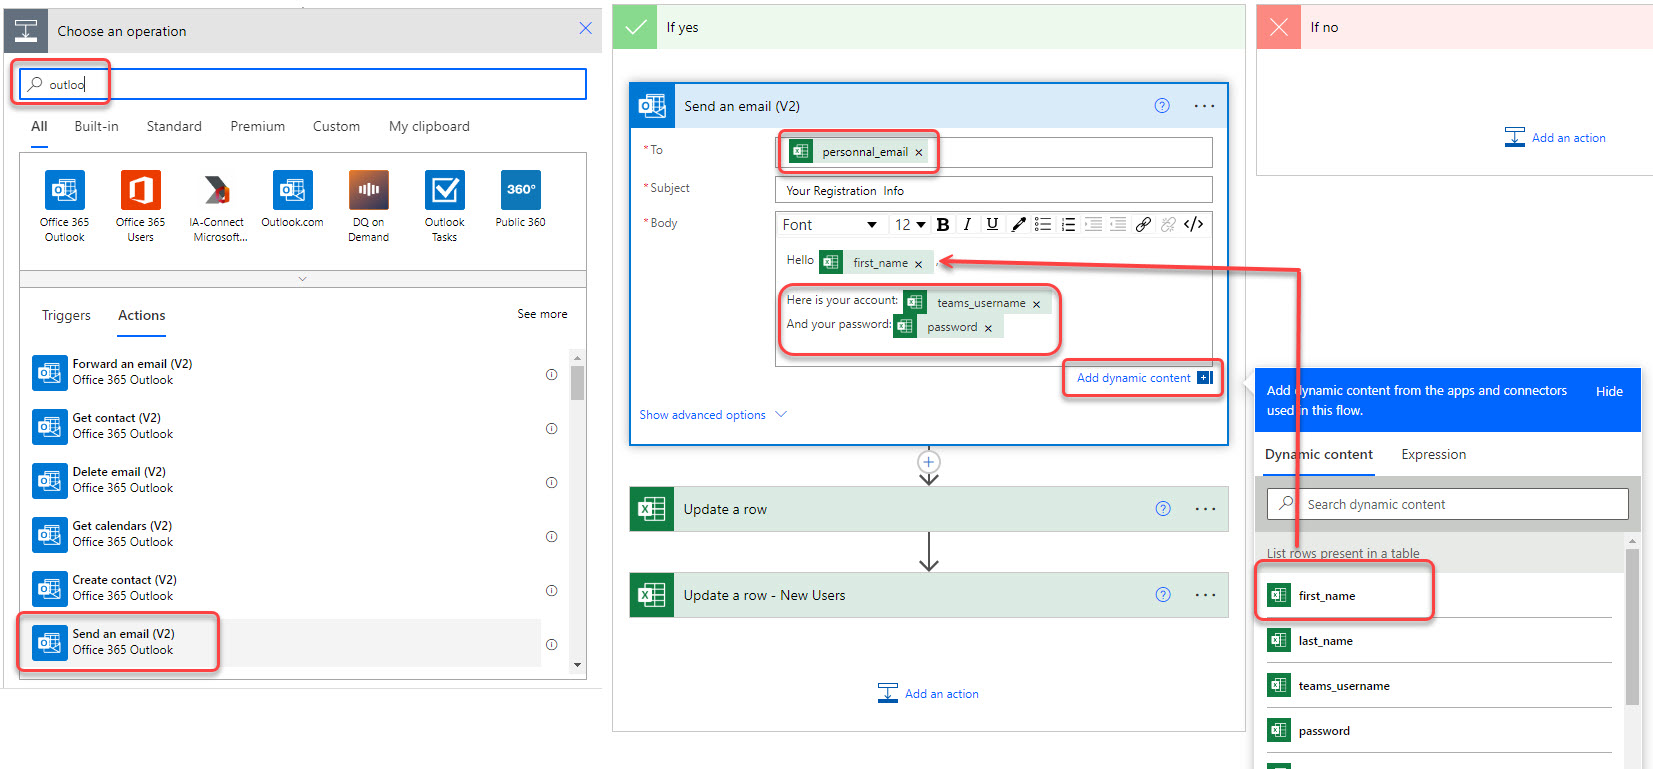
Configure a "Send an email" action
We add and configure a send email action. Using the add dynamic content let us use the fields form the Table.
Add an action to update the content of the cell
After email is sent, we add an action to update the content of the Excel files. In my case, I have two Excel files:
- a first Excel file that contains multiple data about the users, which is used by other process and to manage the information.
- and the other Excel file being the one used by this Power Automate.
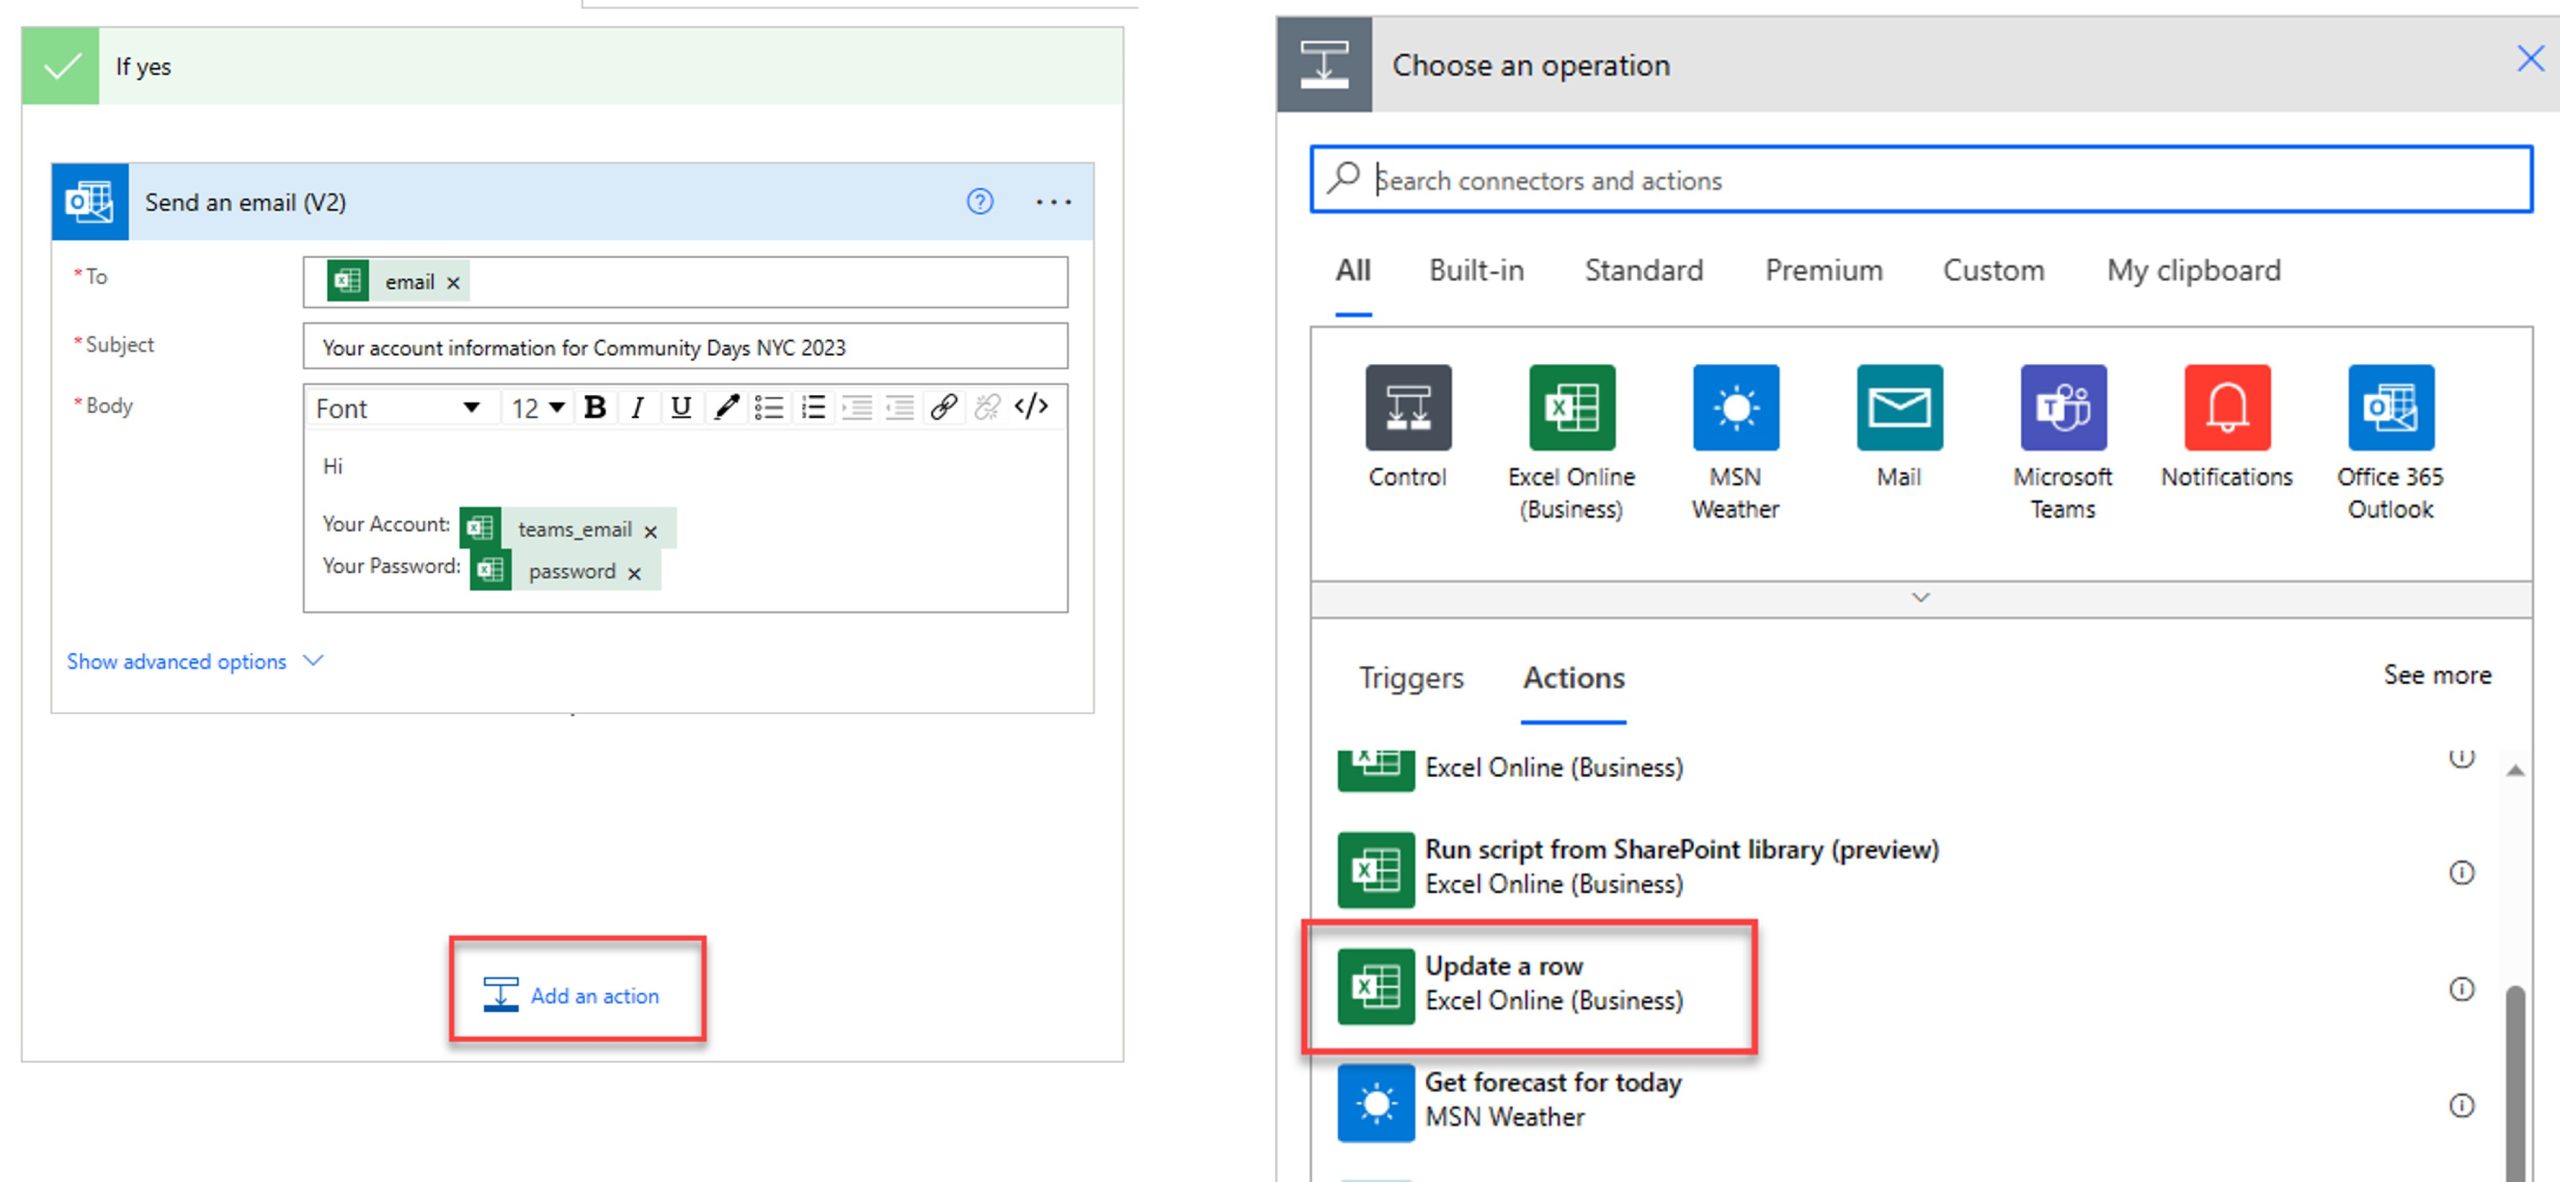
The first action will add to the first Excel file the password that has been sent by the email, and a status saying the info has been sent to the user.
We select the file, set the target Table, and define the key to use to find the row in the file that corresponds to the current user.
Then we can paste the password to the proper field, and set the “Password sent” field to Yes.
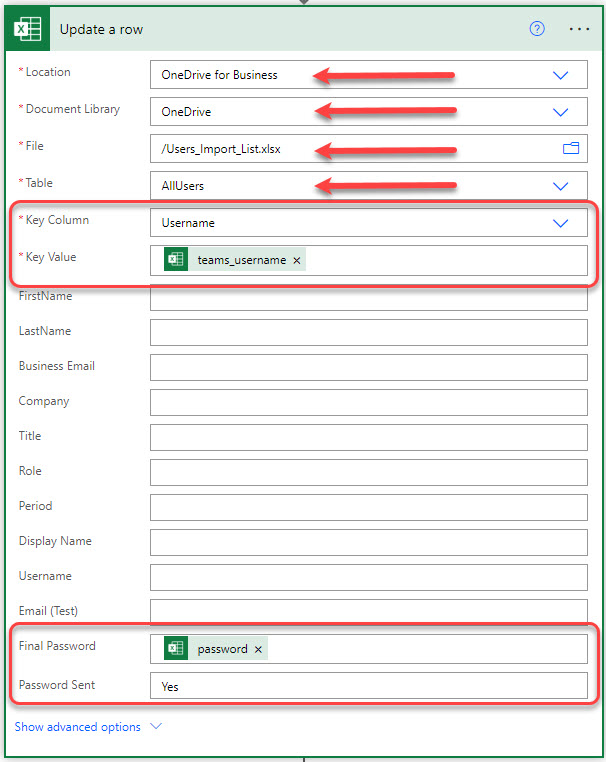
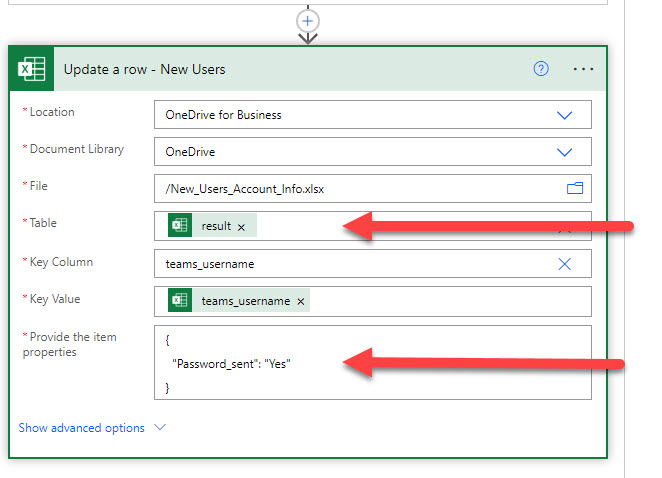
Now we do the same but in the Excel file used in the Power Automate.
Since we used the Office Script to set the table in the Excel file, we need to dynamically provide the table name using the returned value from the script.
Being set as dynamic, Power Automate doesn’t have the list of the fields of the table it can update, so we must provide it manually.
Manually run your flow
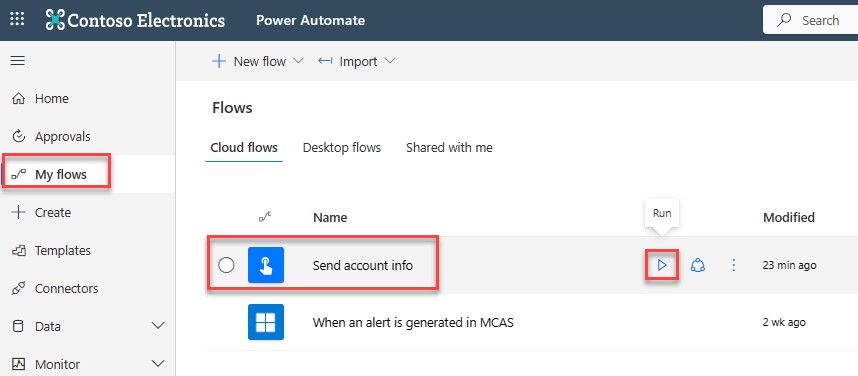
Here we do a manual trigger, but this could be set to run when the Excel file has been modified, or when an email has been received, etc.
Submit a comment