How to Create an Amazing M365 OneDrive Sharing Report for All Users

Creating a OneDrive sharing report for all users can be a challenging task but IT admins can be asked to prepare one. As an IT admin, you may not know the best way to do this so we can explore different approaches to creating this report. You can use Microsoft Office 365 audit logs to do this kind of report.
One of the challenges lies in the fact that the Admin Center allows you to create a One Drive report for one user at a time. Preparing a OneDrive sharing report for all users is a tedious process that involves aggregating a lot of data manually, which often leads to errors and omissions.
You can also choose to write or find a PowerShell script that can do this for you, but it will require a complex script. Finally, you can decide to use a third-party tool to help you prepare the report. Let’s look at these three options and compare the processes.
Run a bunch of OneDrive sharing reports from the Admin Center
The good news is that creating a sharing report in the Admin Center for one user (or site) is pretty straightforward.
It is only when you need to examine several users’ OneDrive files, that it gets complicated – as most actions in the Admin Center do.
To help guide you, here are the steps, with screenshots, to help you along the way.
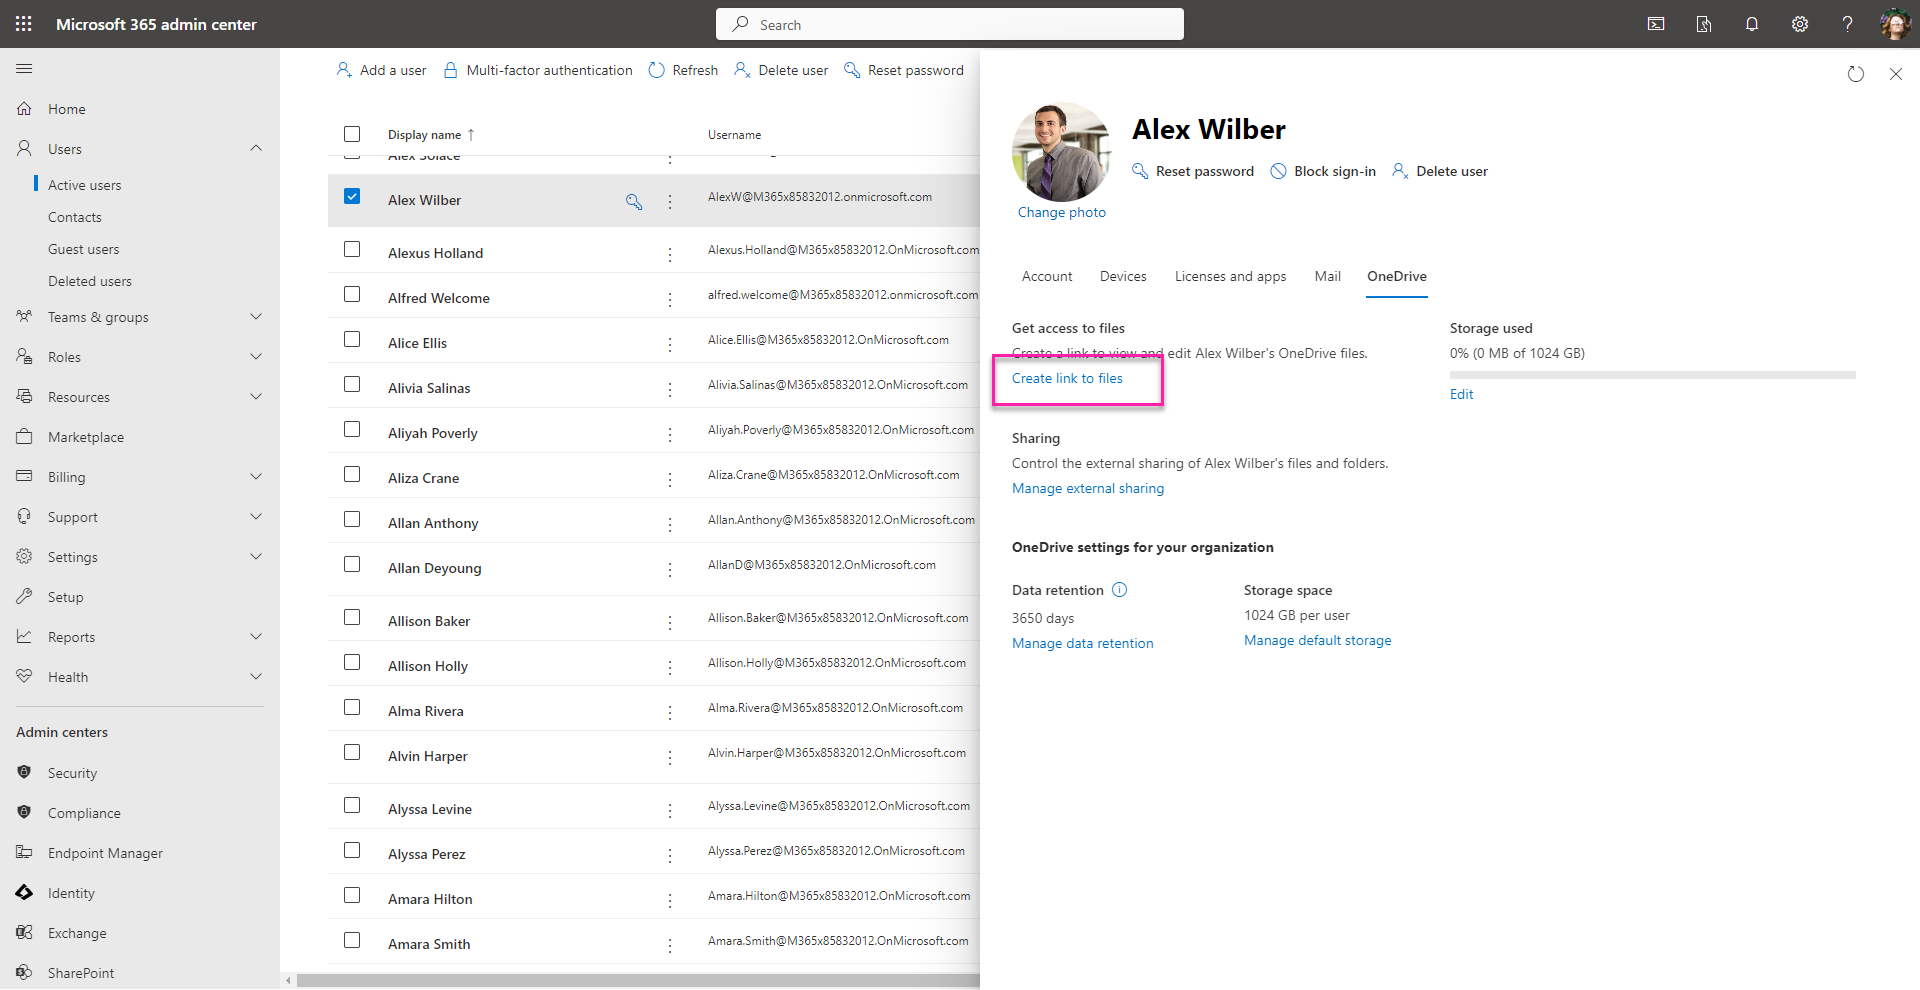
1 – To generate a OneDrive sharing report on a user, you’ll need to search for and select that user. Then click on “Create link to files”.
Note that clicking this link automatically assigns you as a site administrator of that OneDrive site. You may want to remove yourself from the list after you get the report.
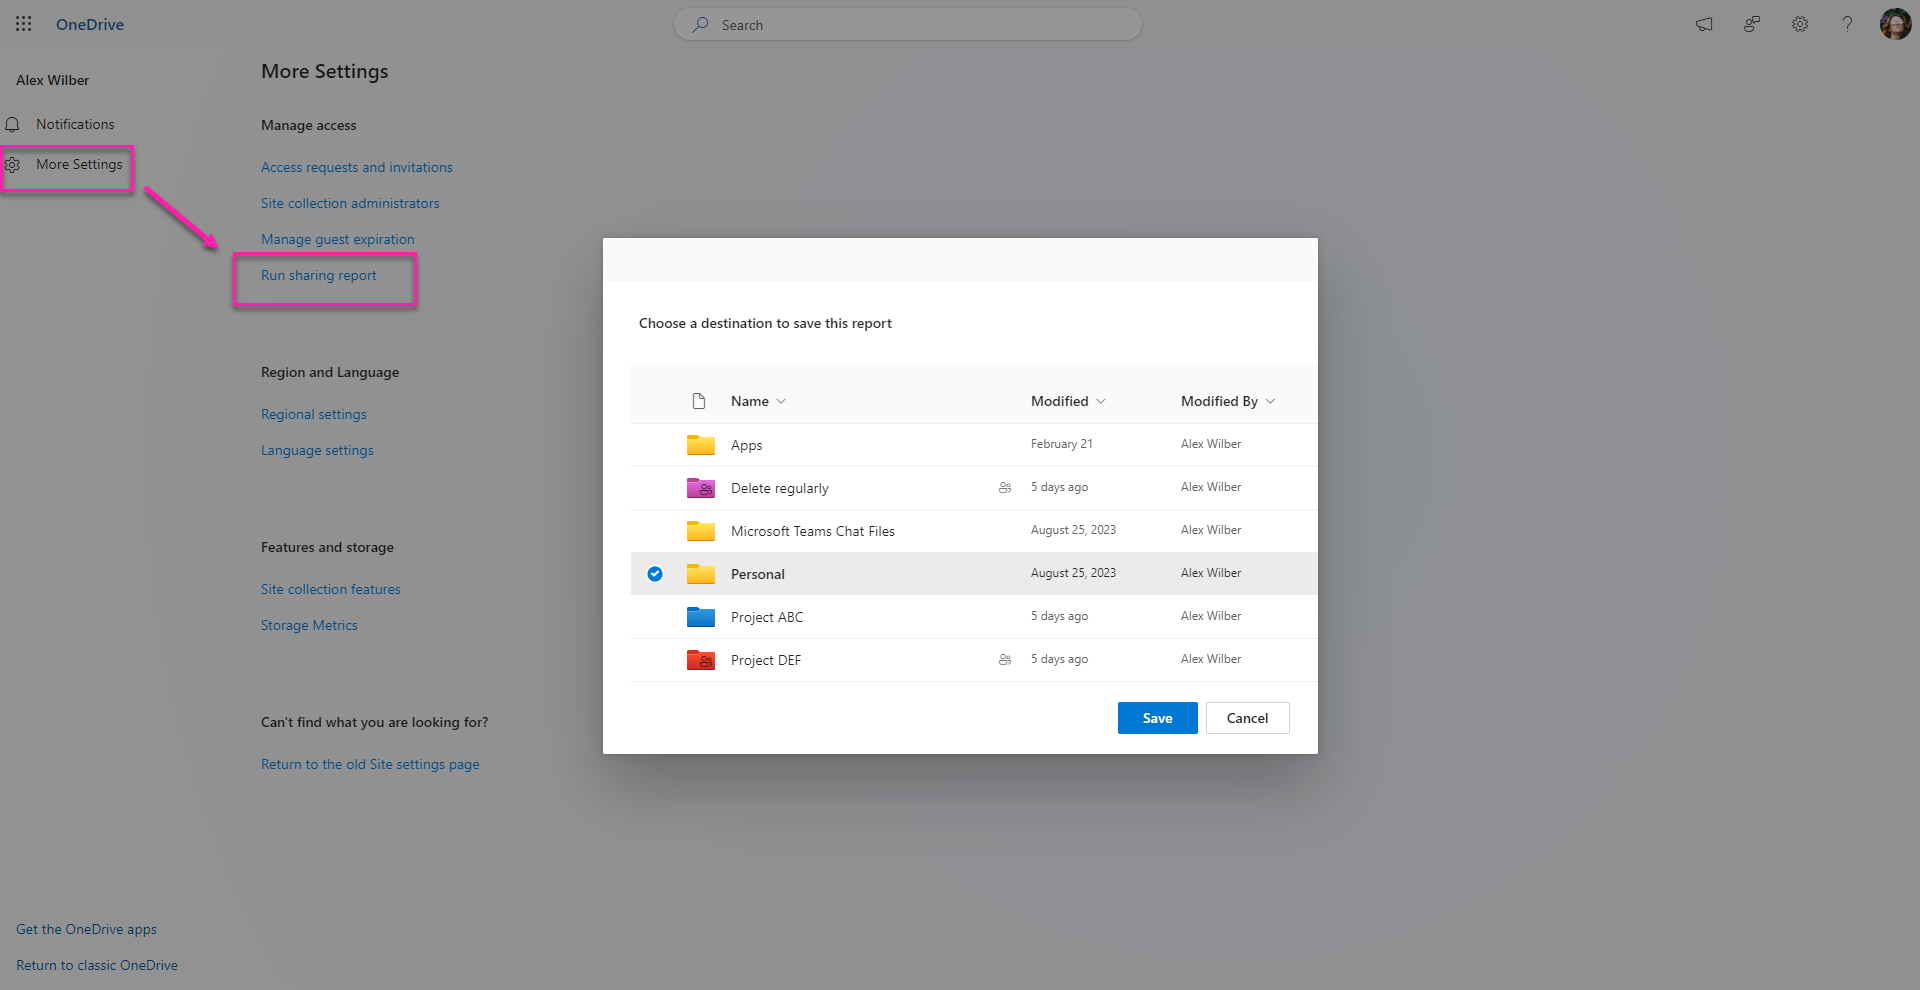
2 – Once the link is created, click it and you’ll see the user’s files.

3 – Then go to More settings and run the sharing report. You’ll be asked where in the drive you want to save the report.
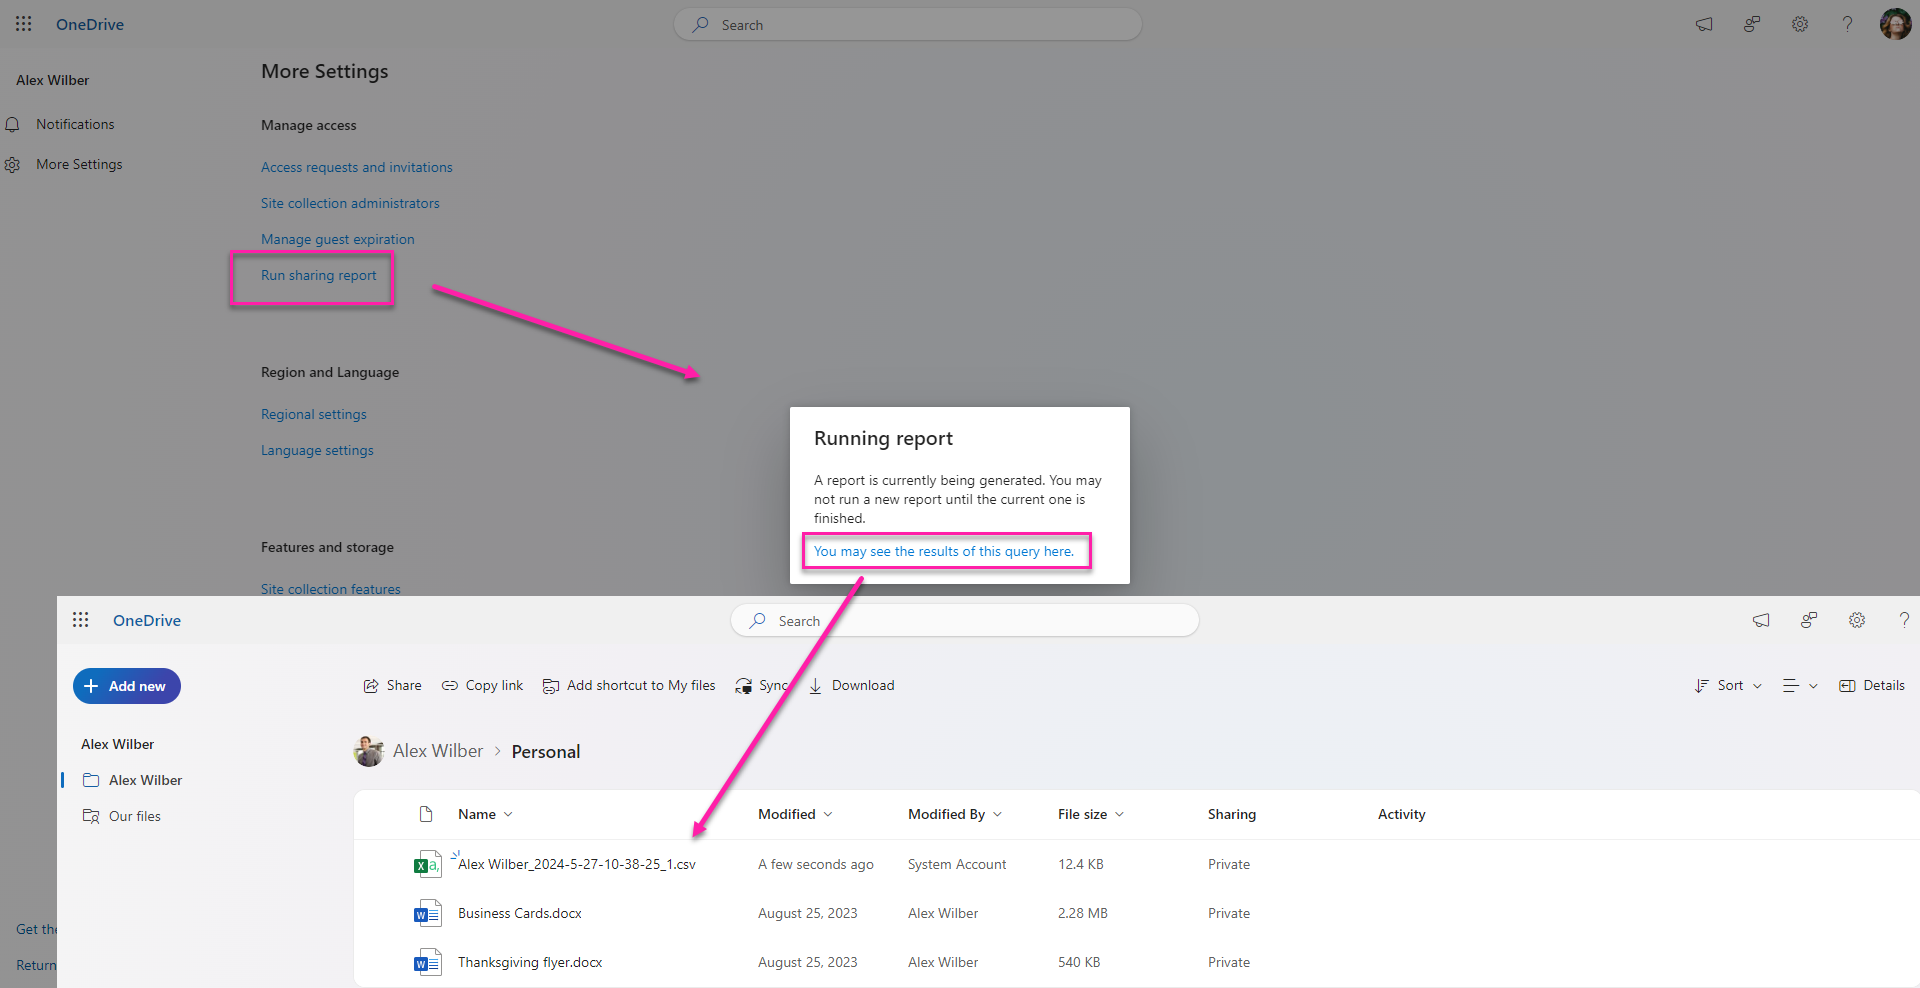
4 – The process may take some time depending on the number of files. If you click on “Run a sharing report” again while it’s still in process, it will let you know and will include a link that leads to the destination folder you chose.
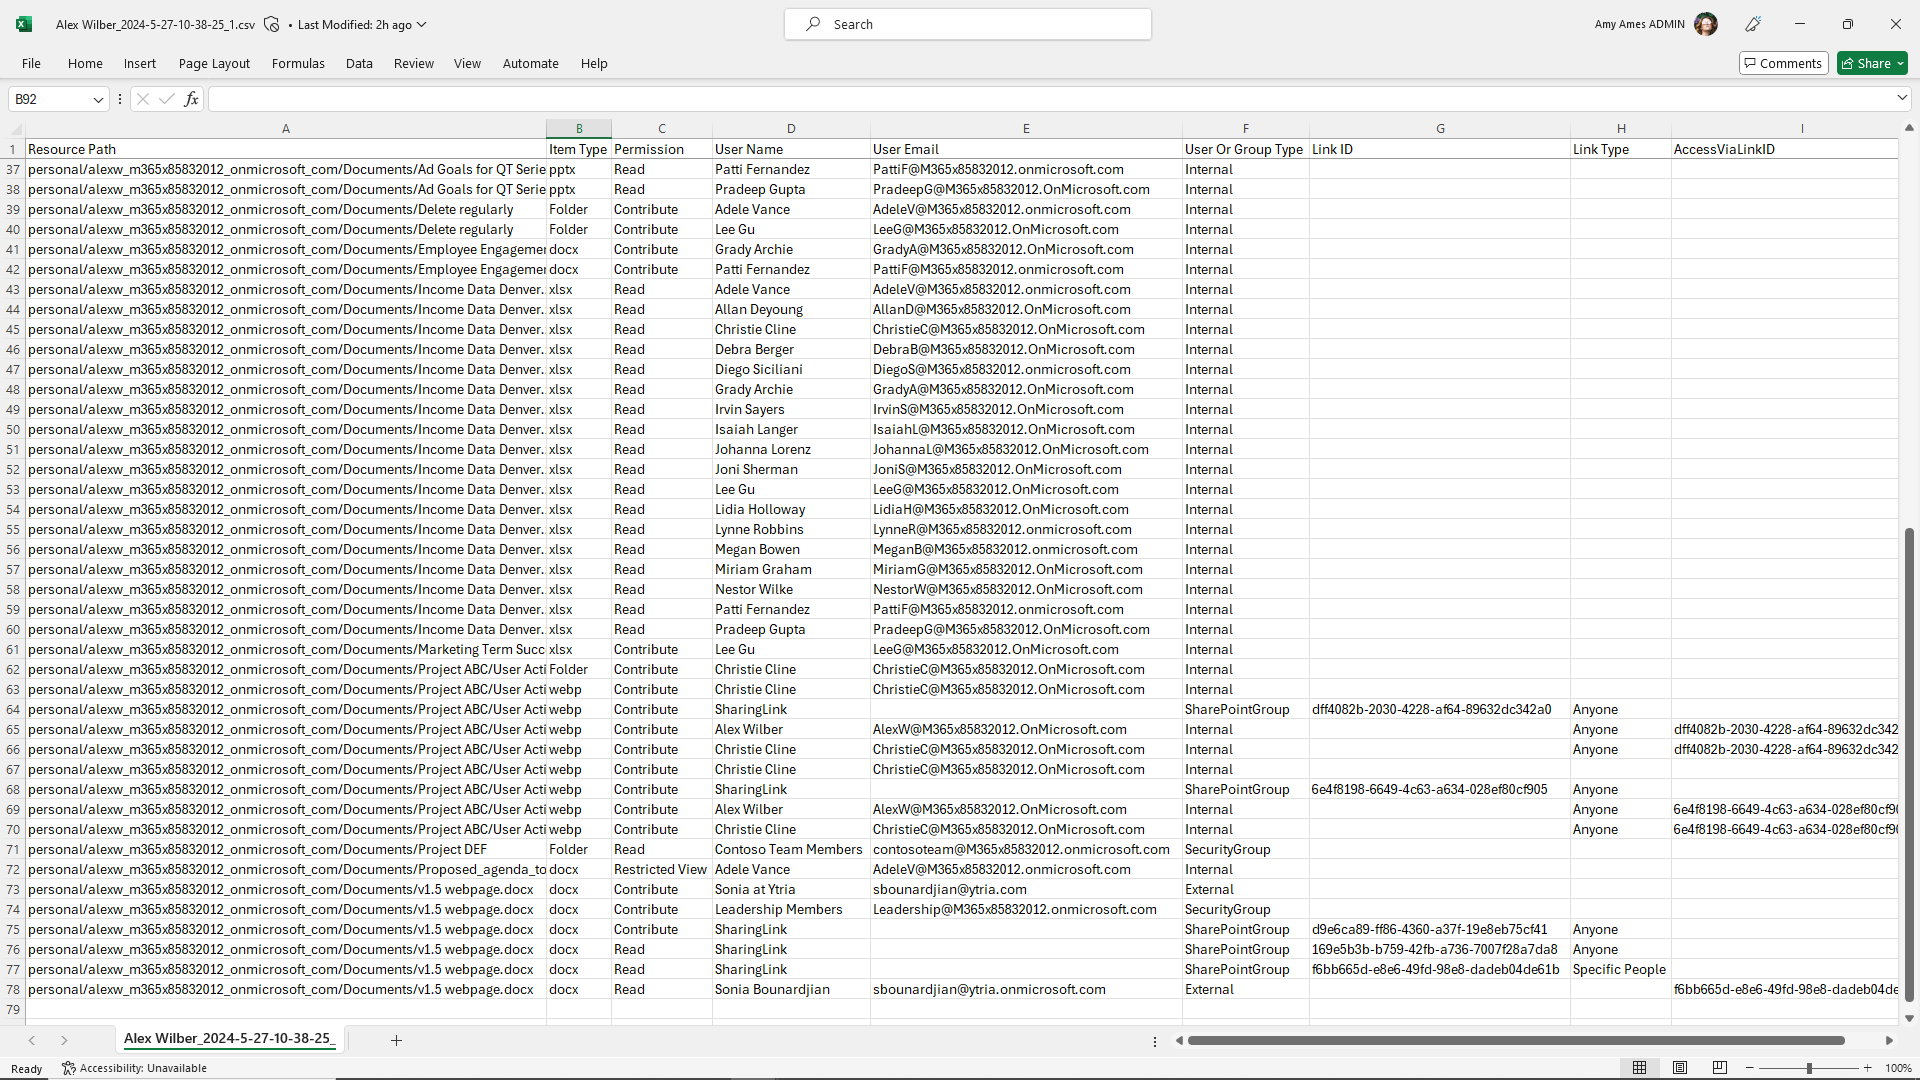
5 – The resulting csv file looks like the image below, showing the different ways a file has been shared and with whom.
Limitations of the Admin Center
There are a few limitations you will face if you choose to use the Admin Center to create a One Drive sharing report for all users.
- You must be a site admin to run the report.
- Links that have been emailed directly that haven’t been clicked, as well as ‘Anyone’ (anonymously shared) links aren’t included in the report.
- The csv report is not actionable, meaning that should you need to remove sharing links, you will not be able to do so. You’ll need to open the file permissions in SharePoint to do that.
Get file permissions with Graph PowerShell
The Microsoft Graph API is an excellent tool for getting all the details of how a OneDrive file has been shared. And together with PowerShell, it allows you to create sophisticated queries.
For example, the following API request retrieves permissions of a single file in a user’s OneDrive:
GET https://graph.microsoft.com/v1.0/drives/<>/items/<>/permissions
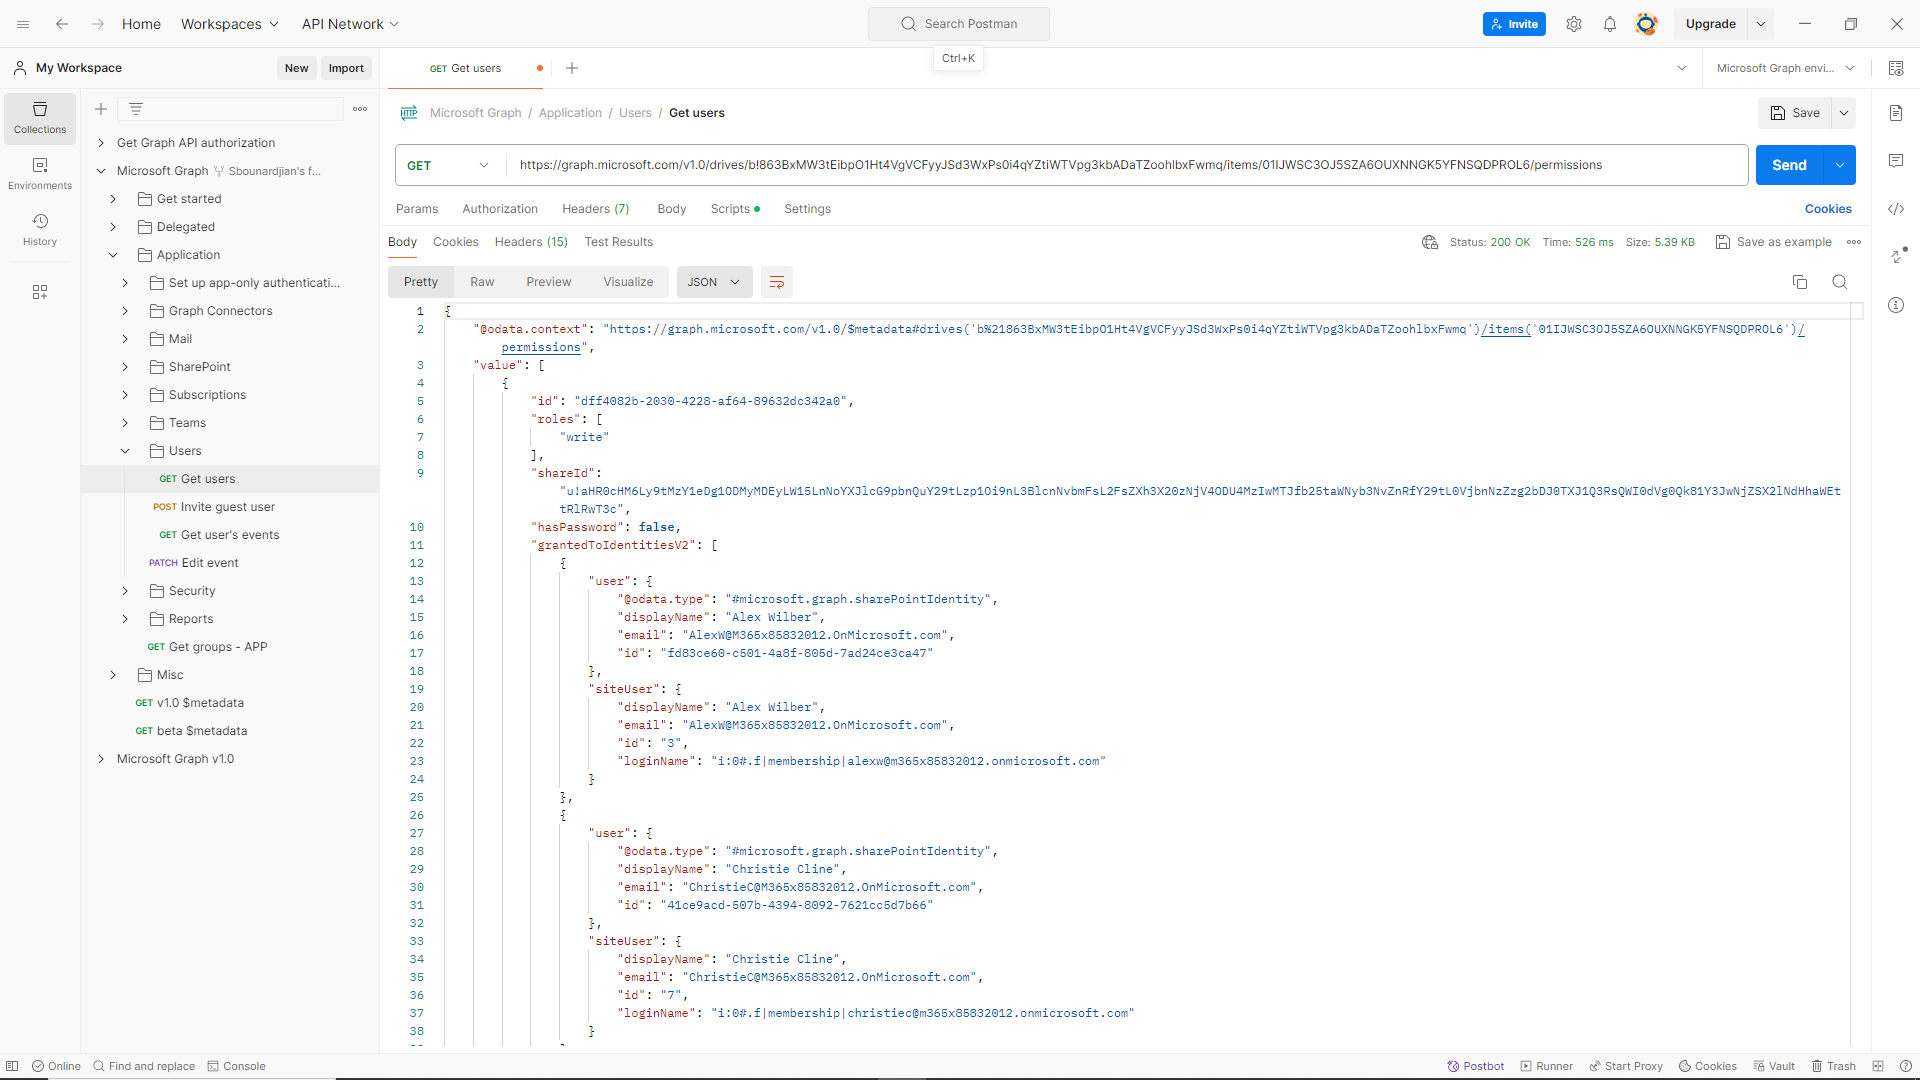
Of course, leveraging this API requires some know-how on both the use of the API and on the PowerShell script writing. You’ll need to understand how delegated vs. application permissions work when retrieving content from SharePoint Online sites that you do not administer or own.
Your information can be exported but only to a csv file. You will need to have some mastery of Excel to be able to process the data.
The alternative is to use a third-party tool that does all the heavy lifting for you, sapio365.
Using sapio365 to get a custom OneDrive sharing report for all users
With sapio365, you don’t need to worry about adding yourself as site administrator if you’re a global admin. Using sapio365 ‘s option to elevate your privileges will give you the access you need to perform tasks like these. Get a free trial and discover a whole lot of tasks that are much easier with sapio365.
sapio365 gives you a full and extensive view of all your users and data, all in one place, without any pagination issues. The only decision you need to make is which users’ OneDrive files you want to include in your report.
With all the data at your fingertips, you can drill down to find very specific information.
What’s more, if you want to search though every user’s OneDrive, there is an automated task that can be scheduled to run during off working hours to avoid heavy bandwidth use.
Here’s a step-by-step guide on how to use sapio365 to create a OneDrive sharing report for selected users.
1 – Select your users and click OneDrive files. For this example, only 2 users are selected. Skip loading all drives unless you want to include more than the default drive (like the drive associated with the preservation hold library).
Note: The processing time will depend on the total number of files and folders retrieved so you want to create batches of users.

2 – You now see a hierarchical view of the file and folder structure for each user. You can see the name of each one, their size, creation and modification dates, and if they’re “shared” or “private”. To clean up the data, you can filter out non-shared files by right-clicking on the header of the “Shared” column. Uncheck “Private” in the filter.

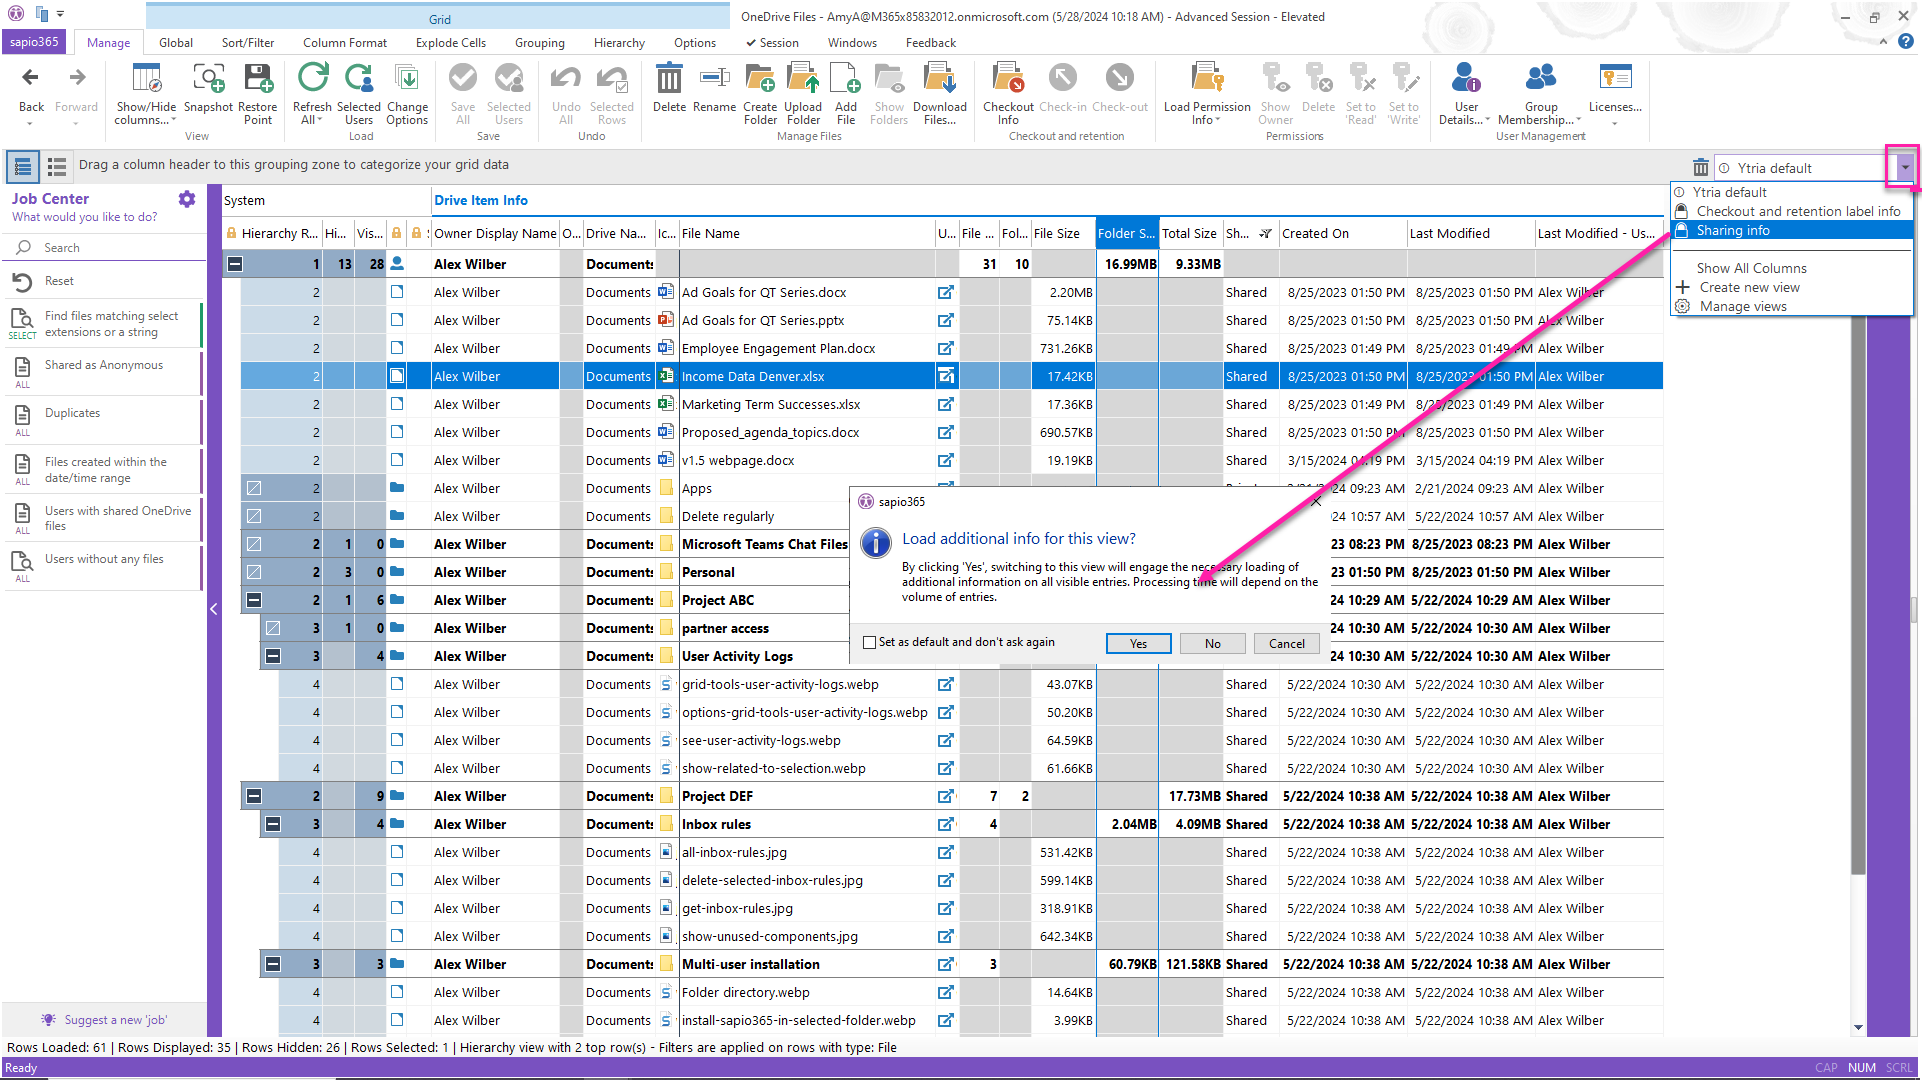
3 – Switch to a “Sharing Info” view that adds sharing data to the grid and loads permissions automatically. Click on “Yes” to load the permissions for all the visible entries (this shortcut comes in handy because you filtered out what you don’t need first).
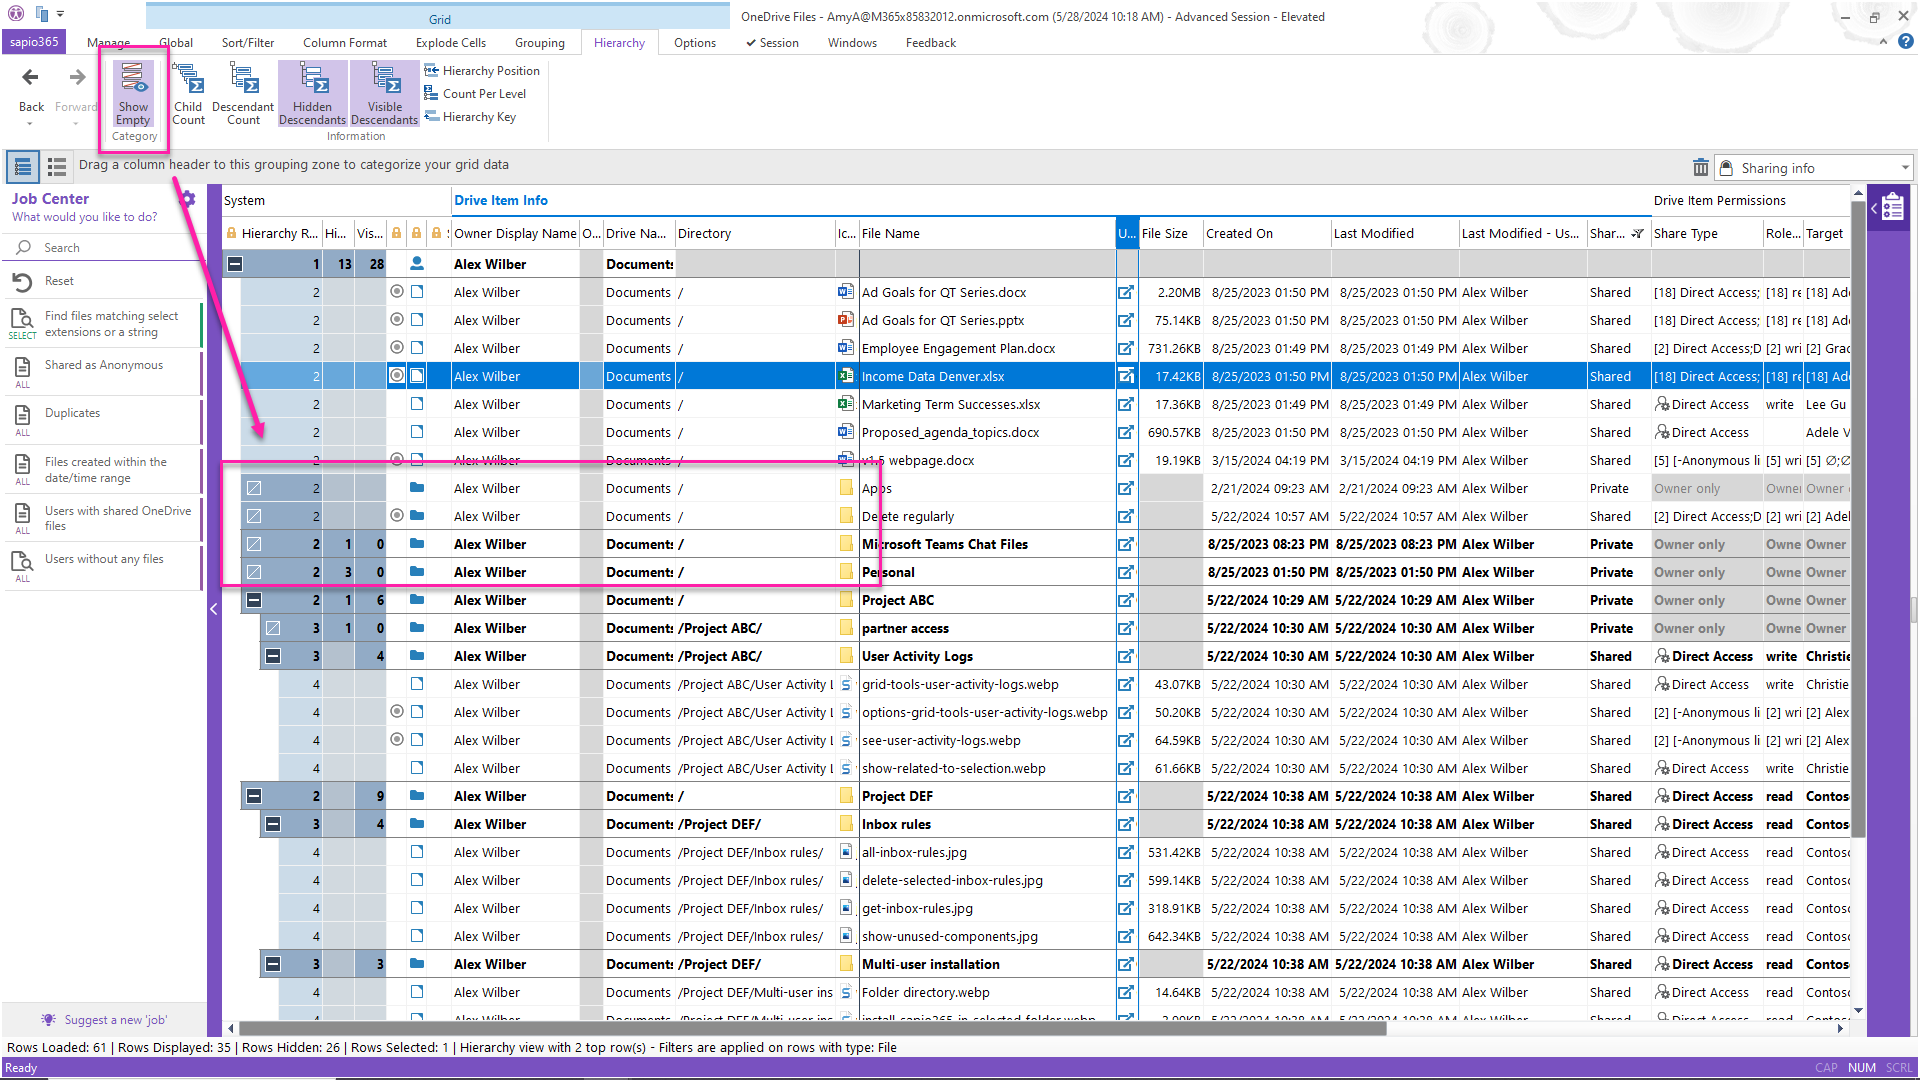
4 – Optional – remove ALL empty folders by clicking ‘Show Empty’. The image below shows an example of the folders that will be hidden. Note that this will also remove shared empty folders.
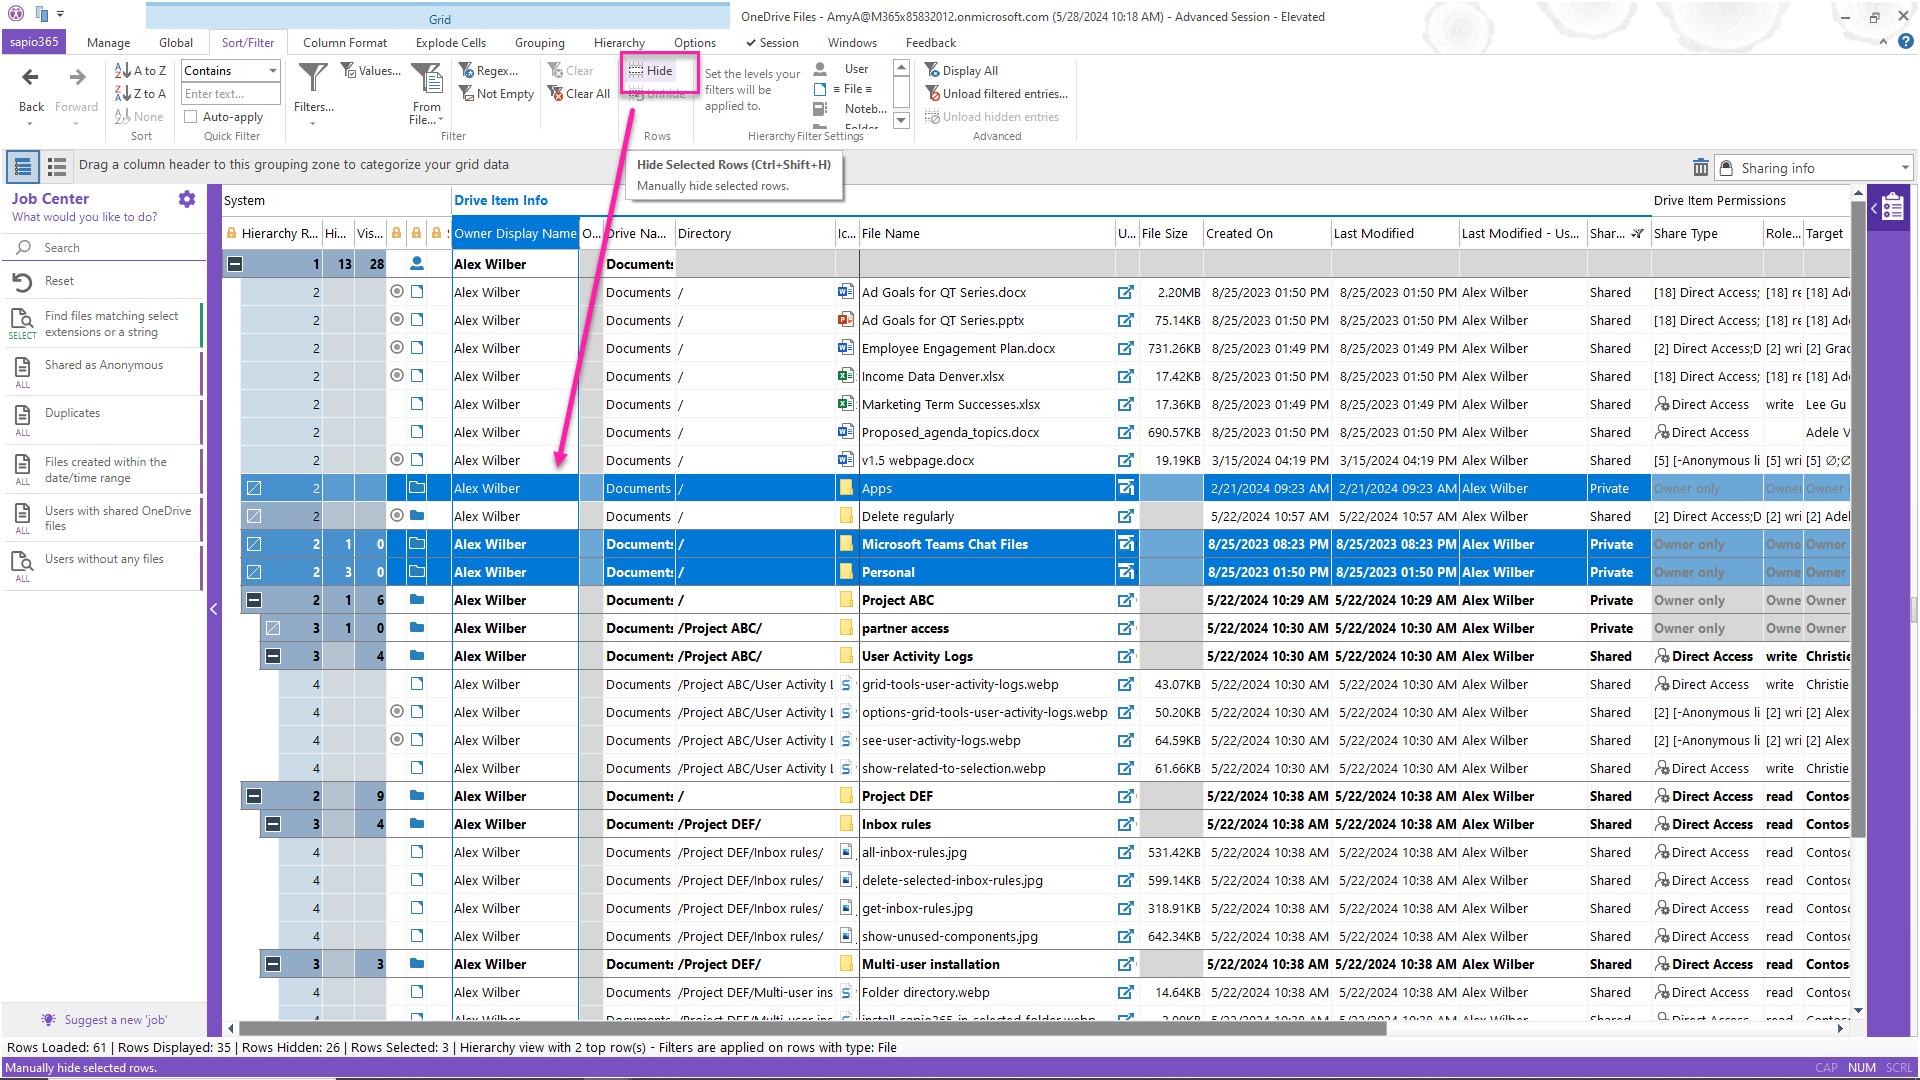
5 – Or, you can manually select empty private folders and hide them.
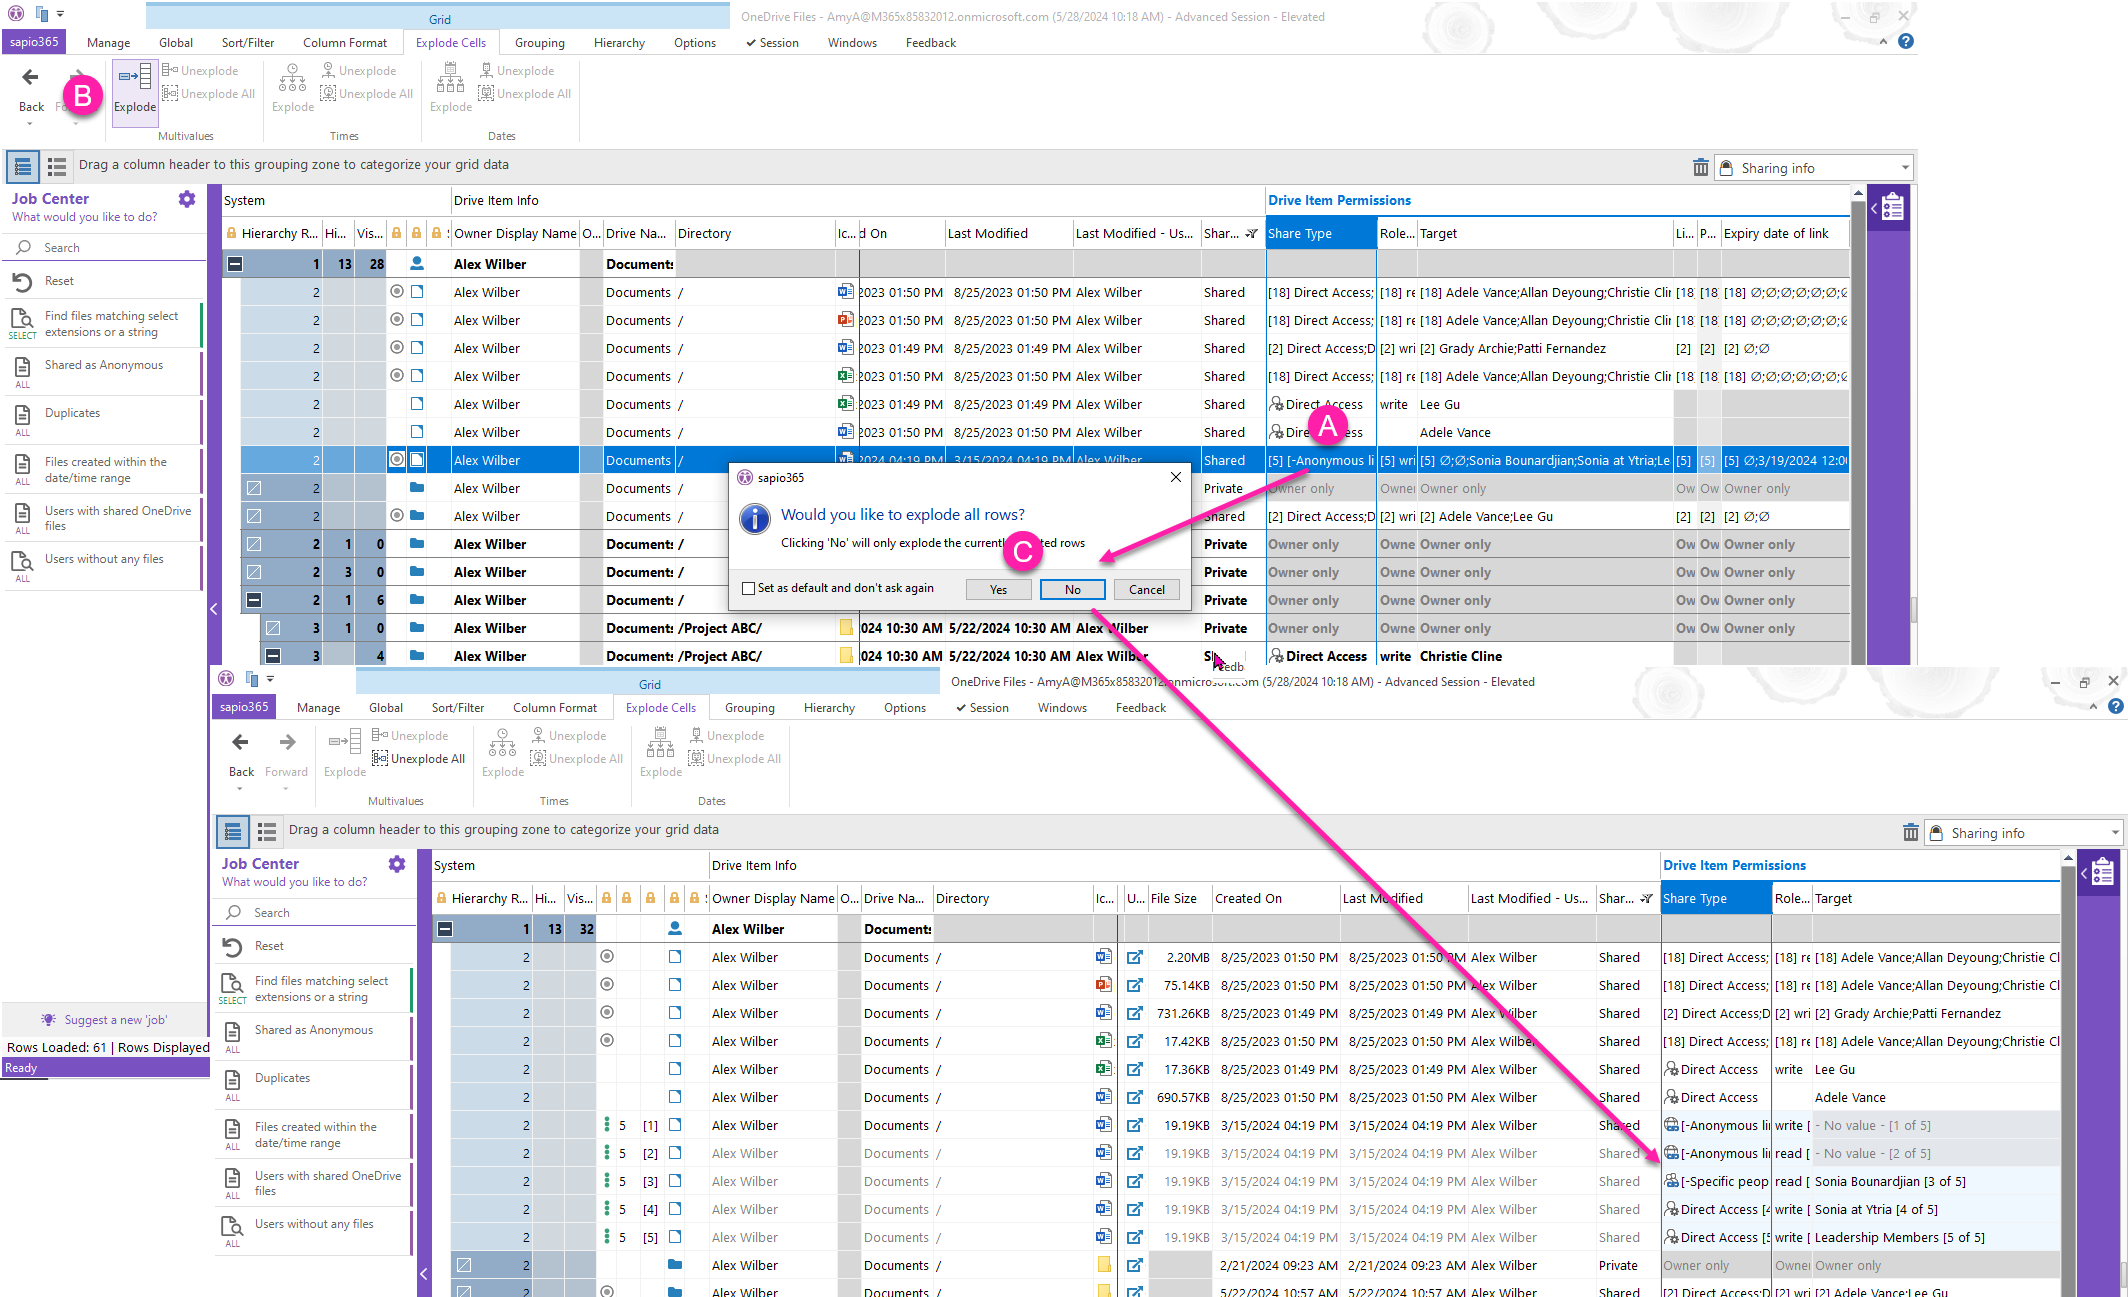
6 – Explode the permissions to show all the ways that a file/folder has been shared (more readable).
- Select a multi-value cell under ‘Share Type’ column.
- Explode.
- Click ‘Yes’ to explode all rows in that column, or ‘No’ to only explode for the selected rows (some shared files may be more important than others).
Exploded values are shown as light blue.
7 – Remove the columns you don’t need in your report by dragging the headers to the trash icon on the top right of the grid, and export (uncheck those two 2 default options to export what you see).
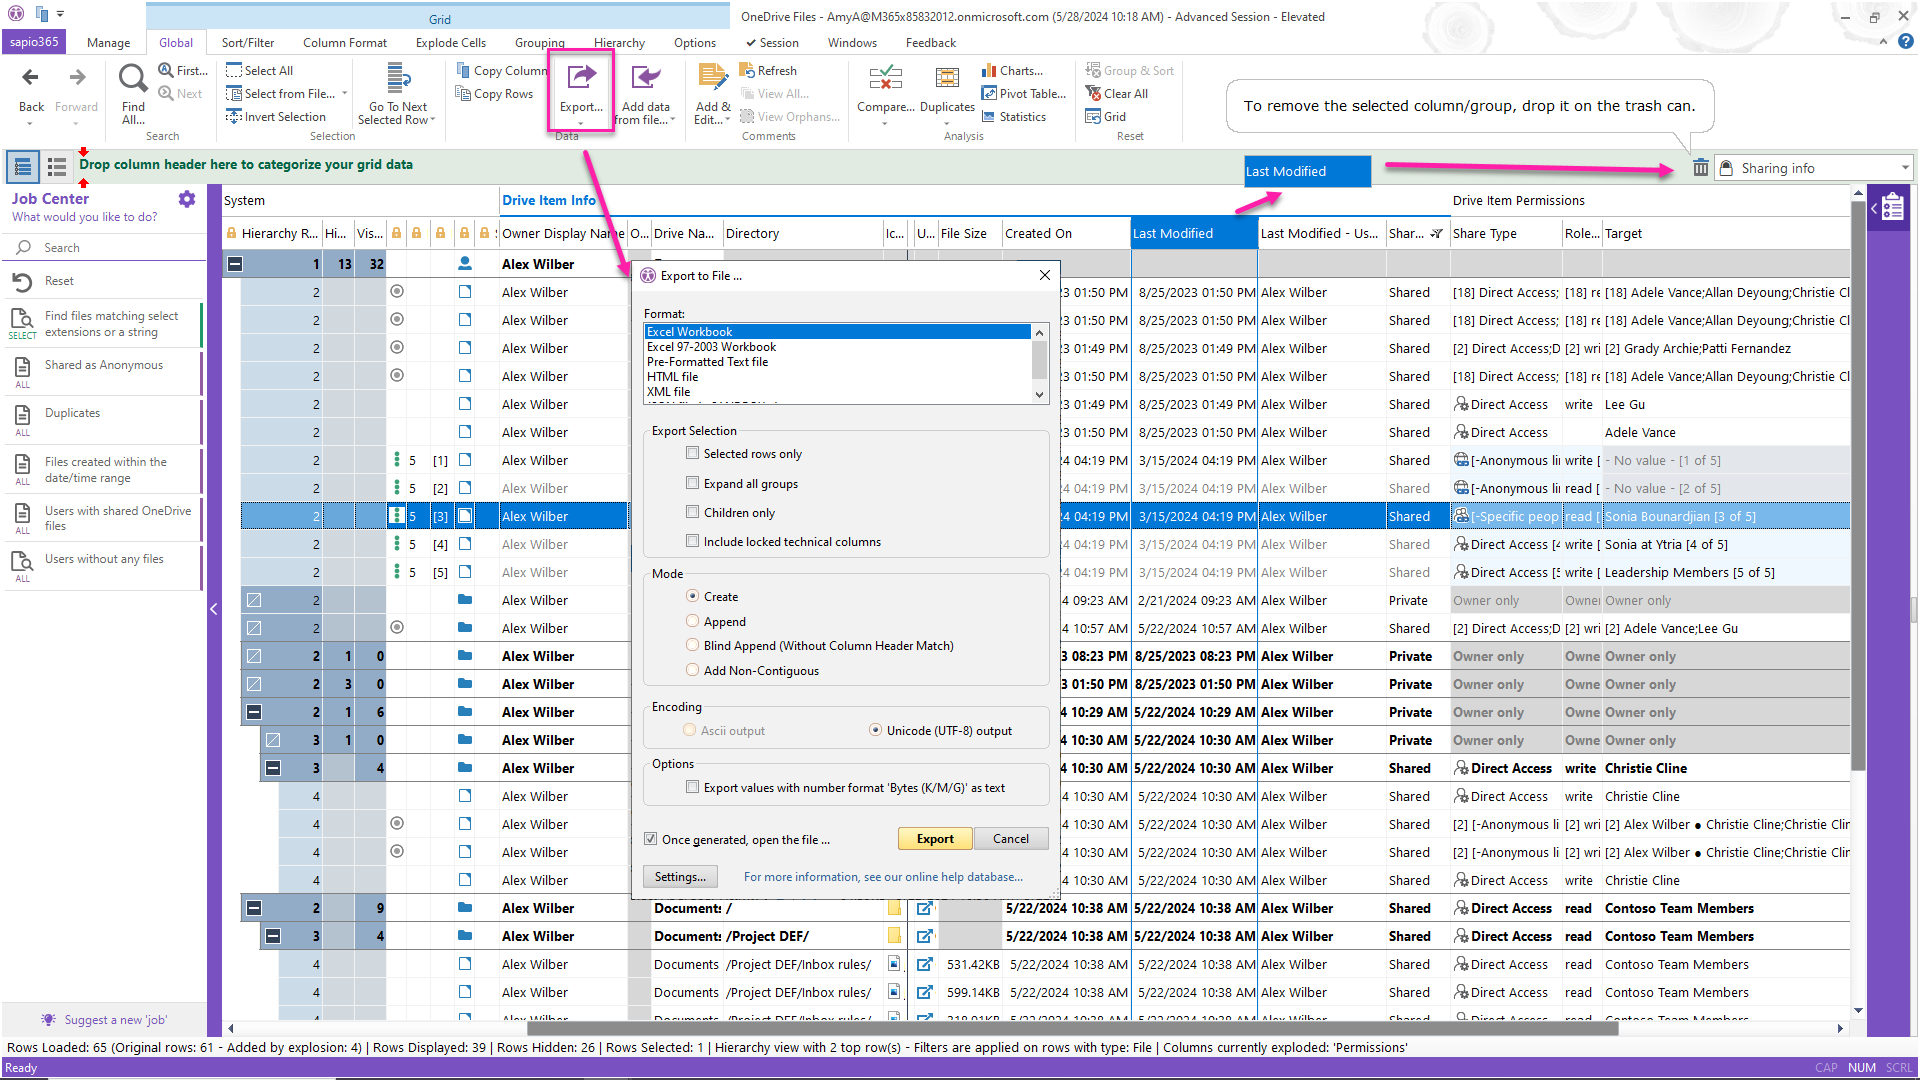
You can save the way the grid is configured by creating a new view that you can use again at a later time.
Summary
As mentioned above, the Admin Center is one method you can use to create a OneDrive sharing report for all users report but it requires manual aggregation of data which is tedious and can lead to errors. You also need to be a site admin.
Using PowerShell is another option, but it requires in-depth knowledge and ability to write code. This method will also require some knowledge of Excel so you can manage and sort the data that is exported to a csv file.
Finally, a third-party software tool like sapio365 allows you to perform this task in less time and with less effort. It provides more details on as many users as you want, allows you to customize your report format, save it and then schedule it to run at a later time and date.
sapio365 can easily handle a OneDrive sharing report for all users and just about any other reporting task in less time and effort, such as reporting on license costs or nested groups.
Discover how using sapio365 for your Microsoft 365 administration can save you hours of time every day.


Submit a comment