SharePoint site classification made easy

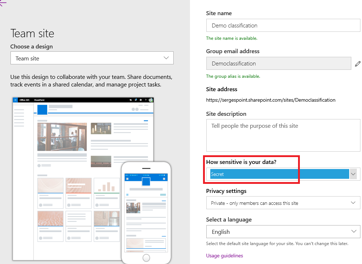
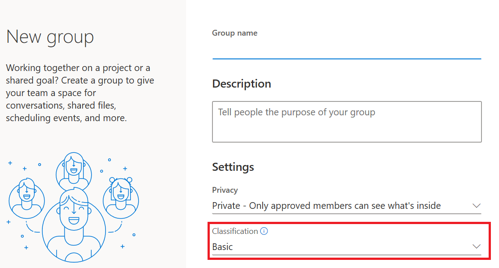
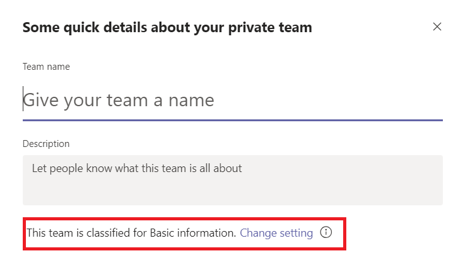
When creating a modern site in Sharepoint, you can select the type of classification you want – including for Groups and Teams. Site classifications can be used to define the sensitivity of the data within your site. Additionally, employing site classifications means you can automate the management of all sites with a specific classification.
However, site classification is not enabled by default. The solution provided by Microsoft for enabling and configuring site classification is to manage this at the Azure AD level by using PowerShell.
Once site classification is enabled, users will see an additional option during site creation that lets them define the sensitivity of the data within their site. So administrators can set a default classification, and then the users can modify the classification when they create their sites.
New Site
New Group
New Team
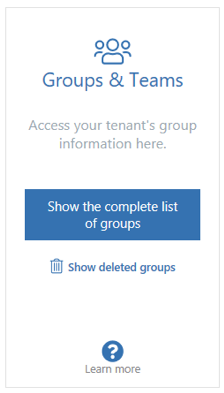
With sapio365 you can configure and manage all site classifications without using PowerShell.
Here’s how:
- Open sapio365
- Login with a sapio365 Admin account
- Select Show the complete list of group
Once the grid is loaded with all your sites/groups
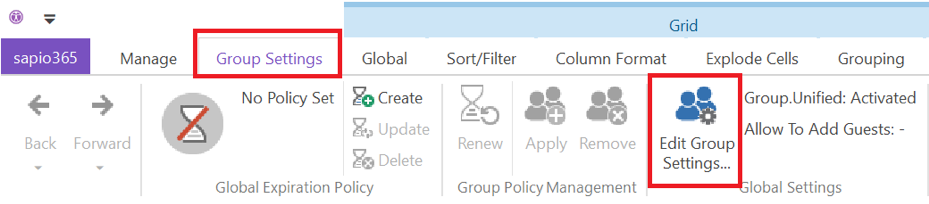
- Click the Group Settings tab in the ribbon
- Click Edit Group Settings…
This lets you edit your tenant-wide group settings.
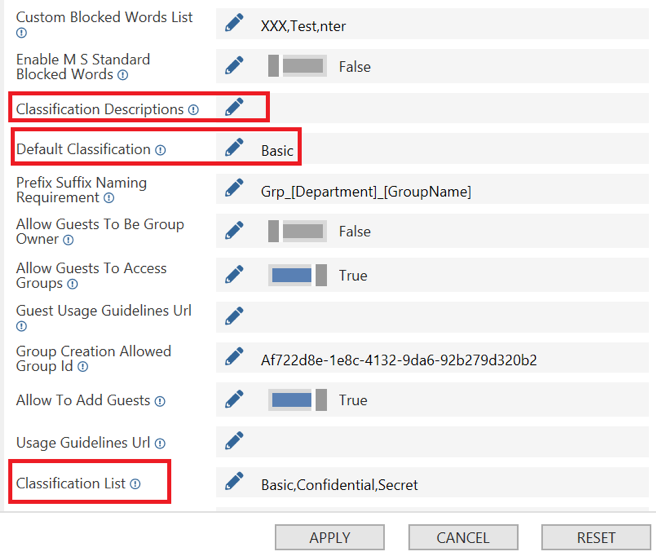
Classification settings can now be managed directly from sapio365 (without having to use PowerShell)
So you can configure/edit:
- Classification List
- Default Classification
- Classification Descriptions
For more information on how to configure site classification with PowerShell see this link
If you want to learn how to get a report of all sites with classifications, and how to bulk edit sites to apply or change classification settings, click right now on the article ‘Edit and report all site classification in SharePoint Online‘.
Submit a comment