Sharing your screen in a meeting with Microsoft Teams

Being able to share your screen with your team during online meetings is a must. When hosting a meeting in Microsoft Teams, it’s possible to share your screen with the participants. So everyone will see exactly what you want them to see – and only what you want them to see.
In this article we continue our series designed to help you understand the options that are available in Teams Meetings, and to share in one central resource all the information you need to use Meetings in Microsoft Teams.
Sharing your screen
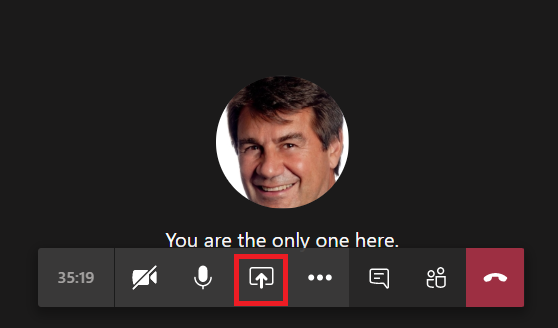
Here’s how you can share your screen in a meeting with Teams:
- Join the meeting
- Click on the Share link
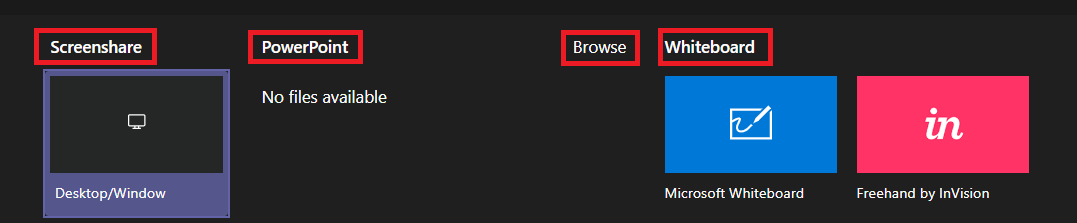
3. You can select precisely what part of your workspace you want to share:
Desktop: If your computer is connected to multiple screens, you can specify which screen you want to share. The shared area will be outlined in red.
A note of caution: Be careful when you share your desktop because, as you click around, participants will see everything that is on your desktop. For example, if you suddenly close a window and Outlook becomes visible, you may reveal your emails to all participants. Therefore, it’s considered good practice to share only a single window or application instead of your entire desktop.
- Window: You can select from among any windows or applications that are currently open on your desktop. So with this option only the selected window will be shared.
- PowerPoint: When you know you only need to share PowerPoint. This is a convenient shortcut to the list of your most recent PowerPoint presentations that you’ve been working on.
- WhiteBoard: Teams offers two options for whiteboarding in a meeting – Microsoft Whiteboard or Freehand by InVision. Whiteboard allows you and your participants to add text, images and draw. We covered working with the Teams Whiteboard in a previous post.
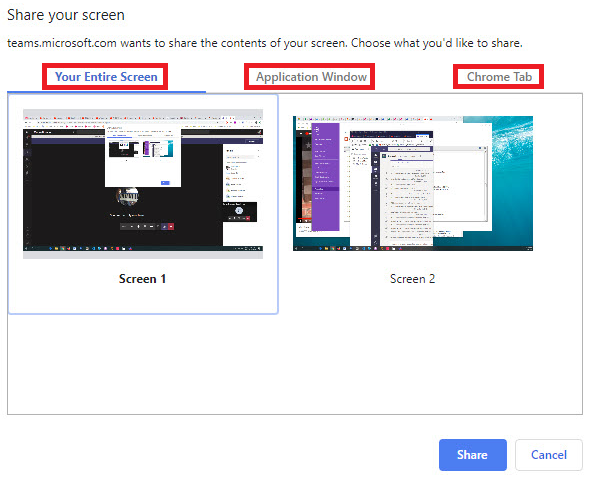
A note if you’re working with the browser client
It’s worth mentioning that the interface is a little bit different in the Teams browser client. You must first select the Desktop/Window option located under the Screenshare label:
In the Share your screen page, you can select:
- Your Entire Screen: If you’re working with multiple screens you can select which of your screens you want to share
- Application Window: If you have multiple applications/windows open, you can select a single window/application to share
- Chrome Tab: If you have multiple tabs open in Chrome, you can select the specific tab that you want to share
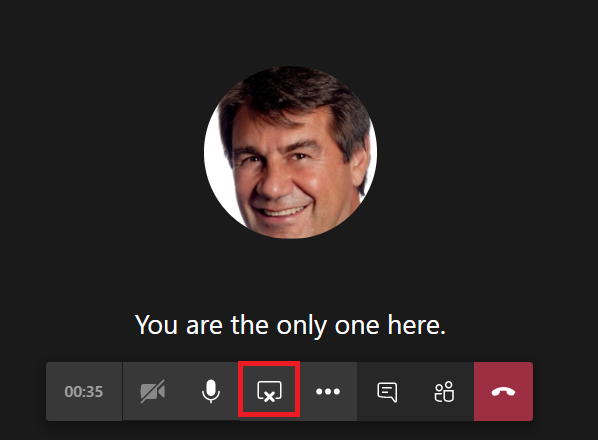
When your meeting is done
To stop sharing, simply click on the Stop Sharing link:
I want to share multiple screens at one time. Is this possible?
No, you can only share one screen at one time.
You can share two screens if you split the screen and select the desktop option. For example, you’d have your word document on one half of the screen and the other half you’ll have a pdf.
any tips for quickly switching between screens? I don’t want to split my screen but I do need to be able to navigate to different windows during a call. It’s cumbersome to stop sharing and then start sharing again. I’d like to just pull up my available windows and switch.
Share desktop.
Can you share your screen in multiple chats at the same time?
@Annie, as far as I know it’s not possible to share your screen in Multiple chats. When you will start another session, it will stop the existing sharing session to start the new session.
Thanks for the great article!!
Yes, Microsoft Teams is a very good new screen sharing, online communication and collaboration tool developed and given by Microsoft. It works on likes of other Unified Communications providers like Webex, R-HUB web video conferencing servers, Gotomeeting etc.
When sharing my screen, can people see me if video/camera is off?
when you share your screen can the host and the guest use the mouse and click and point to something on the screen? or can only the host use the cursor?